
Flats on the way to work. A front wheel that washes out in a corner. Tires that wear bald in one season. Most US riders hit these problems sooner or later. Many of them trace back to one thing: not knowing how to choose bike tyres for the way they actually ride.
The right tire depends on your bike type, terrain, tire clearance, rider weight, and riding style. The main buying factors are width, tread, rubber compound, casing, pressure, and puncture protection. There is no single “best” tire for every cyclist.
Quick answer: To choose the right bike tire, check your bike’s tire clearance and rim width, then match tire width, tread, casing, and pressure to your riding surface and goals.
Tire choice and correct PSI shape your safety, speed, and comfort. The right setup grips better, rolls smoother, and lasts longer. The tire is your only contact with the road, so it deserves more thought than most upgrades. A small change in width or pressure can transform a ride. Learn how we research in our testing process and editorial policy.
What Should You Look for When Choosing Bike Tires?
Start with tire size and compatibility. Only then compare brands and tread designs. A great tire that does not fit your bike is useless.
Next, weigh rolling resistance, comfort, cornering grip, puncture resistance, and durability. Match the tire to the conditions you ride in most often. A tire built for race day will not cope with winter commutes. A knobby trail tire will feel dead on a bike path. For a refresher on what good tires share, see what makes a good bike tyre.
The 7 Key Factors to Compare
Use this checklist when you shop:
- Tire size and width
- Tire pressure range
- Tread pattern
- Rubber compound
- Casing TPI and construction
- Puncture protection
- Rim and tubeless compatibility
Not sure about the first one? Our guide on what bike tire size you need is a good place to begin.
Choose a Tire Based on Your Type of Riding
Road cycling, commuting, gravel, and mountain biking need different tire designs. Your most common riding surface should drive the choice. Mixed-surface riders should pick versatility over extreme specialization.
If you are new to cycling, our list of the best bike tyres for beginners keeps things simple.
Best Tires for Road Cycling
Many modern road bikes do well with 25-32mm tires. Race bikes with tight frames may stop at 28mm, while endurance bikes often fit 32mm or more. Slick tread and supple casings reduce rolling resistance. Balance aero performance against comfort and road quality.
Our article on the best tyre width for road and city riding goes deeper.
Best Tires for Commuting
Consider about 32-40mm when the bike allows it. Put puncture protection and long-term durability first. Reflective details help you stay visible in city traffic. Fenders and wider tires also keep you drier and steadier in rain.
Read more in what bike tyre to buy for commuting and the best bike tyre size for commuting.
Top Tires for Gravel
Consider about 38-50mm+, depending on terrain and clearance. A semi-slick tread works well on mixed pavement and hardpack. Rough gravel may need stronger casings and more aggressive tread.
Chunky Southwestern rock and Midwest limestone roads both reward extra volume.
Top Tires for Mountain Biking
Match width and tread to your style: XC, trail, enduro, or downhill. Wider tires improve traction and impact control. Most modern trail bikes run 2.3 to 2.5 inches, which adds cushion on rocky descents. Casing strength matters on rocky or technical terrain.
Pacific Northwest mud needs open, self-cleaning tread. Dry desert trails often suit a faster-rolling knob.
Ideal Tires for E-Bikes
E-bikes bring higher system weight and e-bike torque. Look for suitable load, speed, and e-bike ratings. These are usually printed on the sidewall. Many e-bikes assist up to 20 or 28 mph, so the tire must handle that speed. Durable tread and reinforced casings reduce early wear.
For daily wear tips, see how often bike tyres should be replaced.
How to Choose the Right Bike Tire Width
Wider tires hold more air and can improve comfort and traction. Narrower tires suit lightweight road setups and smooth surfaces. Always check frame, fork, brake, and rim clearance first.
Want the full story? Read bike tire width explained.
Common Bike Tire Widths Explained
| Width | Typical Use |
|---|---|
| 25-28mm | Road cycling |
| 28-32mm | Road + comfort |
| 32-40mm | Commuting/all-road |
| 40-50mm | Gravel |
| 2.1-2.5 in | Mountain biking |
Use these ranges as general guidance. Actual compatibility varies by bike and wheel design. Wider is not automatically faster or more comfortable. Past a point, extra weight and drag cancel the gains.
For a deeper walkthrough, see what tyre width you should choose.
Can You Put Wider Tires on Your Bike?
Maybe. Check the maker’s maximum tire clearance. Check the rim’s internal width and the tire’s compatibility range. Leave room for mud, debris, and wheel flex.
Read can I use wider tires on my bike and how much wider a tire you can fit before you buy.
How to Choose the Right Tire Tread Pattern
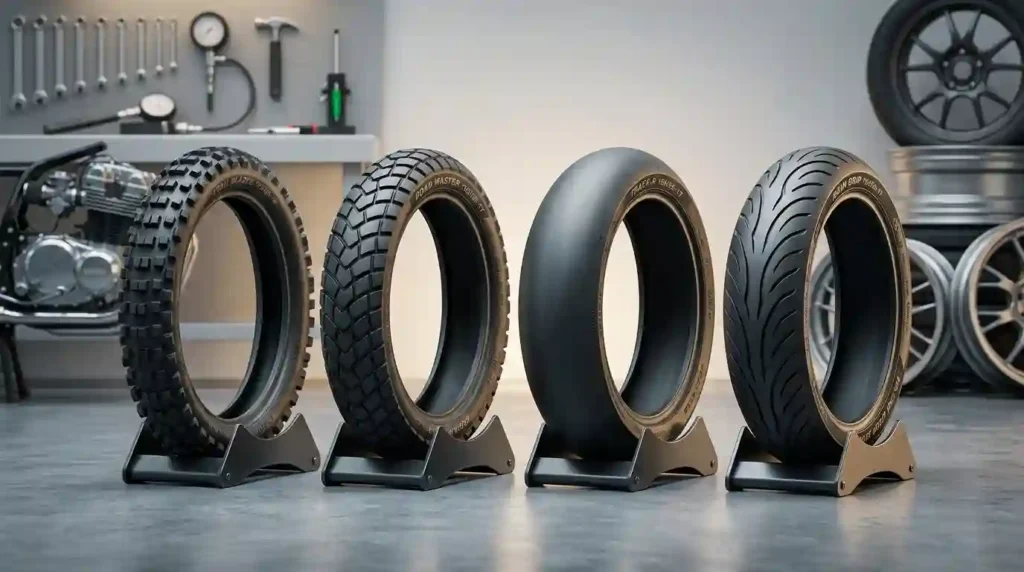
Tread affects traction, rolling resistance, and handling. Slick tires usually suit paved roads. Knobby tires bite harder on loose surfaces.
For the science behind it, see why bike tires have different tread patterns and how much tread a bike tyre should have.
Slick Bike Tires
Slick tires are best on pavement and smooth bike paths. Low tread depth cuts needless rolling resistance. They also run quietly and wear evenly, which suits long commutes. Rubber compound still plays a major role in wet grip.
Semi-Slick Tires
Semi-slicks suit road-to-gravel riding. A smooth center tread rolls efficiently. Side knobs add cornering grip when you lean the bike. This design works well for riders who split time between pavement and dirt roads.
Knobby Tires
Knobby tires are built for dirt, loose gravel, mud, and technical trails. Larger knobs improve traction on unstable ground. Aggressive tread usually raises rolling resistance on pavement. It can also feel noisy and vague on hard surfaces. Save it for the dirt.
How to Choose a Bike Tire Rubber Compound
The compound sets the balance between grip, rolling resistance, and wear. Softer compounds often prioritize traction. Harder compounds usually last longer.
Durometer measures rubber hardness. A lower number means softer rubber. Learn more in what bike tire rubber compound is and what bike tyres are made of.
Soft vs Hard Rubber
Soft rubber improves cornering grip but wears faster. It shines on wet roots and cold mornings. Riders who log high mileage may prefer a firmer blend. Harder rubber increases tread life. Dual-compound tires combine a hard center with softer shoulders.
How Rubber Compound Affects Wet Grip
Compound chemistry matters more than tread looks. Look for independent wet-grip tests where you can. Do not assume deep tread means better wet performance.
How to Choose Tire Casing and TPI
The casing is the main structure under the tread. TPI means threads per inch. It can hint at construction, but TPI alone does not decide quality.
Compare TPI with casing layers, thread material, puncture protection, and weight. Our guide to bike tire casing explains each part.
What Is a High-TPI Tire?
High-TPI casings are thin, flexible, and responsive. A common range is 120 to 320 TPI, though numbers vary by brand and thread type. They often ride smoother on paved roads. Some trade top durability for lower weight.
What Is a Low-TPI Tire?
Lower-TPI construction uses thicker threads. It can emphasize strength and durability. It suits commuting, MTB, and demanding terrain. Build quality matters more than the number alone.
How to Choose Tire Pressure (PSI)
Quick steps:
- Start with the maker’s recommended pressure range.
- Account for rider, bike, and gear weight.
- Consider tire width, rim width, casing, and terrain.
- Test and adjust in small steps.
Use a real gauge, because many pump dials are off by several PSI. Tires also leak slowly, as explained in why bike tyres lose air. Check often, using the tips in how often to check bike tyres.
Here is a simple model for a first guess. Add rider, bike, and cargo weight in pounds to get system weight. Put about 45% on the front wheel and 55% on the rear. Multiply each load by a width factor: 0.78 (25mm), 0.66 (28mm), 0.52 (32mm), 0.34 (40mm), or 0.19 (2.4 in MTB).
Then adjust. Subtract 5 to 10% on rough or wet roads. Subtract about 10% for tubeless. Add 5 to 10% for inner tubes.
Example: A 175 lb rider on a 20 lb bike makes 195 lb. The rear carries about 107 lb and the front about 88 lb. On 32mm tires, that is about 56 PSI rear and 46 PSI front.
PSI by Rider Weight
This table shows starting PSI (front / rear) for tubeless setups.
| System Weight | 28mm Road | 32mm Commuter | 40mm Gravel | 2.4 in MTB |
|---|---|---|---|---|
| 150 lb | 45 / 54 | 35 / 43 | 23 / 28 | 13 / 16 |
| 175 lb | 52 / 64 | 41 / 50 | 27 / 33 | 15 / 18 |
| 200 lb | 59 / 73 | 47 / 57 | 31 / 37 | 17 / 21 |
| 225 lb | 67 / 82 | 53 / 64 | 34 / 42 | 19 / 24 |
| 250 lb | 74 / 91 | 59 / 72 | 38 / 47 | 21 / 26 |
Treat these as a first guess, then test. Never exceed the limit printed on the tire or rim.
Does Rider Weight Affect PSI?
Yes. System weight is a key pressure factor. Heavier loads need more tire support. Cargo, panniers, and a loaded backpack all count toward system weight. A wider tire may allow lower pressure because it holds more air.
What Happens if PSI Is Too High?
The ride gets harsh. Traction on rough surfaces drops. High pressure does not always cut real-world rolling resistance.
What Happens if PSI Is Too Low?
Tire squirm increases, which makes the bike feel vague in turns. Rim strikes and pinch flats become more likely. A pinch flat happens when the tire squashes against the rim and cuts the tube. Tubeless tires may burp air under hard cornering.
How Rim Width Affects Tire Choice
Inner rim width changes the shape and support of the mounted tire. Use the tire within the maker’s recommended rim range. Extreme combinations can hurt handling and safety.
| Internal Rim Width | Typical Road/Gravel Tire | Typical MTB Tire |
|---|---|---|
| 15-17mm | 23-32mm | Not common |
| 19mm | 25-40mm | Not common |
| 21-23mm | 28-50mm | 2.1-2.3 in |
| 25mm | 32-55mm | 2.2-2.5 in |
| 30-35mm | Not common | 2.3-2.6 in |
These are rough guides. Always confirm with your rim and tire maker.
Hooked vs. hookless: A hooked rim has a small lip that locks the bead. A hookless rim has a straight wall and depends on a tight bead fit. Many hookless rims cap pressure near 72 PSI (5 bar), so check your rim label.
How to Check Your Rim Width
Measure the inside distance between the rim bead hooks. Check the wheel maker’s specs if you have them. Compare the number with the tire maker’s recommended range.
Our guide on how to measure bike tire size covers calipers and tape.
Why Actual Tire Width Can Differ
A labeled 32mm tire may measure differently on different rims. Pressure and casing build also change the measured width. Check the real mounted width when frame clearance is tight.
See bike tire size compatibility and bike wheel size vs tire size for more.
Should You Choose Tubeless or Inner-Tube Tires?
Tubeless setups allow lower-pressure riding and cut pinch-flat risk. Inner tubes are simpler to install and repair. Both work well when matched to your bike and riding style.
Benefits of Tubeless Tires
Tubeless sealant can seal many small punctures. Lower pressure can improve comfort and traction. Tubeless suits gravel, MTB, and some road use.
Benefits of Inner Tubes
Installation is simple. Roadside repairs are easy, and a spare tube weighs little. Tubes are practical for many commuter and beginner setups.
What You Need for Tubeless
Gather these parts:
- Tubeless-compatible tire
- Tubeless-ready rim
- Correct rim tape
- Tubeless valve
- Tubeless sealant
- Compatible inflation equipment
How to Choose Puncture Protection
Consider where you ride. Commuters often benefit from reinforced tread belts. Performance riders may prefer lighter casings with less protection.
What Is a Puncture Belt?
A puncture belt is a protective layer under or within the casing. It helps resist cuts from glass, thorns, and road debris. Extra protection adds weight and can stiffen the casing.
Performance vs Puncture Protection
Racing tires put weight and efficiency first. Commuter tires put durability and puncture resistance first. Choose protection for your real risk, not the maximum available. A rider on smooth rural roads needs less than someone dodging glass downtown.
How to Choose Bike Tires for Comfort
Width and PSI have a big effect on ride quality. Flexible casings absorb road vibration. Wider tires can often run lower pressure when the rim supports them.
For a deeper look, read how to choose bike tires for everyday riding.
Best Width for Comfortable Road Riding
A good starting point is 28-32mm for many road bikes. Check rim and frame compatibility. Test pressure rather than assuming the lowest PSI is best.
Best Width for Comfortable Commuting
Try 32-40mm on rough city streets. Pick durable casing construction for daily use. Think about puncture protection and wet grip too.
How to Choose Bike Tires for Speed
Look beyond width when judging rolling resistance. Many riders chase a few grams and ignore the pressure in their tires. Casing flexibility, compound, pressure, and tread all matter. Smooth surfaces favor slick, lightweight tires.
What Makes a Tire Fast?
- Low rolling resistance.
- Efficient casing deformation.
- Pressure that suits the rider and surface.
- A low-rolling tread design.
Are Narrow Tires Always Faster?
No. Real-world rolling resistance depends on the surface and tire build. Wider tires can do well on rough pavement because they cut impedance losses, the energy lost to vibration.
Weigh test data against your actual riding conditions.
How to Choose Bike Tires for Grip
Grip depends on compound, tread, pressure, casing, and surface. Cornering traction needs stable sidewalls and suitable pressure. Wet, loose, and rocky ground each call for different designs.
Tire Pressure and Cornering Grip
Too much pressure reduces compliance on rough ground. Too little causes sidewall instability. Tune PSI for your weight, width, and riding style.
In wet weather, drop pressure a little for more grip. Stay above the point where the tire squirms.
Front vs Rear Tire Choice
The front tire often benefits from stronger cornering grip. The rear handles more drive and braking force, so it wears faster. Many riders move a worn rear tire to the front and fit a fresh one at the back. MTB and gravel riders may run different treads front and rear.
How to Choose Bike Tires for Tubeless Setups
Confirm that both tire and rim are tubeless compatible. Choose a sealant that suits your use and temperature range. Some blends thicken in cold weather, which matters for winter riders in the Northeast and Upper Midwest. Follow the maker’s advice for installation and pressure.
Tubeless Installation Steps
- Inspect the rim and tire.
- Install the correct tubeless rim tape.
- Install the tubeless valve.
- Mount the tire.
- Add the right amount of sealant.
- Inflate and seat the beads.
- Rotate and shake the wheel to spread the sealant.
- Check for leaks before riding.
Top up sealant every few months, since it dries out over time.
How to Choose Bike Tires for Different US Riding Conditions
Urban Streets
Put puncture protection and wet grip first. Consider 32-40mm tires where clearance allows. Use durable casings for daily miles.
Smooth Roadways
Consider 25-32mm slick tires. Prioritize rolling resistance and casing quality. Pick a pressure that fits your weight and the road surface.
Rough Pavement
Consider 30-40mm tires. Lower suitable PSI improves comfort. Strong casing protection helps against potholes and debris.
Gravel Roads
Consider 38-50mm tires. Choose tread for loose or hardpack surfaces. Tubeless is useful for low-pressure riding.
Technical MTB Trails
Choose width and casing by terrain severity. Aggressive tread improves traction in loose conditions. Strong sidewalls help prevent rock damage. Sharp Southwestern rock can slice a thin casing in one ride.
How to Buy the Right Bike Tire: Step-by-Step
Quick how-to:
- Identify your bike type.
- Identify your normal riding surface.
- Check the current tire size.
- Check frame and fork clearance.
- Measure rim internal width.
- Choose tire width.
- Select tread pattern.
- Compare rubber compound.
- Compare casing and TPI.
- Check puncture protection.
- Confirm tubeless compatibility.
- Set an appropriate starting PSI.
Need help with step 3? See how to find bike tyre size and how to read bike tire size. Sidewall codes are explained in what the numbers on bike tyres mean.
First, Define Your Riding Goal
Decide what matters most: comfort, speed, grip, durability, or puncture protection. Think about whether you ride one surface or several.
Next, Check Compatibility
Verify tire width, wheel diameter, rim width, and frame clearance. Check brake and fork clearance. Confirm the maker’s specs.
Take a moment here, because a wrong size is the most common buying error. Labels like 700×28, 700c, 650B, and 26×2.1 show up often. Our ETRTO sizing guide and fit checker help you decode them.
Then, Compare Tire Construction
Compare casing, TPI, rubber compound, puncture belt, and sidewall protection. Think about the trade-off between weight and durability.
Finally, Set Your Starting PSI
Use the maker’s limits and a pressure calculator. Count rider, bike, and cargo weight. Fine-tune after real-world testing.
Common Bike Tire Buying Mistakes
- Buying the wrong diameter or width.
- Ignoring rim compatibility.
- Choosing tread by looks alone.
- Treating TPI as a standalone quality score.
- Running the same PSI in every tire.
- Choosing maximum puncture protection when speed is the goal.
- Assuming the most expensive tire is automatically the best.
Thinking of a size change? Read can you put narrower tires on a bike, can you change bike tire width, and can I put a different size tire on my bike. Curious why sizes vary so much? See why bike tyres come in different sizes.
How We Evaluate Bike Tires
We look at four areas:
- Rolling resistance: Compare controlled test results where available.
- Puncture resistance: Consider standard puncture tests and real-world reports.
- Durability: Examine tread wear, casing build, and long-term results.
- Ride quality: Judge comfort, cornering grip, steering, and vibration control.
Rolling Resistance Testing
Keep load and pressure controlled when comparing tires. Remember that lab surfaces differ from real roads. Use independent testing where you can.
Puncture Testing
Compare puncture-force results when standard data exists. Consider tread thickness and protective belts. Pair lab results with real-world durability reports.
Frequently Asked Questions About Choosing Bike Tires
More answers live on our site FAQs page.
How do I know what bike tire I need?
Check your current tire size, wheel diameter, rim width, and available frame clearance. Then match width, tread, casing, and pressure to your riding style.
What is the best bike tire for everyday riding?
A durable, moderately wide tire with efficient tread suits most commuters. Around 32-40mm works well when the bike allows it. See the best bike tyres for everyday riding.
Are wider bike tires better?
Wider tires can improve comfort and traction. They are not automatically faster or better for every bike.
What tire pressure should I use?
PSI depends on system weight, tire width, rim width, casing, and surface. Start inside the maker’s range and adjust gradually.
Is tubeless better than inner tubes?
Tubeless can cut pinch-flat risk and allow lower pressure. Inner tubes are simpler and easier to repair.
How often should bike tires be replaced?
Replace tires when tread is badly worn, or when you see cracks, cuts, bulges, exposed casing, or repeated punctures. Mileage varies with compound, rider weight, surface, and care.
Does higher TPI mean a better tire?
Not always. Judge TPI alongside casing material, construction, puncture protection, and intended use.
Can I use a different tire width on my bike?
Often yes, but only inside the bike and rim maker’s limits. Check frame, fork, brake, and rim clearance first.
Final Verdict: How to Choose Bike Tires
Keep these five points in mind:
- Choose for your riding: Road, commuting, gravel, MTB, or e-bike.
- Choose the correct size: Confirm wheel, rim, and frame compatibility.
- Choose the right construction: Balance casing, TPI, compound, tread, and puncture protection.
- Choose the right pressure: Use rider weight, tire width, rim width, and terrain to set a starting PSI.
- Test and adjust: The best setup balances comfort, speed, grip, and durability on your actual rides.
Curious how bike tires differ from the ones on a car? See the difference between bike tyres and car tyres. For the basics, read how bike tires work.
Test Your Exact Setup With Our Free Calculator
Ready to pick your tires with confidence? Enter your bike type, tire width, rim width, and weight into the Free Bike Tire Pressure Calculator / Tire Finder Tool at TheBikeTires.com. You will get a clear starting PSI and tire ideas that fit your bike.
Do not guess. Check your setup today and ride with more grip, comfort, and confidence.

Mohidul Islam is a leading cycling technology specialist and bike tire consultant with over 15 years of hands-on experience in the bicycle industry. He holds a Bachelor of Science in Mechanical Engineering from Penn State University, where he focused heavily on material science, tread mechanics, and rubber compound performance. Over the past decade and a half, Alex has conducted extensive field testing, tubeless setup evaluations, and tire pressure modeling for road, mountain, and e-bikes. His practical insights and data-driven approach help cyclists of all levels optimize grip, speed, and durability on every ride.



