
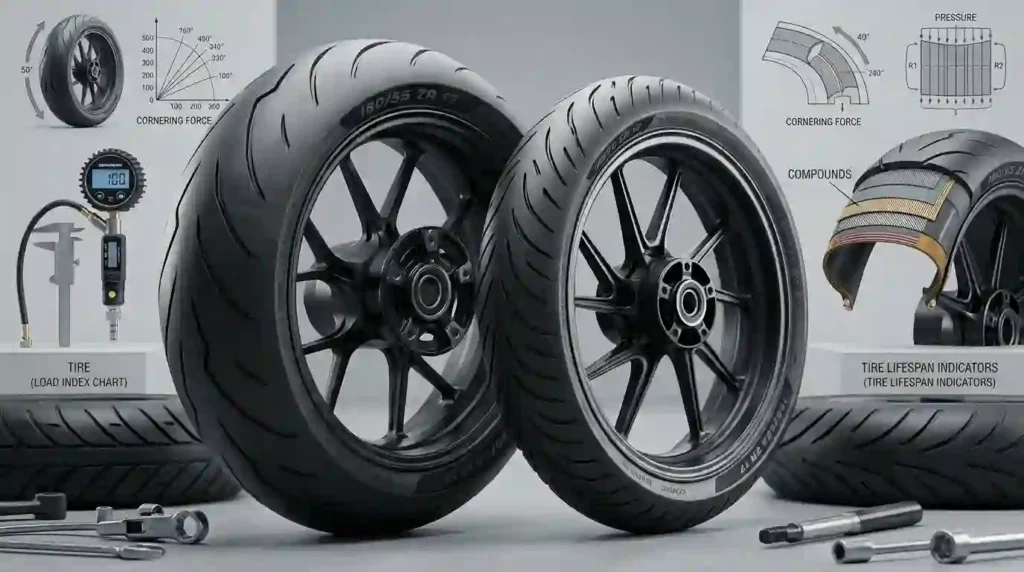
Selecting the correct bicycle tire involves more than matching two simple numbers printed on a sidewall. True tire compatibility means the tire’s bead seats securely on the rim, inflates safely without popping off or blowing out, and leaves enough clearance inside your frame, fork, and brake assemblies.
A tire that looks almost identical to your existing setup can still be dangerous or physically impossible to install. A subtle difference in bead-seat diameter, rim channel width, or casing height can cause severe pinch flats, unstable cornering grip, frame rub, or catastrophic bead failure at high speed.
                      PRIMARY COMPATIBILITY FACTORS

    +-------------------+    +-------------------+    +-------------------+
    | Bead-Seat Diameter|    | Internal Rim Width|    | Frame & Fork Space|
    | (Must match 100%) |--->| (Supports casing) |--->| (Prevents rubbing)|
    +-------------------+    +-------------------+    +-------------------+
                                       |
                                       v
                             +-------------------+
                             | PSI & Usage Scope |
                             | (Performance/Grip)|
                             +-------------------+
Understanding how diameter, width, rim width, frame clearance, tire pressure (PSI), and intended terrain interact ensures peak performance, extended tread life, and maximum safety on every ride.
What Does Bike Tire Size Compatibility Mean?
Tire compatibility means a tire can be safely mounted, seated, inflated, and operated on a specific rim and bicycle frame without mechanical failure or handling hazards.
Cyclists often confuse physical outer tire width with rim diameter standards. While you can often run a wider or narrower tire on the same wheel, you can never alter the required bead-seat diameter of the rim itself.
Featured Snippet Rule: Match the tire’s bead-seat diameter (BSD) in millimeters directly to the rim first. Once the BSD matches, verify that the tire width falls within the rim manufacturer’s approved internal width range and leaves adequate clearance inside the frame and fork.
The 3 Main Tire Compatibility Measurements
- Bead-Seat Diameter (BSD): The exact diameter in millimeters where the tire bead locks into the internal rim shoulder. This measurement must match the wheel with 100% precision.
- Tire Casing Width: The nominal width of the inflated tire casing, measured in millimeters or fractional/decimal inches.
- Frame and Fork Clearance: The physical space between the inflated tire tread/sidewalls and the bicycle frame, fork blades, brake calipers, and fenders.
Why Tire Size Labels Can Be Confusing
Legacy sizing systems rely on historical naming conventions rather than standardized physical engineering measurements. Labels like 700C x 28, 650B x 47, and 29 x 2.25 use different units (French, metric, and Imperial), which masks their true dimensions.
                       SIZING SYSTEM COMPARISON

    Traditional Label          ETRTO / ISO Standard       Primary Sizing Unit
    -----------------          --------------------       -------------------
       700C x 28C                  28 - 622                 Metric (mm)
       650B x 47                   47 - 584                 Metric (mm)
       29 x 2.25                   57 - 622                 Imperial (Inches)
The European Tyre and Rim Technical Organisation (ETRTO) and International Organization for Standardization (ISO) resolved this confusion by creating a universal two-number code (e.g., 28-622). The first number represents the nominal tire width in millimeters, while the second number represents the precise bead-seat diameter in millimeters.
Relying solely on fractional inches or historical French terms often leads to misfitting parts. A traditional 26 x 1-3/8 inch tire uses a completely different rim diameter than a standard 26 x 2.0 inch mountain bike tire, despite both using the number “26.”
How Bike Tire Sizes Work
Modern wheel systems separate the physical rim mounting interface from the outer tire casing volume.
                  WHEEL DIAMETER vs TIRE VOLUME

         700 x 25C Road Tire              29 x 2.30 MTB Tire
          (622 mm Rim BSD)                 (622 mm Rim BSD)

           /-------------\                  /-----------------\
          |    25 mm      |                |      58 mm        |
          |  Casing Width |                |   Casing Width    |
           \-------------/                  \-----------------/
                 |                                   |
           +-----------+                       +-----------+
           | 622mm RIM |                       | 622mm RIM |
           +-----------+                       +-----------+
| Bicycle Type | Common Traditional Sizes | Standard ETRTO / ISO Code | Typical Use Case |
|---|---|---|---|
| Road | 700C x 25C, 700C x 28C | 25-622, 28-622 | Smooth asphalt, fast group rides |
| Gravel | 700C x 40C, 650B x 47 | 40-622, 47-584 | Hardpack dirt, fire roads, singletrack |
| Hybrid / Commuter | 700C x 35C, 700C x 38C | 35-622, 38-622 | City streets, paved bike paths, debris |
| Mountain (MTB) | 27.5 x 2.4, 29 x 2.35 | 60-584, 60-622 | Technical trails, loose rock, mud |
| E-Bike | 700C x 45C, 27.5 x 2.6 | 45-622, 65-584 | High torque urban and cargo transit |
Reading the full ETRTO/ISO code on the sidewall is the single most accurate method for confirming tire and wheel fitment.
What Does 700C Mean?
700C is a legacy French designation corresponding to a 622 mm bead-seat diameter.
Common sizes include 700 x 25C, 700 x 28C, and 700 x 40C.
Changing tire width on a 700C rim directly alters the total outer diameter of the wheel. A 700 x 40C gravel tire has a significantly larger overall circumference than a 700 x 25C road tire, requiring additional frame height and fork clearance.
What Does 650B Mean?
650B corresponds to a 584 mm bead-seat diameter.
Commonly found on gravel, adventure, and mountain bikes, popular sizes include 650B x 47 (or 27.5 x 1.85 inches) and 650B x 2.1.
Because a 650B rim (584 mm) is physically 38 mm smaller in diameter than a 700C rim (622 mm), 650B tires cannot be mounted on 700C rims under any circumstances.
What Does 26-Inch Mean?
Traditional 26-inch bicycle wheels feature a 559 mm bead-seat diameter.
“26-inch” is not a universally precise description. Older utility, nursery, and proprietary rim standards (such as 26 x 1-3/8 or 26 x 1-1/2) use BSD measurements ranging from 571 mm to 597 mm.
Always verify the 559 mm ETRTO marking on older frames before buying a replacement 26-inch tire.
What Does 27.5-Inch Mean?
27.5-inch is the modern mountain bike term for the 584 mm BSD standard (identical to 650B).
This size is widely used for trail, enduro, and downhill mountain bikes, with tire widths ranging from 2.25 inches to 2.8 inches (plus-size).
The actual outside diameter of a 27.5-inch wheel expands significantly as tire width and casing height increase.
What Does 29-Inch Mean?
Modern 29-inch (29er) mountain bike rims use the same 622 mm bead-seat diameter as standard 700C road wheels.
Wider MTB casings (e.g., 29 x 2.4 inches / 60-622) create a much larger total outer wheel diameter, improving roll-over capability on rough trail obstacles.
Although 29er and 700C rims share an identical 622 mm BSD, internal rim width and frame limits restrict cross-compatibility.
The Most Important Rule: Match the Bead-Seat Diameter
The rubber tire bead must match the rim’s bead-seat diameter (BSD) with zero margin for error.
                      BEAD-SEAT MATCHING REQUIREMENT

   [ Tire Bead Seat ] ==========================> [ Rim Bead Seat ]
      622 mm BSD       MUST MATCH 100% EXACTLY       622 mm BSD

   Attempting to mix sizes (e.g., 584 mm tire on 622 mm rim) causes:
   - Severe tire blowouts under pressure
   - Inability to seat or mount the tire bead
   - Permanent casing and rim damage
If the tire BSD is too small, you cannot physically pull the tire over the rim sidewall. If it is too large, the tire will sit loosely on the rim bed and blow off instantly when pressurized.
Always refer to the ISO/ETRTO integer stamped into the tire sidewall (e.g., 622, 584, or 559) to confirm diameter compatibility.
What Is Bead-Seat Diameter?
Bead-seat diameter is the physical distance across the rim bed from shoulder to shoulder where the tire bead rests when fully seated.
                            BSD CROSS-SECTION

                   <---- Internal Rim Width ---->
                   +---|                    |---+
                   |   | <--- Bead Seat ---> |   |
                   |   |     (e.g., 622mm)  |   |
                   +---+--------------------+---+
Standardized BSD values remove the ambiguity of marketing labels:
- 622 mm: Standard 700C Road/Gravel and 29-Inch MTB.
- 584 mm: Standard 650B Gravel/Road and 27.5-Inch MTB.
- 559 mm: Standard 26-Inch MTB and Cruiser.
BSD is the most reliable metric for verifying mechanical tire-to-rim fitment.
Why You Cannot Mix Different Diameter Standards
- A 584 mm (650B) tire bead cannot stretch over a 622 mm (700C) rim.
- A 622 mm tire will fall off a 584 mm rim as soon as you inflate it.
- A 559 mm (26-inch) tire is structurally incompatible with both 584 mm and 622 mm rim standards.
Never force, stretch, heat, or modify a tire casing to make an incompatible diameter fit a rim.
How Tire Width Affects Compatibility
Tire width determines total air volume, casing profile, contact patch geometry, handling dynamics, and minimum required operating pressure.
Wider tires hold more air volume, allowing lower inflation pressures that absorb vibrations, lower rolling resistance on unpaved surfaces, and increase traction.
However, a tire must always fit within the rim’s supported width range and clear the frame stays and fork legs.
Can I Put a Wider Tire on My Bike?
Upgrading to a wider tire requires checking two core limits before purchasing:
- Physical Clearance: Ensure the bike frame, fork, brake bridge, and fenders have enough physical space for the wider tire.
- Rim Width Limits: Confirm the internal rim width can safely support the broader casing without causing squirm or roll-off.
Account for actual tire growth over time, dynamic wheel flex during hard cornering, and extra space for mud clearance when riding off-road.
Can I Put a Narrower Tire on My Bike?
A narrower tire can be safely installed on a rim as long as the internal rim width is not too wide for the tire casing.
Installing an excessively narrow tire on a wide rim stretches the tread profile flat, leaving the aluminum or carbon rim lips vulnerable to strike damage from rocks and potholes.
Always check the rim manufacturer’s minimum recommended tire width chart rather than judging fit by eye.
How Rim Width Changes Actual Tire Width
The internal width of your rim changes the mounted dimensions and shape of your tire casing.
                    RIM WIDTH EFFECT ON TIRE PROFILE

     Narrow Rim (15mm)      Optimal Rim (21mm)       Ultra-Wide Rim (28mm)
      on 28 mm Tire          on 28 mm Tire            on 28 mm Tire

          /-----\               /-------\              |---------|
         |       |             |         |             |         |
          \-----/               \-------/              \---------/
        "Lightbulb"           Rounded Arc            Flattened Casing
      Cornering Squirm     Ideal Support & Grip    Exposed Rim Shoulders
As a general rule, every 3 mm increase in internal rim width increases the mounted tire width by approximately 1 mm.
A tire labeled 700 x 28C may measure 27.5 mm wide on a traditional 15 mm internal rim, but stretch to 29.8 mm on a modern 21 mm internal wide rim.
Bike Tire and Rim Width Compatibility
Matching internal rim width to tire width ensures stable cornering grip, proper bead locking, and optimum tire casing shape.
                    INTERNAL RIM MEASUREMENT

               +---|                    |---+
               |   |<-- MEASURE HERE -->|   |
               |   |  Internal Rim Width|   |
               +---+--------------------+---+
               |                            |
               +----------------------------+
                 External Rim Width (Ignore)
Always measure the internal distance between the inner rim hooks or walls, not the external width across the outer brake tracks.
Recommended Rim Width to Tire Width Compatibility Chart
| Internal Rim Width (mm) | Minimum Tire Width | Optimal Tire Width Range | Maximum Tire Width |
|---|---|---|---|
| 15 mm | 23 mm | 25 mm – 28 mm | 32 mm |
| 17 mm | 23 mm | 25 mm – 32 mm | 38 mm |
| 19 mm | 25 mm | 28 mm – 38 mm | 45 mm |
| 21 mm | 28 mm | 32 mm – 45 mm | 50 mm / 2.0 in |
| 23 mm | 30 mm | 35 mm – 50 mm | 2.25 in |
| 25 mm | 32 mm | 38 mm – 2.25 in | 2.4 in |
| 30 mm (MTB) | 2.0 in / 50 mm | 2.3 in – 2.5 in | 2.8 in |
How to Check Your Rim Width
- Remove the tire and inner tube from the wheel.
- Use a digital vernier caliper to measure the internal distance between the inner rim walls in millimeters.
- Compare your reading against the compatibility chart above to determine your safe tire width range.
What Happens If the Tire Is Too Wide for the Rim?
When a wide tire is forced onto a narrow rim, it forms an unsupported “lightbulb” profile.
This causes the tire to squirm and roll sideways during aggressive cornering, leading to unpredictable handling, poor steering response, and an increased risk of burping air in tubeless configurations.
What Happens If the Tire Is Too Narrow?
Mounting an overly narrow tire on a wide rim stretches the sidewalls outwards at a harsh angle.
This exposes the alloy or carbon rim edges to direct impacts from potholes and square-edged rocks, leading to rim dents, structural carbon cracking, and pinch flats.
How to Check Bike Tire Clearance
Frame clearance and rim compatibility must be verified as separate safety steps.
                      SAFE CLEARANCE REQUIREMENTS

                          /===============\
                         /  FORK / FRAME   \
                        |  +---------------+  |
                        |  | 4-6mm GAP MIN |  |
                        |  |   +-------+   |  |
                        |  |   | TIRE  |   |  |
                        |  |   +-------+   |  |
                        |  +---------------+  |
                       ---                   ---
A tire may mount perfectly to a rim, yet rub against the frame chainstays or fork legs during high-load pedaling efforts.
Maintain a minimum of 4 mm of space (6 mm for muddy gravel or off-road trail riding) between the tire and any part of the frame, fork, or brake assembly.
When check Frame Clearance
- Measure the narrowest gap between the current tire sidewalls and the left/right chainstays (near the bottom bracket).
- Check space at the seatstays and the seat tube junction.
- Account for frame flex during hard out-of-saddle sprinting.
Check Fork Clearance
- Measure the lateral clearance between the tire tread shoulders and both internal fork legs.
- Verify vertical height clearance beneath the fork crown or arch.
- Remember that wider tires feature taller casing heights, reducing overhead vertical clearance.
Check Brake Clearance
- Rim Brake Calipers: Dual-pivot and direct-mount calipers restrict maximum tire width (typically capping road tires at 28 mm to 30 mm).
- Disc Brake Systems: Disc brakes eliminate caliper clearance limits, shifting the restriction entirely to frame stays and fork arches.
- Fender Extensions: Full-coverage mudguards require an extra 10 mm of internal clearance to prevent trapped gravel from locking the wheel.
Can You Put Any Bike Tire on Any Wheel?
No. A bicycle tire must match the wheel’s exact bead-seat diameter, fit within the rim’s internal width limits, and clear all frame boundaries.
Tires with matching diameter callouts can still be incompatible if casing volume exceeds internal frame dimensions or rim channel capacity.
Quick Bike Tire Compatibility Checklist
  [ ] 1. Bead-Seat Diameter (BSD) matches rim (e.g., 622mm = 622mm)
  [ ] 2. Tire width falls within internal rim width limits
  [ ] 3. Frame/fork retains 4-6mm minimum clearance
  [ ] 4. PSI ratings align across tire, rim, and wheel system
  [ ] 5. Tubeless vs. inner tube requirements verified
  [ ] 6. Tread and casing match target riding terrain
Bike Tire Compatibility by Riding Type
Each cycling discipline requires specific trade-offs between casing width, tread compound, and pressure tolerances.
                           DISCIPLINE TIRE SETUP

    Road                 Gravel               MTB                  E-Bike
    (700C / 25-30mm)     (700C/650B / 38-45mm) (29/27.5 / 2.3-2.6")  (Reinforced Casing)
    +-----------------+  +-----------------+  +-----------------+  +-----------------+
    | High Pressure   |  | Low Pressure    |  | Max Volume      |  | Heavy Duty      |
    | Aerodynamics    |  | Multi-Surface   |  | Aggressive Grip |  | Torque Rated    |
    | Fast Asphalt    |  | Tubeless Focus  |  | Impact Shields  |  | ECE-R75 Standard|
    +-----------------+  +-----------------+  +-----------------+  +-----------------+
Road Bike Tire Compatibility
- Dominant Standard: 700C (622 mm BSD).
- Popular Widths: 700 x 25C, 700 x 28C, and 700 x 30C.
- Key Considerations: Modern road frames are designed around wider 28 mm tires to lower rolling resistance and vibration fatigue. Confirm caliper brake arch limits on older road frames before upgrading.
Gravel Bike Tire Compatibility
- Dominant Standards: 700C (622 mm BSD) and 650B (584 mm BSD).
- Popular Widths: 700 x 38C–45C or 650B x 47–50.
- Key Considerations: Gravel tires prioritize tubeless capability, supple sidewalls, and puncture protection belts. Always check mud clearance around chainstays when running aggressive 45 mm tread knobs.
Mountain Bike Tire Compatibility
- Dominant Standards: 29-Inch (622 mm BSD) and 27.5-Inch (584 mm BSD).
- Popular Widths: 2.25 inches to 2.6 inches.
- Key Considerations: Modern trail bikes use wide rims (28 mm–35 mm internal width) to support large volume casings at low PSI (18–26 PSI) for cornering traction over loose rocks and wet roots.
Commuter Bike Tire Compatibility
- Dominant Standards: 700C, 27.5-Inch, and 26-Inch.
- Popular Widths: 700 x 32C to 700 x 40C.
- Key Considerations: Commuter setups prioritize heavy-duty sub-tread puncture protection belts (e.g., thick aramid or rubber layers) to resist glass and urban debris.
E-Bike Tire Compatibility
- Dominant Standards: E-bike specific casings across 700C, 27.5-inch, and 29-inch wheels.
- Key Considerations: Electric hub and mid-drive motors deliver high torque, accelerating tread wear and tire casing stress. Choose tires carrying the ECE-R75 certification, which rate casings for e-bike speeds up to 28 mph (45 km/h) and higher total system weights.
How Tire Pressure Affects Compatibility and Performance
Inflation pressure (PSI) dictates how a tire contacts the road surface, flexes over bumps, and supports rider weight.
                          PSI vs CONTACT PATCH

        Over-Inflated (Too High)            Optimal Inflation

             +---+                              +------+
             |   |                              |      |
             +---+                              +------+
        Harsh Ride, High Flex,              Maximum Traction,
        Loss of Cornering Traction          Low Rolling Resistance
Operating outside ideal pressure limits reduces traction and increases wear. Over-inflation creates a harsh ride and increases rolling resistance on uneven surfaces, while under-inflation risks rim strikes and pinch flats.
How Rider Weight Affects PSI
Heavier combined system weights (rider + bicycle + gear) require higher air volume or increased PSI to support the casing and prevent the rim from bottoming out over sharp impacts.
                SYSTEM WEIGHT vs PRESSURE ALLOCATION

    Front Wheel (40% Weight)            Rear Wheel (60% Weight)
    Lower Pressure                      Higher Pressure
    (~10% less than rear)               (Main System Load)
Always distribute target pressure based on rear-wheel bias, setting front pressure roughly 10% lower than the rear wheel to optimize steering grip.
How Tire Width Affects PSI
Higher casing volume requires less pressure to support the same system load.
                      TIRE VOLUME vs OPERATING PSI

   Road (25 mm Casing)    ===========================> High PSI (70 - 85 PSI)
   Gravel (40 mm Casing)  ====================> Medium PSI (30 - 42 PSI)
   MTB (2.4 in Casing)    ==============> Low PSI (18 - 26 PSI)
Lower pressures in high-volume casings increase cornering traction and allow the tire to absorb trail chatter without deflecting off obstacles.
Baseline Tire Pressure Chart (Total System Weight: 180 lbs / 82 kg)
| Bicycle Category | Tire Width | Tubeless Front PSI | Tubeless Rear PSI | Tube Setup Adjustment |
|---|---|---|---|---|
| Road Bike | 700 x 25C | 68 PSI | 74 PSI | Add +6 PSI |
| Road Bike | 700 x 28C | 58 PSI | 64 PSI | Add +5 PSI |
| Gravel Bike | 700 x 38C | 32 PSI | 36 PSI | Add +4 PSI |
| Gravel Bike | 700 x 42C | 27 PSI | 30 PSI | Add +4 PSI |
| Mountain Bike | 29 x 2.3 in | 20 PSI | 23 PSI | Add +3 PSI |
| Commuter Bike | 700 x 35C | 40 PSI | 45 PSI | Add +5 PSI |
Simple Tire Pressure Setup Process
- Find Max Ratings: Locate the maximum PSI limit on both your tire sidewall and rim bed.
- Determine Base Pressure: Use the chart above as a starting reference point for a 180 lb system weight.
- Adjust for Weight: Add or subtract 1 PSI for every 10 lbs above or below an 180 lb system weight.
- Adjust for Terrain: Reduce pressure by 2 to 3 PSI for wet, slippery, or loose trail conditions to expand the contact patch.
- Test and Refine: Conduct test rides on familiar routes, monitoring cornering feel and rim dampening. Adjust in 1 to 2 PSI increments.
Tubeless Tire Compatibility Explained
Tubeless technology removes the inner tube, sealing the tire against a specialized rim using liquid latex sealant.
                          TUBELESS vs TUBED

         Tubed Setup                           Tubeless Setup
   +---------------------+               +---------------------+
   | Outer Tire Casing   |               | Outer Tire Casing   |
   |   +-------------+   |               |   ~~~~~~~~~~~~~~~~~ |
   |   | Inner Tube  |   |               |   | Liquid Sealant| |
   |   +-------------+   |               |   ~~~~~~~~~~~~~~~~~ |
   | Rim               |               | Rim + Airtight Tape |
   +---------------------+               +---------------------+
   Pinch flat risk on impacts            Self-healing puncture protection
How to Check Tubeless Compatibility
Both the tire and the rim must be explicitly designed for tubeless operation:
- Tire Markings: Look for terms like Tubeless Ready (TLR), Tubeless Easy (TLE), TC (Tubeless Compatible), or UST. Standard non-tubeless tires have permeable sidewalls and non-compliant beads that can pop off rims under pressure.
- Rim Profiling: Verify the rim features a rounded tubeless retaining hump along the internal shoulders to lock the tire bead in place during hard cornering.
- Hookless vs. Hooked Rims: Straight-side (hookless) carbon rims require certified hookless-compatible tires and strict adherence to a 72.5 PSI (5.0 bar) maximum pressure limit.
Tubeless vs Inner Tube Comparison
| Feature | Tubeless Systems | Traditional Inner Tubes |
|---|---|---|
| Pinch Flat Resistance | Exceptional (No inner tube to pinch) | Poor (Vulnerable to snakebite flats) |
| Operating Pressure | Low (Optimizes traction and comfort) | Moderate to High (Required to avoid flats) |
| Puncture Repair | Automatic (Liquid sealant heals holes up to 6mm) | Manual (Requires tire removal and patch) |
| Initial Installation | Technical (Requires rim tape, valves, compressor) | Simple (Requires basic tire levers) |
| Ongoing Maintenance | Refresh liquid sealant every 2–4 months | Minimal (Check inflation pressure regularly) |
Basic Tubeless Installation Steps
- Tape Rim: Wrap airtight tubeless tape smoothly across the internal rim channel, extending 1–2 mm wider than the internal rim width.
- Fit Valve: Insert a dedicated tubeless valve through the rim valve hole, hand-tightening the O-ring locknut.
- Mount Tire: Push the first tire bead into the center drop-channel of the rim, followed by the second bead.
- Inject Sealant: Pour 45–90 ml of liquid tubeless sealant directly into the tire casing cavity before seating the final section.
- Seat Bead: Use a high-volume floor pump or air compressor to quickly inflate the tire until the beads snap onto the rim shoulders.
- Seal Envelope: Rotate and shake the wheel horizontally to distribute sealant across the internal casing walls.
How Tread, Casing, and Compound Affect Tire Choice
While size compatibility determines if a tire will fit your wheel, its construction dictates how it rides.
                     PERFORMANCE INFLUENCE FACTORS

   Casing Thread Count (TPI) --+
   Rubber Durometer -----------+---> Real-World Performance
   Puncture Belt Layer --------+
   Tread Profile Design -------+
Tread Pattern Architecture
- Slick Tread: Smooth rubber contact patch optimized for asphalt efficiency and maximum cornering grip on dry pavement.
- Semi-Slick Tread: Smooth center strip for fast rolling on straightaways, paired with aggressive shoulder knobs that engage during cornering on dirt or gravel.
- Knobby Tread: Open block tread patterns that penetrate loose soil, mud, and sand to provide braking and cornering traction off-road.
Casing TPI (Threads Per Inch)
Casing density measures the number of nylon or cotton threads woven per inch of tire casing fabric:
- 60 TPI Casing: Thicker nylon threads that create a stiff, durable sidewall resistant to cuts and rock abrasions.
- 120+ TPI Casing: Finer, supple threads that conform easily to road surface imperfections, lowering rolling resistance and improving ride comfort.
Rubber Compound Durometer
Rubber hardness is measured using a Shore A durometer rating:
- Hard Compounds (60a–70a): Harder rubber formulations used in the center tread to extend wear life and improve rolling efficiency.
- Soft Compounds (42a–50a): Softer, tacky rubber compounds used on shoulder knobs to increase wet weather grip and cornering traction.
- Dual/Triple Compounds: Premium tires combine a hard center compound with soft side knobs to balance speed and grip.
Puncture Belts
Integrates protective layers beneath the center tread to stop sharp objects before they puncture the airtight casing:
- Aramid/Kevlar Weaves: Lightweight woven barriers designed for high-performance road and gravel tires.
- High-Density Elastic Rubber Belts: Sub-tread layers (3 mm to 5 mm thick) used in heavy-duty urban commuter and e-bike tires to resist glass and debris.
Common Bike Tire Compatibility Mistakes
Avoid these four common sizing errors when purchasing new tires:
                      FOUR COMMON COMPATIBILITY TRAPS

   [ 1. Diameter Only ]   Ignore tire width or frame clearance limits.
   [ 2. 700C vs 29er  ]   Attempting to fit a 2.4" MTB tire in a road frame.
   [ 3. Max Width     ]   Ignoring tire growth and mud space requirements.
   [ 4. Max PSI       ]   Exceeding rim pressure limits on tubeless setups.
1. Matching Only the Tire Diameter
Assuming a matching diameter guarantees fitment is a common mistake. Buying a 700C tire without checking if its 45 mm width clears your road bike frame leads to tire rub and frame damage.
2. Assuming a Bigger Tire Always Fits
Wide tires offer extra comfort, but actual mounted widths can exceed printed sidewall ratings on wide rims. Always leave a 4 mm to 6 mm safety margin around frame stays.
3. Confusing 700C and 29-Inch Tires
Although both formats use a 622 mm bead-seat diameter, mounting a wide 2.4-inch 29er mountain bike tire onto a narrow 15 mm road rim creates an unstable lightbulb profile that can pop off the wheel.
4. Ignoring Manufacturer Limits
Never exceed the lower maximum pressure rating between your tire sidewall and rim bed. High pressures on wide rims can cause carbon rim hook failure or bead stretch.
How to Measure Your Existing Bike Tire
When markings on your tire sidewall become worn or unreadable, measure your setup directly before buying a replacement.
                           MEASUREMENT PROCESS

   Step 1: Read Sidewall   ======>  Record ETRTO Code (e.g., 28-622)
   Step 2: Rim Channel     ======>  Measure Internal Width (mm)
   Step 3: Stays Clearance ======>  Check Narrowest Frame Gap (mm)
Step 1: Read the Tire Sidewall
Examine the tire sidewall under bright light for relief-molded numbers. Look for the ETRTO standard integer (e.g., 37-622 or 54-559), as well as maximum PSI limits and tubeless designations.
Step 2: Measure Rim Internal Width
Remove the tire and use digital calipers to measure the internal distance between the rim hooks. Compare this value against the compatibility chart to establish your safe width range.
Step 3: Measure Available Frame Clearance
Measure the narrowest point between your current tire and the frame stays, fork blades, and brake bridges. Subtract 8 mm total (4 mm per side) from this distance to calculate your maximum safe tire width upgrade.
How to Choose a Replacement Bike Tire
Select your replacement tire using this step-by-step decision framework:
                       REPLACEMENT TIRE SELECTION

   [ Step 1: Bead-Seat Diameter ]  Match rim BSD exactly (622, 584, or 559 mm).
                 |
                 v
   [ Step 2: Width Envelope ]      Select a width safe for both rim and frame.
                 |
                 v
   [ Step 3: Construction ]        Match casing TPI, compound, and tread to terrain.
The Best Tire Features for Road Riders
- Casing: 120+ TPI supple casing for lower rolling resistance.
- Tread: Slick or micro-diamond tread for fast pavement performance.
- Width: 28 mm to 30 mm to optimize comfort and vibration dampening.
Best Tire Features for Gravel Riders
- Casing: Tubeless-ready design with reinforced sidewall grid protection.
- Tread: Fast-rolling center tread paired with aggressive shoulder knobs.
- Width: 38 mm to 45 mm for traction over loose dirt and gravel.
Best Tire Features for Commuters
- Casing: Heavy-duty casing featuring a sub-tread puncture protection belt.
- Tread: Deep water-channeling grooves with reflective sidewall strips.
- Width: 32 mm to 38 mm for durability and puncture resistance.
Data-Backed Testing for Bike Tire Compatibility
Professional tire testing uses controlled, repeatable laboratory and field methods to evaluate performance.
                      TIRE TESTING METHODOLOGY

   +--------------------+   +--------------------+   +--------------------+
   | Rolling Resistance |   | Puncture Resistance|   | Wet Cornering Grip |
   | (Motorized Drum)   |   | (Needle Penetrate) |   | (Angle Friction)   |
   +--------------------+   +--------------------+   +--------------------+
Rolling Resistance Testing
Rolling resistance is measured in Watts using a motorized steel drum roller under controlled loading conditions (e.g., 40 kg load at 18 mph / 29 km/h):
- High-Performance Road Tires: 9.0 W – 11.5 W per tire.
- Standard Touring/Commuter Tires: 16.0 W – 22.0 W per tire.
Puncture Resistance Testing
Penetration force is measured in Newtons (N) by driving a hardened steel probe into the tire tread and sidewall until it punctures the casing:
- Race Casings: 25 N – 35 N force threshold.
- Heavy-Duty Commuter Casings: 70 N – 105 N force threshold.
Grip and Cornering Testing
Cornering traction is calculated by measuring the friction coefficient of the tire compound on wet and dry surfaces at increasing lean angles (15∘ to 45∘).
People Also Ask: Bike Tire Size Compatibility
Can Any Bike Tire Fit Any Bike Wheel?
No. The tire must match the rim’s exact bead-seat diameter (BSD), fall within its approved internal width range, and clear the bicycle frame and fork.
How Do I Know What Tire Size Fits My Bike?
Check the ETRTO code stamped on your existing tire sidewall (e.g., 28-622). Match the 622 BSD to your rim, then verify that your frame has at least 4 mm of clearance around the tire.
Can I Put a Wider Tire on My Bike?
Yes, provided your internal rim width can safely support the wider tire profile and your frame, fork, and brakes maintain at least 4 mm to 6 mm of clearance.
Can I Put a Smaller Tire on a Bigger Rim?
You cannot change rim diameter standards (e.g., putting a 584 mm tire on a 622 mm rim). However, you can run a narrower tire on the same rim diameter if it falls within the rim’s approved width range.
Are 700C and 29-Inch Wheels the Same?
Both standards share an identical 622 mm bead-seat diameter. The difference lies in tire width: 29-inch mountain bike tires are wider and taller than 700C road or gravel tires.
Can I Use a Different Tire Brand With My Wheel?
Yes. As long as the replacement tire matches the required bead-seat diameter and falls within approved width limits, you can run any tire brand on your wheels.
Frequently Asked Questions
What is the most important bike tire compatibility measurement?
The bead-seat diameter (BSD) in millimeters is the most critical measurement. It must match the rim standard exactly (e.g., 622 mm for 700C/29er) for the tire to mount safely.
Does tire width have to match rim width?
No. Tire width is wider than internal rim width. Refer to the rim width compatibility chart to select an approved tire width for your rim.
How much wider can I make my bike tires?
Your upgrade limit is determined by frame clearance and internal rim width. Maintain at least 4 mm of clearance (6 mm for mud) between the tire tread and frame stays.
Can wider tires reduce rolling resistance?
Yes. At equivalent pressures, wider tires create a shorter, wider contact patch that reduces casing deflection loss over rough surface terrain.
Are tubeless tires compatible with every bike?
No. Both the rim bed and tire casing must be certified tubeless-ready, equipped with airtight tape, tubeless valves, and liquid sealant.
What PSI should I use based on rider weight?
Inflation pressure depends on combined system weight, tire volume, and terrain. Adjust your baseline pressure by adding or subtracting 1 PSI for every 10 lbs above or below an 180 lb system weight.
How do I know when a bike tire needs replacing?
Replace your tire when the center tread flattens out, structural casing threads show through the rubber, sidewall cracks appear, or puncture frequency increases.
Can e-bike tires use the same compatibility rules?
While BSD and rim width rules remain the same, e-bikes require tires with ECE-R75 certifications, reinforced casings, and durable compounds to handle high motor torque and system weight.
Final Bike Tire Compatibility Checklist
  [ ] 1. Match Bead-Seat Diameter (BSD): Confirm 622, 584, or 559 mm.
  [ ] 2. Check Internal Rim Width: Match tire width to the rim chart.
  [ ] 3. Verify Frame/Fork Clearance: Ensure 4-6 mm of space around stays.
  [ ] 4. Confirm System Pressure Limits: Check tire and rim MAX PSI ratings.
  [ ] 5. Confirm Tubeless Compatibility: Verify TLR/TLE markings on both parts.
  [ ] 6. Match Construction to Use: Select appropriate TPI, compound, and tread.
  [ ] 7. Calculate System PSI: Adjust pressure based on rider weight and terrain.
Conclusion: Choose the Right Bike Tire With Confidence
Achieving proper bicycle tire compatibility requires matching more than just a single sidewall label. By matching bead-seat diameter first, verifying internal rim width ranges, and ensuring frame clearance, you guarantee a safe, reliable fitment. Pairing the right casing, compound, tread pattern, and pressure optimizes cornering traction, comfort, puncture resistance, and efficiency on every ride.
Find Your Ideal Tire and PSI
Stop relying on generic sidewall maximums. Use the Free Bike Tire Pressure Calculator / Tire Finder Tool at TheBikeTires.com to compute starting pressures based on your exact weight, tire width, and riding conditions.

Mohidul Islam is a leading cycling technology specialist and bike tire consultant with over 15 years of hands-on experience in the bicycle industry. He holds a Bachelor of Science in Mechanical Engineering from Penn State University, where he focused heavily on material science, tread mechanics, and rubber compound performance. Over the past decade and a half, Alex has conducted extensive field testing, tubeless setup evaluations, and tire pressure modeling for road, mountain, and e-bikes. His practical insights and data-driven approach help cyclists of all levels optimize grip, speed, and durability on every ride.



