
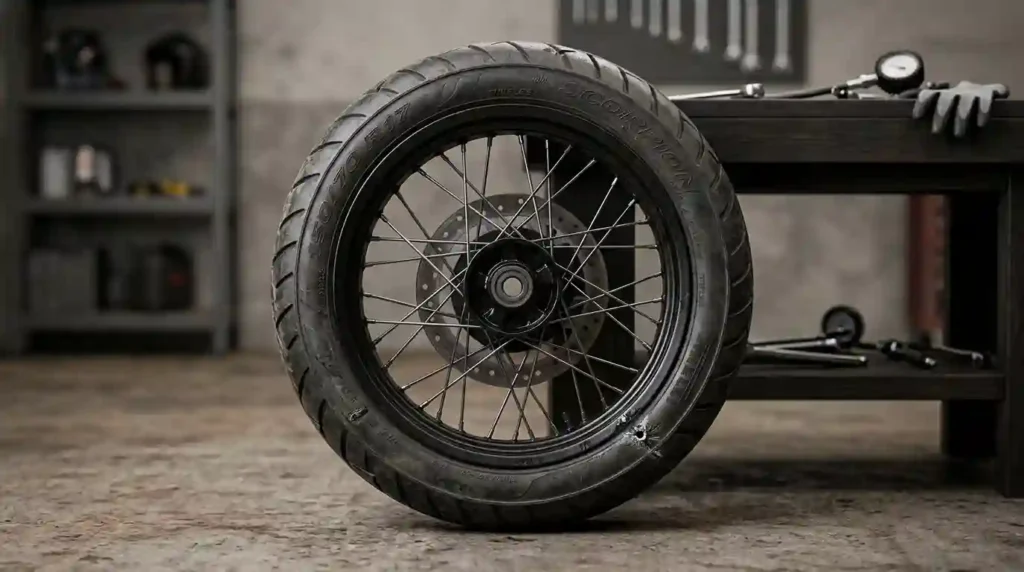
You fix a flat on the roadside. You fit a new tube, pump it up, and ride off. Ten minutes later, it is flat again. A bike tyre puncture near the rim is a classic cause of this loop.
US riders face a long list of tire problems. Flats, weak cornering grip, wrong tire pressure (PSI), and fast tread wear are the big ones. The right tire and correct PSI shape your safety, your speed, and your comfort. If you are choosing new rubber, start with our guide on how to choose bike tyres.
A hole near the rim is a clue. It may point to a pinched tube, bad rim tape, sharp debris, or a damaged bead. If you only swap the tube, the real cause stays put.
This guide helps you find the cause first. Then you can fix it for road, mountain, gravel, commuter, and e-bike setups.
Quick answer: Find where the hole sits on the tube. Match it to the tire and rim. Fix that cause before you fit a new tube.
What Is a Bike Tire Puncture Near the Rim?
This is a puncture close to the tire bead, the rim edge, or the inner area of the tire. The bead is the reinforced edge that locks the tire onto the rim.
Where the hole sits helps you find the cause. It can point to the rim, the tube, the casing, or an outside object. Our explainers on how bike tires work and what a bike tire casing is cover the basics.
Damage to the bead or rim can be more serious than a plain tube puncture. A tube patch cannot fix either one.
This is why a quick look at the tube pays off. A few seconds of inspection can save you from a second flat on the same ride.
Puncture Near the Tire Bead vs. Rim Tape
The bead sits against the rim and keeps the tire in place. The bead seat size is part of the ETRTO sizing system.
Rim tape covers the spoke holes on many wheels. It shields the tube from sharp metal edges inside the rim.
A hole on the rim-facing side of the tube often points to the tape, a spoke hole, or a rough rim surface. But low pressure can cause rim-side holes too, so check both.
Why Puncture Location Matters
A hole on the outer side of the tube may mean glass, thorns, or debris in the tire. Two close holes often mean a pinch flat, caused by an impact against the rim.
A hole on the side of the tube is a different story. It often means the tube was caught under the bead during install, which can also cause a loud blowout.
A damaged bead, a cracked rim, or a sharp edge needs attention before you ride again. Slow leaks can also hide other issues, as why bike tyres lose air explains.
| Hole Location on Tube | Likely Cause | First Check |
|---|---|---|
| Outer side, single hole | Glass, thorn, wire | Tire tread and inside |
| Two small parallel slits | Pinch flat | PSI and impact history |
| Inner side, single hole | Rim tape, spoke hole, burr | Rim bed and tape |
| Side edge of tube | Tube trapped under bead | Tire installation |
| Near the valve | Valve hole edge or stem | Valve hole and seating |
What Causes a Bike Tire Puncture Near the Rim?
Common causes include damaged rim tape, exposed spoke holes, pinch flats, bead damage, and debris inside the tire. Poor installation can also trap a tube between the bead and the rim.
Many riders also cause repeat flats by pinching the tube with tire levers while mounting the last bit of bead. Go slow, and finish by hand when you can.
Wrong pressure, poor rim fit, and worn casings raise the odds of repeat flats. A habit of checking your bike tyres often catches many of these early.
Damaged or Misaligned Rim Tape
Rim tape protects the tube from spoke holes and sharp edges. Tape that has shifted, split, or worn thin can expose the tube.
Match the tape width and type to the rim’s internal width and design. Our guide to bike tire width helps you read those numbers.
Pinch Flats Caused by Low Tire Pressure
A hard hit can compress the tire and pinch the tube against the rim. Low pressure raises this risk on potholes, curbs, and rocky trails.
The classic sign is two small slits side by side, often called a snakebite. Riders sometimes blame the rim tape when low pressure is the real cause. Choose PSI by tire width, total weight, terrain, and rim limits. See how much air to put in a bike tire.
Tire Bead or Rim Damage
A torn bead can stop the tire from sitting well on the rim. Bent or cracked rims and sharp burrs can cut tires or tubes.
Stop riding if the tire slips, bulges near the rim, or will not seat evenly. A tire that creeps on the rim can tear the valve stem or blow off under load. That is a crash risk, not just a flat. Our guide on how often bike tyres should be replaced helps you decide when to retire one.
Trapped Debris and Worn Tire Casings
Small glass bits or wire can stay inside the tire after a puncture. They then cut the new tube.
Thin casings and worn puncture belts give less protection. Check both the tread and the sidewalls before you fit a new tube. Learn how much tread a bike tyre should have to judge wear.
How to Find the Source of a Rim-Area Puncture
Remove the wheel and tire safely. Inspect the tube and tire before you fit new parts.
Find the hole in the tube. Compare it with the matching area of the tire and rim. Check the rim tape, spoke holes, bead, and casing interior for sharp objects.
Quick steps: 1. Remove the wheel and tire. 2. Find the hole in the tube. 3. Inspect the tire and rim at that spot.
Remove the Wheel and Tire (Step 1)
Shift to a suitable gear. Release the brake or axle mechanism as needed. On a disc-brake bike, do not squeeze the lever while the wheel is out.
Deflate the tire fully. Work the bead off with compatible tire levers. Avoid sharp tools that could damage the tube, tape, or casing.
Locate the Tube Puncture (Step 2)
Inflate the removed tube slightly. Listen and feel for escaping air.
Use soapy water to find small leaks. If needed, dip the tube in water and watch for bubbles. Mark the hole so you can match its position to the tire and rim. A tip: line the tube up with the tire in the same direction it sat. The hole then points right at the cause.
Inspect the Tire and Rim (Step 3)
Check the tire interior for glass, wire, thorns, cuts, and exposed threads. Run a cloth along the inside to catch small bits.
Look for damaged tape, spoke ends, burrs, cracks, and dents. Replace faulty parts before you reinstall. If you need to confirm sizing, learn how to read bike tire size.
How to Fix a Bike Tire Puncture Near the Rim
Find and fix the cause before you replace or patch the tube. Use a suitable patch only for a repairable tube hole, and follow the patch maker’s steps.
Replace a damaged bead or an unsafe rim. A patch cannot restore their strength.
Repair or Replace the Inner Tube (Step 1)
Clean and dry the area before you apply a compatible patch. Press it firmly and give it time to bond.
Replace the tube if the hole is large, the valve area is damaged, or the tube has several weak spots. A snakebite pair of holes is usually quicker to fix with a fresh tube. Never patch a tube before you remove the cause.
Replace Damaged Rim Tape (Step 2)
Remove the old tape. Inspect the rim bed for sharp edges or damaged spoke holes.
Fit tape that matches the wheel’s inner rim width and design. For tubeless wheels, use compatible tubeless tape and follow the wheel maker’s steps. Do not let tape block the valve hole. Tape that is too narrow leaves spoke holes bare. Tape that is too wide can curl and fold at the edges.
Reinstall the Tire Correctly (Step 3)
Check that the tube sits evenly inside the tire. Inflate it just enough to give it shape before you mount the tire. This helps stop it folding under the bead.
Confirm the bead is seated all the way around the rim. Inflate slowly within approved limits. Our guide on how to inflate a bike tire correctly covers the process. Watch for bulges and uneven seating.
Can Tubeless Sealant Fix a Puncture Near the Rim?
Tubeless sealant can close some small holes in the tire casing. It depends on the opening and the sealant’s condition.
Sealant will not fix damaged rim tape, a cracked rim, a torn bead, or a major casing failure. Find out whether the leak comes from the tire, valve, tape, or bead before you add more sealant.
A simple test helps. Spray soapy water around the valve, bead, and spoke holes, then watch for bubbles. The spot that foams is the spot to fix.
Tubeless Tire vs. Inner-Tube Repair
Inner-tube systems need a patch or a new tube after a puncture. Tubeless systems may seal small holes. But leaks at the bead or valve often need a different fix.
Both setups need a sound rim, a compatible tire, and correct installation.
| Factor | Inner Tube | Tubeless |
|---|---|---|
| Small tire hole | Patch or new tube | May self-seal |
| Rim tape leak | Tube can be cut | Air leaks from the spoke bed |
| Bead leak | Rare, check seating | Common, reseat or clean |
| Roadside fix | Simple | May need a tube |
When to Check the Valve and Bead
A loose or damaged tubeless valve can leak air near the rim. Dirt, poor seating, or a bad tire and rim match can cause bead leaks. Our guide on bike tire size compatibility shows how to check the match.
Never ride a tire that will not seat securely or has a damaged bead.
How Tire Pressure (PSI) Affects Rim-Area Punctures
Low pressure raises pinch-flat risk, especially on potholes and rough ground. Too much pressure can pass component limits. It can also reduce grip and worsen the effect of impacts.
Use the tire and rim makers’ ranges as your start. Read what happens if bike tire pressure is too high and whether you can overinflate a bike tire.
How to Choose the Right Tire Pressure
Consider total weight, tire width, rim width, casing build, and surface. Here is a quick starting estimate. It is a rule of thumb, not a standard.
- Add rider, bike, and gear weight in pounds. This is your system weight.
- Front load is about 47% of that. Rear load is about 53%.
- Multiply each load by the width factor below.
- Subtract about 10% for tubeless, 5% for wet roads, and 10% for rough ground.
| Tire Width | Width Factor |
|---|---|
| 28 mm (1.1 in) | 0.80 |
| 32 mm (1.25 in) | 0.68 |
| 40 mm (1.6 in) | 0.40 |
| 2.1 in (53 mm) MTB | 0.30 |
| 2.4 in (61 mm) MTB | 0.22 |
Example for 32 mm tubed tires:
| System Weight | Front PSI | Rear PSI |
|---|---|---|
| 150 lb | 48 | 54 |
| 180 lb | 58 | 65 |
| 210 lb | 67 | 76 |
| 250 lb | 80 | 90 |
Never pass the tire or rim limit. Use a gauge, not your thumb. See how to check bike tire pressure and how to find the correct bike tire pressure.
Does Tire Width Affect Rim-Area Punctures?
Wider tires often run lower pressure for a given load. Still, the right PSI depends on the full setup. Gravel tires and mountain bike tires use different pressures from narrow road tires.
Check approved tire and rim pairs before you change width. Rim fit depends on inner rim width.
| Inner Rim Width | Typical Tire Range |
|---|---|
| 17 mm | 25 to 32 mm |
| 21 mm | 28 to 40 mm |
| 25 mm | 35 to 50 mm |
| 30 mm | 2.1 to 2.6 in |
These are common guides. Follow your rim maker. Hooked rims have a small lip that grips the bead. Hookless rims do not, and many cap pressure near 72 PSI. See how much wider a tire you can fit and whether you can use wider tires on your bike.
Do E-Bikes Need Extra Puncture Protection?
Often, yes. E-bikes can carry more weight and deliver strong e-bike torque from a stop. Both stress the tire and rim.
Choose tires with fitting load ratings and build. Look for use marks, as shown in bike tyre markings explained for beginners. For heavy daily use, see how to choose durable bike tyres.
Check beads, rim tape, and pressure more often when you carry cargo or ride rough roads.
How to Prevent Bike Tire Punctures Near the Rim
Check the rim tape, beads, and tire interior every time you fix a flat. Keep pressure suitable. Avoid harsh hits where you can.
Replace worn or damaged parts before they cause repeat punctures. Good habits cost little, and they save time on the road.
On a daily commute, a two-minute check each week is plenty. For long weekend rides, add a quick look at the rim tape and bead before you leave.
Inspect Rim Tape and Spoke Holes
Look for splits, movement, bare spoke holes, and sharp edges. Make sure the tape fully covers the needed area without blocking the valve hole.
Recheck the rim bed whenever one wheel gets repeated tube punctures. Also check how often you top up air. Our guide on how often to inflate bike tires sets a simple routine.
Choose Tires with Suitable Puncture Protection
Compare casing build, puncture belts, and reinforced options for your riding style. Balance puncture resistance against rolling resistance, weight, and cornering grip.
Our piece on puncture protection vs. rolling resistance explains the trade-off. For a full buying guide, read how to choose puncture-resistant bike tyres.
Check Tire Wear and Installation
Look for cuts, cracked rubber, exposed threads, bead damage, and uneven wear. Make sure the tire size and bead type match the rim. If you are unsure, learn what bike tire size you need.
After installation, check bead seating and pressure before you ride.
Best Bike Tires and Rim Accessories to Prevent Repeat Flats
Consider puncture-resistant tires, suitable tubes, durable rim tape, and a reliable gauge. Pick parts by wheel type, rim width, tire size, conditions, and budget. See our list of the best bike tyres for puncture protection.
Do not assume thick tread or high casing TPI alone means better protection.
| Rider Type | Look For | Common Width |
|---|---|---|
| Daily commuter | Durable casing, belt | 32 to 40 mm |
| Gravel | Reinforced casing | 38 to 50 mm |
| Mountain bike | Strong casing, wide volume | 2.2 to 2.6 in |
| E-bike | Load rating, tough bead | 40 mm and up |
Best Tire Features for Daily Commuting
Look for real puncture protection and a durable casing for urban debris. Consider width and tread pattern for comfort, wet grip, and easy rolling.
Check frame clearance and rim fit before you upgrade. Urban riders in the Midwest and Northeast also face potholes after winter, so a sturdier casing pays off. See how to choose tyres for a commuter bike, the best bike tyre size for commuting, and our picks of bike tyres for daily commuting.
Gravel and Mountain Bike Features That Matter
Look for casing reinforcement built for Southwestern loose rock, sharp gravel, and trail hits. Match tread and rubber to the surface and the grip you want. Wet Pacific Northwest mud calls for a different tread than dry desert.
Set PSI to support the tire without too much casing movement. Read how to choose bike tires for gravel roads, how to choose tires for mixed surfaces, and how to choose bike tires for wet weather.
Choosing Rim Tape and Pressure Gauges
Pick rim tape by rim bed width, wheel design, and tubeless use. Use a gauge with a suitable range and fine reading for your tire type.
Recheck pressure and inspect the rim bed after repeated flats. Good tape and a good gauge cost little compared with a ruined ride.
How Rim-Area Puncture Resistance Is Tested
Compare tires and rim products using clear methods and equal test conditions. Look for separate proof on tread puncture, casing strength, bead strength, and rim tape performance.
Lab results are comparative evidence. They do not promise protection from every real flat. A tire that scores well in a lab can still fail on a sharp rock edge. Use test data as one input and match it to your own roads and trails. See our testing process and editorial policy for how we approach reviews.
What to Look for in Tire Testing
Check the method, sample size, pressure, tire size, and the type of puncture or impact. Tell independent tests apart from maker claims.
Consider field results across surfaces and loads. Puncture armor can affect feel, so see how much bike tires affect comfort and how much they affect speed.
Understanding Casing TPI and Puncture Belts
TPI means threads per inch. Casing performance also depends on thread material, weave, and build. Puncture belts often guard the tread and may not cover the bead or sidewall.
Judge the whole tire design, not one number. Rubber matters too, so read what a bike tire rubber compound is.
| Term | Plain-English Meaning |
|---|---|
| TPI | Thread density in the casing |
| Durometer | Rubber hardness; lower is softer |
| Puncture belt | Extra layer, usually under tread |
| Rolling resistance | Energy lost as the tire rolls |
| Cornering traction | Grip the tire holds in a turn |
Frequently Asked Questions About Bike Tire Punctures Near the Rim
Why does my bike tire keep puncturing near the rim?
Damaged rim tape, bare spoke holes, trapped tubes, and pinch flats are common causes. Check the hole location and inspect the rim bed before you fit a new tube. Also confirm that pressure and rim fit are right. Your tread also matters, so see why bike tires have different tread patterns.
Can I patch a bike tube punctured near the rim?
Yes, if the hole is in the tube and suits a patch. Fix the cause first, such as bad rim tape or a sharp edge. Replace the tube if the valve area or tube is badly damaged.
Can damaged rim tape cause repeated flat tires?
Yes. Worn or shifted tape can expose the tube to spoke holes or sharp edges. Replace tape that is split, moved, or wrong for the rim. Use the right width and type for the wheel.
When you swap tape, clean the rim bed first. Dirt under the tape can let it shift and expose a spoke hole.
What PSI helps prevent pinch flats?
No single PSI fits every rider or bike. Consider total weight, tire width, rim fit, terrain, and maker limits. Use a reliable gauge and adjust in small steps.
Is a tubeless tire less likely to puncture near the rim?
Tubeless setups can seal some small tire holes without a tube. They can still leak at the bead, valve, or damaged tape. Correct install and matching parts still matter.
How do I know if my bike tire bead is damaged?
Look for frayed bead material, uneven seating, bulges, or a tire that slips on the rim. Stop riding if the tire will not seat securely. Replace the tire if the bead is damaged.
Does rim width affect tire punctures?
Rim width changes tire shape, support, and fit. Use approved tire and rim pairs and follow pressure limits. A wider rim does not prevent punctures on its own. Grip also depends on setup, as we show in how much bike tires affect grip.
When should I replace a bike tire instead of repairing it?
Replace tires with damaged beads, deep casing cuts, bulges, or exposed threads. A tube patch cannot restore a damaged casing or rim. If you are unsure, ask a qualified bike mechanic to inspect it.
Final Verdict: Stop Repeat Punctures Near the Rim
A puncture near the rim often points to a problem with rim tape, spoke holes, installation, or a pinch flat from an impact. The hole’s location is your best clue.
Here are the key takeaways:
- Find the cause before you replace the tube.
- Check the bead, rim bed, tape, and casing for damage.
- Replace any bead or rim that is damaged, since a patch cannot fix them.
- Prevent repeat flats with correct PSI, matching parts, regular checks, and tires made for your terrain.
Test your exact setup. Do not guess your pressure or your tire fit. Use the Free Bike Tire Pressure Calculator / Tire Finder Tool at TheBikeTires.com to match PSI and tire size to your weight, rim, and riding style. It takes a minute, and it can end the flat-tire loop.
A flat near the rim feels random, but it rarely is. The hole, the tape, the bead, and the pressure all tell a story. Read it once, fix it properly, and your next ride should go the distance.
Ride smart, check often, and fix the cause, not just the symptom.

Mohidul Islam is a leading cycling technology specialist and bike tire consultant with over 15 years of hands-on experience in the bicycle industry. He holds a Bachelor of Science in Mechanical Engineering from Penn State University, where he focused heavily on material science, tread mechanics, and rubber compound performance. Over the past decade and a half, Alex has conducted extensive field testing, tubeless setup evaluations, and tire pressure modeling for road, mountain, and e-bikes. His practical insights and data-driven approach help cyclists of all levels optimize grip, speed, and durability on every ride.



