
A flat tire can ruin a commute, cut a long ride short, or end a weekend trail trip. You stand on the roadside with a tube in your hand and the clock ticking. Most US riders know that feeling.
The good news is that flats are not random. The right tire, the right tire pressure (PSI), and a few smart habits can cut them down a lot. This guide covers the best bike tyres for puncture protection and shows you how to choose one with confidence.
We will look at puncture belts, tough casings, tubeless sealant, and the role of PSI. We will also cover other common pain points, such as slow rolling resistance, weak cornering traction, and early tread wear. Tire choice and pressure affect your safety, your speed, and your comfort on every ride.
Our goal is simple. Find a tire that balances flat protection, speed, grip, comfort, and cost. If you are new to tire basics, start with how bike tires work and what makes a good bike tyre. To see how we review tires, read our testing process.
Quick note: No tire is flat-proof. The best setup lowers your risk, and a small repair kit handles the rest.
What Are Puncture-Resistant Bike Tires?
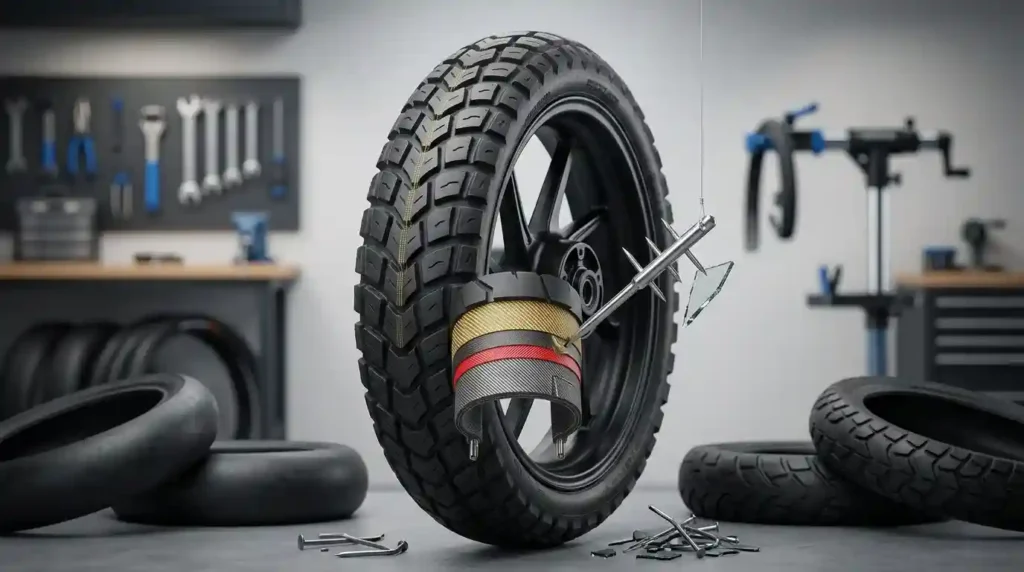
Puncture-resistant bike tires are tires built to keep sharp objects from reaching the inner tube or tire cavity. They use extra rubber, protective belts, or stronger casings under the tread. These layers slow or stop thorns, glass, and small debris. They reduce flats, but no tire is completely flat-proof.
Reinforced rubber layers add a barrier between the road and the air chamber. Protective belts spread the force of a sharp point across a wider area. A stronger casing resists cuts and pinch damage.
Big hazards still win sometimes. Large thorns, sharp metal, and deep glass shards can pass through almost any tire. In the Southwest, goathead thorns are a classic example. If you want to know what sits inside a tire, see what bike tires are made of.
How Do Bike Tires Prevent Punctures?
Tires fight flats in three ways. They block sharp objects, they flex over rough ground, and they hold air at the right pressure. Learn the parts below and tire spec sheets start to make sense.
Puncture Belts and Protective Layers
A puncture belt is a layer under the tread that blocks sharp objects. Nylon is common and affordable. Aramid fibers, the family that includes Kevlar, are strong for their weight. Some tires use a thick rubber strip instead, or add one on top.
Tread protection and sidewall protection are not the same. Many tires protect only the tread to save weight. Touring and mountain tires often add sidewall layers too.
More reinforcement adds weight and can raise rolling resistance. That is the price of safety. Always check the maker’s specs, because protection levels differ even inside one brand.
Casing TPI and Tire Durability
Casing TPI means threads per inch in the tire body. A high TPI casing uses thin threads. It feels supple and smooth. A low TPI casing uses thicker threads. It feels firmer and often lasts longer.
Here is the catch. Higher TPI does not mean better puncture protection. A race tire with a 120 TPI casing can cut more easily than a 60 TPI commuter tire.
Flexible casings suit fast road rides. Reinforced casings suit daily commutes and rough routes. For a deeper look, read about the bike tire casing.
Rubber Compounds and Tread Patterns
The rubber compound controls wear and grip. Durometer is a hardness score on the Shore A scale. A lower number means softer rubber. Soft rubber grips well on wet roads but wears faster. Hard rubber lasts longer but may slip more. Learn more in our guide to bike tire rubber compound.
Tread patterns change by terrain. Road tires run smooth. Gravel tires use small knobs. Mountain tires use big lugs, which shed Pacific Northwest mud. See why tread patterns differ for the details.
Tread design alone does not decide puncture resistance. Underneath, the belt and casing do the real work. You can also check how much tread a bike tire should have before it wears thin.
Best Types of Bike Tires for Puncture Protection
Different riding styles face different flat threats. Use this table to match tire construction to your needs. Sizes show metric and imperial units.
| Riding style | Main flat threat | Typical width | Key protection | Trade-off |
|---|---|---|---|---|
| Commuting | Glass, road debris | 32 to 42 mm (1.25 to 1.6 in) | Thick tread belt | Added weight |
| Road | Glass, wire | 25 to 32 mm (1.0 to 1.25 in) | Light belt, endurance casing | Slightly slower |
| Gravel | Sharp stones, thorns | 38 to 50 mm (1.5 to 2.0 in) | Reinforced casing, sealant | More drag on pavement |
| Mountain bike | Rocks, pinch flats | 2.25 to 2.6 in (57 to 66 mm) | Reinforced sidewalls | Heavier tires |
| E-bike | Heavy load, torque | 1.75 to 2.4 in (45 to 60 mm) | E-bike rated casing | Higher cost |
Brand examples help, but they are not rankings. The Schwalbe Marathon Plus and Continental Gatorskin are known for heavy protection. Always confirm current specs before you buy.
Commuting Tires With Strong Flat Protection
City riders face glass, metal scraps, and constant stop-and-go riding. Look for a reinforced tread belt, durable sidewalls, and a smooth or lightly textured tread for pavement.
Pick dependable protection first. Then balance weight and rolling resistance so the daily ride stays easy. A tire that feels like a brick will make you dread the trip.
Our guides can help you narrow it down. Start with how to choose tires for a commuter bike and what bike tyre to buy for commuting. Width matters too, so see the best tire size for commuting.
Road Bike Tires for Flat Protection
Lightweight road tires are fast but thin. Endurance and training models add a belt and a tougher casing. They give up a little speed for a lot more peace of mind.
Consider tire width, casing design, and your speed goals together. Many riders now choose 28 mm tires for a better ride and lower pressure.
Before you buy a wider tire, check frame clearance and rim compatibility. Read the best tire width for road and city riding and see our picks for 700c tires built for comfort.
Gravel Tires for Puncture Protection
Gravel tires face sharp stones and rough chunk. Look for reinforced casings that resist cuts. Choose a tread that grips loose dirt without adding needless drag on pavement.
Match tire width and construction to your terrain, wheel setup, and load. A loaded touring bike needs more protection than a light race bike. Midwest limestone roads and Southwestern rock beds can punish thin casings.
Learn more in how to choose bike tires for gravel roads and how to choose tires for mixed surfaces.
Mountain Bike Tires for Puncture Protection
Mountain trails test tires the hardest. Compare reinforced sidewalls, strong tread casings, and pinch flat protection. A pinch flat happens when the tire squeezes the tube against the rim.
Rocky Southwestern trails, roots, and sharp edges can slice a weak casing. Hard cornering adds more stress.
Match casing strength to trail difficulty, rider weight, and riding style. Many riders choose a stronger casing for the rear tire, which takes more hits. Heavier casings cost weight but save rides.
E-Bike Tires With Puncture Resistance
Look for tires rated for your bike’s use, load, and speed class. E-bike torque and extra system weight stress the tire at every launch. Frequent acceleration also wears tread faster.
Many e-bike tires list a speed rating, such as 25 km/h (about 15.5 mph) or 45 km/h (about 28 mph). US Class 3 e-bikes assist up to 28 mph, so check that rating before you buy.
Read the maker’s guidance for compatibility, pressure, and load limits. Do not assume a normal bike tire can handle an e-bike.
What Features Should You Look for in a Puncture-Resistant Bike Tire?
Three features matter most: reinforcement, fit, and ride quality. Each one affects how well the tire protects you and how it feels on the road. Weigh them against your own route.
Reinforced Tread and Sidewalls
Put tread protection first if your flats come from glass, thorns, or road debris. Choose stronger sidewalls for rocky trails, heavy loads, and rough surfaces.
Remember that protection levels vary between models. Two tires from the same brand can have very different belts and casings. Read the product page, not just the name.
Tire Width and Rim Compatibility
A wider tire holds more air. That can allow lower pressure when the wheel and tire support it. Lower pressure helps comfort and grip.
Check the approved rim width range, wheel specs, and frame or fork clearance. Never assume a wider tire will fit. Our will this tire fit my wheel checklist and the tire size compatibility guide walk you through it.
Use this table as a general guide. Always confirm with the rim and tire makers.
| Inner rim width | Common tire width range | Typical use |
|---|---|---|
| 17 to 19 mm | 25 to 32 mm (1.0 to 1.25 in) | Road, commuter |
| 19 to 21 mm | 28 to 40 mm (1.1 to 1.6 in) | Endurance, light gravel |
| 22 to 25 mm | 35 to 50 mm (1.4 to 2.0 in) | Gravel |
| 25 to 30 mm | 2.1 to 2.5 in (53 to 63 mm) | Trail mountain bike |
| 30 to 35 mm | 2.3 to 2.6 in (58 to 66 mm) | Enduro, e-mountain bike |
Curious about extra room? See how much wider a tire you can fit and whether you can use wider tires on your bike.
Rolling Resistance, Grip, and Comfort
Tougher construction often adds weight. Still, some reinforced tires roll well. Do not assume that protection always means slow.
Compare grip and braking on wet roads, gravel, and loose surfaces. A tire that slides in the rain is not safe, even if nothing can puncture it.
Choose the balance that fits your route. Protection alone should not drive the choice. Our wet weather tire guide shows how grip and flat defense work together.
Tubeless vs. Inner Tube: Which Offers Better Puncture Protection?
Both setups can work well. Tubeless adds sealant protection. Inner tubes add simplicity. The best pick depends on your skills, your terrain, and your patience for maintenance.
How Tubeless Tires Prevent Flats
Tubeless sealant is a liquid inside the tire. It rushes to a hole and seals many small punctures as you ride. This works only in a compatible tire and rim setup.
There is no tube to pinch. That lowers pinch flat risk, especially at lower pressures. Mountain and gravel riders love this benefit.
Sealant has limits. Large cuts, damaged beads, and some sidewall holes can still flatten a tubeless tire.
Benefits of Tires With Inner Tubes
Inner tubes are simple. You can swap one on the roadside in minutes. Many beginners find this easier than tubeless.
Pair a puncture-resistant tire with a suitable tube. You can also add a tire liner when it fits your setup. Liners may help with some punctures, but they add weight and can affect fit.
New riders can start with our list of best bike tyres for beginners.
Which Setup Should You Choose?
Choose tubeless if you want sealant protection and feel comfortable with setup and upkeep. Choose a reinforced tire with an inner tube if you want the simplest repair process.
Before you convert, check compatibility. The tire, rim, rim tape, valve, and sealant must all work together. Mixing parts can cause leaks or dangerous bead failures.
Not sure where to begin? Our guide on how to choose bike tyres covers the basics.
Choosing the Right Tire Pressure for Puncture Protection
Pressure is the cheapest flat defense you have. Too low and you risk rim strikes. Too high and you lose grip and comfort. Here is how to find your starting point.
Rider Weight and Tire Pressure
Rider weight is only one factor. Bike weight, cargo, tire width, rim design, and terrain all matter. Use the tire maker’s advice or a calculator as a starting point.
Do not copy another rider’s PSI. Their bike, tires, and load differ from yours.
Use the quick table below. Numbers show tube-type starting points by total system weight (rider plus bike plus gear), in pounds.
| Tire width | 120 lb | 150 lb | 180 lb | 210 lb | 240 lb |
|---|---|---|---|---|---|
| 25 mm | 54 PSI | 68 PSI | 81 PSI | 95 PSI | 108 PSI |
| 28 mm | 46 PSI | 57 PSI | 68 PSI | 80 PSI | 91 PSI |
| 32 mm | 36 PSI | 45 PSI | 54 PSI | 63 PSI | 72 PSI |
| 40 mm | 24 PSI | 30 PSI | 36 PSI | 42 PSI | 48 PSI |
| 45 mm | 20 PSI | 26 PSI | 31 PSI | 36 PSI | 41 PSI |
| 2.25 in MTB | 16 PSI | 20 PSI | 23 PSI | 27 PSI | 31 PSI |
A Simple PSI Formula for Total System Weight
This is a rule of thumb, not a factory spec. It gives a safe place to start.
Starting PSI = total system weight (lb) x width factor
Width factors: 25 mm = 0.45, 28 mm = 0.38, 32 mm = 0.30, 40 mm = 0.20, 45 mm = 0.17, 2.25 in MTB = 0.13.
Then adjust:
- Tubeless setup: subtract about 10 percent.
- Front tire: subtract 2 to 3 PSI. Rear tire: add 2 to 3 PSI.
- Wet roads or loose rock: subtract 5 to 10 percent.
Example: A 165 lb rider plus a 25 lb bike weighs 190 lb. On tubeless 32 mm tires, 190 x 0.30 = 57 PSI. Subtract 10 percent for tubeless and you get about 51 PSI. Run about 49 front and 53 rear.
Hooked vs. Hookless Rims and Pressure Limits
Hooked rims have a small lip that locks the tire bead in place. Hookless rims have a straight wall and no lip. Hookless rims often have lower pressure limits. Many cap near 72.5 PSI (5 bar), so check the label.
Always use a tire approved for your rim type. Never exceed the lower of the tire and rim limits. This rule protects you from a blowout.
For more sizing basics, see how to read bike tire size and ETRTO bike tire sizes.
Setting Tire Pressure Step by Step
- Check the tire’s permitted pressure range and the wheel maker’s limits.
- Enter rider weight, bike weight, tire width, terrain, and riding style into a suitable pressure calculator.
- Inflate within the approved limits, then test the ride and adjust in small steps.
How do I choose the right bike tire pressure? Follow the three steps above, and change pressure by 2 to 3 PSI at a time. Use a reliable gauge, since pump gauges can be off. Stop when the bike feels grippy, smooth, and stable.
Can Low Tire Pressure Cause More Flats?
Yes. Too little pressure lets the tire squash against the rim. That causes pinch flats and rim strikes. Too much pressure has its own cost, since it reduces grip and comfort and makes the tire bounce over bumps.
The right level depends on tire width, load, casing, and terrain. There is no single magic number.
Check pressure often. Air leaks slowly, and temperature swings change it. Read why bike tires lose air to understand the causes, and see how often you should check your tires.
Pressure Changes for Wet Roads and Rough Terrain
Wet roads need a little less pressure. A softer tire grips better on slick pavement. Drop about 5 to 10 percent, but stay above the pinch flat zone.
Rough ground needs care too. Rocky trails and chunky gravel often call for lower pressure so the tire can conform. Add a bit more if you hit sharp edges often. Our guide on choosing tires for rough roads has more tips.
Reducing Bike Tire Punctures
Good habits cost nothing. A few minutes of care can save hours of roadside repair. Use these simple routines for every ride.
Inspect Tires Before Every Ride
Look over your tires before you roll. Carefully remove visible glass, thorns, and debris when it is safe to do so. Check the tread and sidewalls for cuts, bulges, exposed casing, and embedded objects.
Replace a tire when damage hurts its structure or safety. Not sure when? Read how often bike tires should be replaced.
Install Tires and Tubes Correctly
Check the rotation arrows, bead seating, rim tape, and valve condition. Make sure the tube is not trapped between the bead and the rim.
Inflate slowly. Then confirm the bead sits evenly all the way around the wheel. Look for the thin line on the sidewall near the rim.
Maintain a Tubeless Setup
Use compatible sealant. Follow the tire or sealant maker’s advice on amount. Check sealant condition often and top it up as needed, since it dries out over time.
Carry a pump, tubeless plugs, and a spare tube. Some holes are too big for sealant.
Adjust Your Riding Habits
Ride around glass, sharp debris, and potholes when you can do so safely. Slow down on rough surfaces and avoid hitting sharp edges head-on.
If you commute daily or ride debris-heavy roads, inspect your tires more often. Our guides to daily cycling tires and everyday riding tire choices can help.
Fixing a Flat Tire on the Road
Flats happen to every rider. Stay calm, move off the road, and work through a simple routine. The steps differ for tubes and tubeless setups.
Fixing a Flat With an Inner Tube
- Find and remove the cause of the puncture.
- Patch the tube or replace it, then check the inside of the tire for sharp debris.
- Refit the tire, inflate to a suitable pressure, and check bead seating.
Run your fingers carefully along the inside of the tire. A tiny thorn left behind will puncture your new tube.
Repairing a Tubeless Puncture
- Let the sealant try to close a small hole. Spin the wheel and keep the hole at the bottom.
- If it fails, use a compatible tubeless plug when the damage suits plugging.
- If the tire still will not seal, fit a spare tube if it is safe and compatible, or use another proper repair method.
When Should You Replace a Tire Instead of Repairing It?
Replace tires with major cuts, exposed casing, damaged beads, or structural bulges. A plug or sealant cannot make a damaged tire safe.
Follow the maker’s repair guidance. Avoid unsafe sidewall repairs. When in doubt, replace the tire. A new tire costs far less than a crash.
Testing and Comparing Puncture-Resistant Bike Tires
Marketing claims are easy to make. Real proof is harder to find. Use these tips to judge tire tests fairly.
Puncture Resistance Testing
Lab tests measure the force a standard probe needs to pass through the tread or belt. Compare results only when the method, probe, tire size, pressure, and conditions match.
Remember that lab results are not real-world flat rates. Roads, debris, pressure, and rider habits all play a part.
Rolling Resistance and Durability Tests
Rolling resistance tests measure the energy a tire loses as it rolls. Look for consistent conditions, including pressure, load, speed, and tire size.
Also weigh tread wear, sidewall strength, wet grip, and long-term performance. A tire that resists flats but wears out fast is no bargain. Learn more about bike tire width and how it shapes these results.
Trustworthy Tire Reviews: What to Look For
Favor reviews that explain their testing method and compare similar tire sizes and pressures. Look for real-world mileage, puncture reports, repair history, and clear notes about conditions.
Separate measured results from opinion and brand claims. We explain our standards in our editorial policy and share more about our team on the about page.
Be careful with claims. No tire is “puncture-proof.” Be wary of any review that names a universal winner without evidence.
Common Mistakes When Buying Puncture-Resistant Bike Tires
Many riders make the same errors. Avoid these and you will save money and time.
- Choosing the thickest tire. Extra rubber adds weight and can hurt ride quality and rolling resistance.
- Ignoring fit and limits. Rim compatibility, load ratings, frame clearance, and pressure limits all matter. Learn what tire size you need and how to measure bike tire size.
- Trusting sealant too much. Sealant does not stop every flat.
- Trusting a high TPI number. A high TPI does not guarantee durability.
- Mixing up size codes. Terms like 700c and 650b describe wheel standards, not simple widths. Our guide to bike wheel size vs tire size clears this up.
Frequently Asked Questions About Puncture-Resistant Bike Tires
Which Bike Tires Are Best for Puncture Protection?
Look for reinforced tread belts, durable casings, and protection suited to your terrain. Commuters often do well with tough road tires. Gravel and mountain riders may need stronger sidewalls. See our guide to the best bike tyres for everyday riding.
Are Tubeless Tires Better Than Inner Tubes for Puncture Protection?
Tubeless sealant can close many small punctures. The lack of a tube also removes one pinch flat risk. Reinforced tires with inner tubes can still offer strong protection and are often simpler to repair.
Is There a Best PSI to Prevent Bike Tire Punctures?
No single PSI works for every rider. Weight, tire width, terrain, casing, and wheel limits all matter. Start with a compatible calculator and stay within the tire and rim limits.
Do Wider Bike Tires Reduce Punctures?
Wider tires hold more air and may allow lower pressure. They do not stop punctures on their own. Casing strength, pressure, and conditions still matter. See whether you can change your bike tire width.
When Do Puncture-Resistant Tires Need Replacing?
Replace a tire when the tread, casing, or sidewall is worn or damaged beyond safe use. Watch for repeated flats, exposed casing, deep cuts, and bulges.
Do Puncture-Resistant Tires Make a Bike Slower?
Some reinforced tires add weight or rolling resistance. The effect varies by design. Compare independent rolling resistance results and pick a balance of speed and protection. Long rides need extra thought, so see how to choose tires for long distance.
Can You Use Puncture-Resistant Tires on Any Bike Wheel?
No. Tire diameter, approved rim width, bead type, pressure limits, and frame clearance must all match. Check the wheel, tire, and bike specs first. You can also learn if you can put a different size tire on your bike.
Are Puncture-Resistant Tires Worth It for Daily Commuting?
Often, yes. They reduce the hassle of flats on routes with glass, thorns, and debris. Compare the upfront cost with your riding frequency, repair costs, and time lost to flats.
Conclusion: Choose the Best Bike Tires for Puncture Protection
The best puncture-resistant tire depends on your riding style, terrain, tire width, casing design, and your balance between protection and speed.
Key takeaways:
- Match tire construction to your terrain and load.
- Combine the right tire with correct PSI, regular checks, and compatible rims.
- Use tubeless sealant or a tough tube setup based on your skill and comfort.
- Remember that even reinforced tires can puncture, so carry a pump, plugs, and a spare tube.
Still deciding? Read our overview of how to choose bike tires for both road and off-road.
Test Your Exact Setup With the Free Tire Pressure Calculator
Do not guess your PSI. A wrong number can mean more flats, less grip, and a harsher ride.
Try it now: Use the Free Bike Tire Pressure Calculator and Tire Finder Tool at TheBikeTires.com. Enter your weight, bike, tire width, and terrain. Get a pressure that fits your exact setup.
Take two minutes today. Your next ride will feel faster, safer, and a lot more comfortable.

Mohidul Islam is a leading cycling technology specialist and bike tire consultant with over 15 years of hands-on experience in the bicycle industry. He holds a Bachelor of Science in Mechanical Engineering from Penn State University, where he focused heavily on material science, tread mechanics, and rubber compound performance. Over the past decade and a half, Alex has conducted extensive field testing, tubeless setup evaluations, and tire pressure modeling for road, mountain, and e-bikes. His practical insights and data-driven approach help cyclists of all levels optimize grip, speed, and durability on every ride.



