
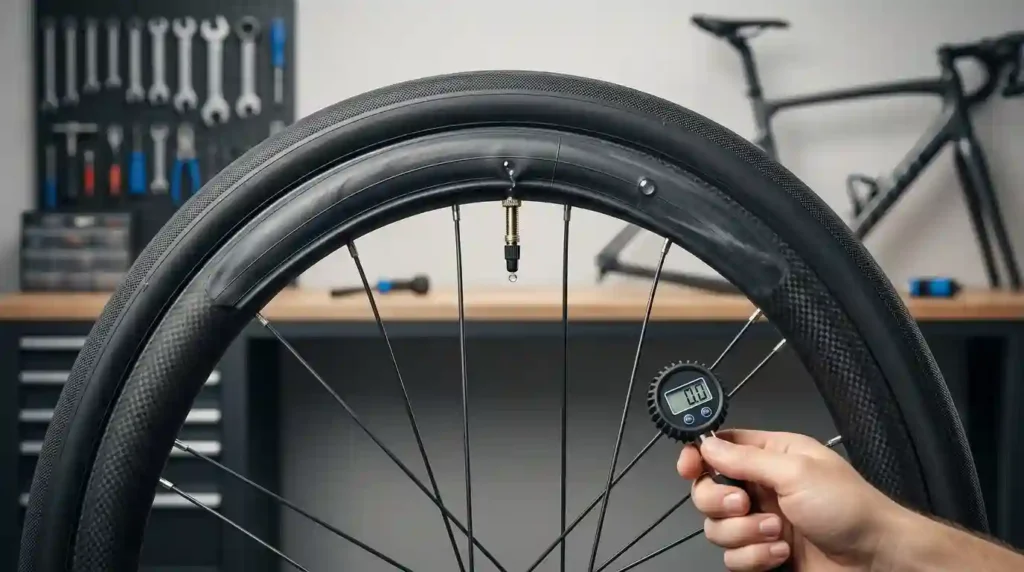
Every cyclist has experienced the frustration of rolling their bike out for a ride only to find a soft or completely flat tire. While a sudden flat from a sharp thorn or piece of glass is easy to spot, gradual pressure loss often leaves riders asking: Why do bike tyres lose air when there is no obvious hole?
Maintaining correct tire pressure is the single most effective way to improve your ride quality, speed, and cornering grip while avoiding premature tread wear and costly rim damage. Whether you ride a high-pressure road setup, a low-pressure tubeless mountain bike, or an e-bike, understanding why pneumatic tires drop PSI helps you fix subtle leaks and keep your wheels rolling smoothly.
Why Do Bike Tyres Lose Air?
All bicycle tires lose air over time because no pneumatic tire system is completely airtight. The speed at which your tire loses pressure depends on whether the air loss is driven by natural physical processes, mechanical component leaks, or environmental shifts.
- Natural air loss: Air molecules continuously escape through the microscopic pores of rubber inner tubes and tire casings over time.
- Mechanical leaks: Punctures, loose or damaged valve cores, torn rim tape, and poor bead seals cause rapid, noticeable pressure loss.
- Setup factors: Tubeless tires rely on liquid sealant, airtight rim tape, and precise bead-to-rim interfaces to maintain a seal.
Featured Snippet: Why Do Bike Tires Lose Air? Bike tires lose air because air naturally permeates through rubber and inner tube materials, while small punctures, loose valve cores, damaged rim tape, sudden temperature changes, and compromised tubeless bead seals cause faster pressure loss.
Do Bike Tires Naturally Lose Air Over Time?
Yes, bicycle tires naturally lose air even when the tube, rim, and casing are in perfect condition.
Air Permeation Through Rubber
At a microscopic level, rubber and synthetic elastomer compounds are porous web structures. Under pressure, oxygen and nitrogen molecules migrate slowly through these microscopic pathways in a process called permeation.
+-------------------------------------------------------------+
|                MICROSCOPIC AIR PERMEATION                   |
+-------------------------------------------------------------+
|  High Pressure Interior (Air Molecules: O2, N2)             |
|  *   *   *   *   *   *   *   *   *   *   *   *   *   *   *   |
|  ---------------------------------------------------------  |
|  Microscopic Pores in Rubber Casing / Tube Wall              |
|    |       |       |       |       |       |       |        |
|    v       v       v       v       v       v       v        |
|  ---------------------------------------------------------  |
|  *       *       *       *       *       *       *          |
|  Low Pressure Exterior Environment                          |
+-------------------------------------------------------------+
- Butyl Tubes: Standard black butyl rubber inner tubes have dense molecular structures that retain air well, losing roughly 1 to 3 PSI per week under normal conditions.
- Latex Tubes: Lightweight latex rubber tubes are extremely supple and fast-rolling, but their porous structure allows air to escape rapidly, dropping 5 to 20 PSI overnight.
- Tubeless Casings: Tubeless tires rely on liquid sealant to coat and block the microscopic pores inside the woven fabric casing. Without sufficient sealant, air permeates directly through the sidewalls.
Why You May Need to Inflate Tires Every Week
Checking and topping off your tires weekly is a normal part of bicycle maintenance, not an indicator of a defect.
High-pressure, low-volume setups (such as 28mm road tires at 70 PSI) contain a relatively small volume of compressed air. When a small amount of air permeates out, the percentage drop in pressure is immediately noticeable. Conversely, high-volume mountain bike tires operating at 22 PSI store much more total air, making daily permeation less obvious on a pressure gauge.
Always check tire pressure using a reliable digital or dial pressure gauge before riding rather than relying on a hand squeeze, which cannot accurately distinguish between 40 PSI and 60 PSI.
Does Temperature Make Bike Tires Lose Air?
Temperature changes directly alter tire pressure without any air actually escaping the tire. According to Gay-Lussac’s Law, the pressure of a given mass of gas is directly proportional to its absolute temperature when volume remains constant.
Pressure Drop≈1 PSI for every 10∘F (5.6∘C) drop in ambient temperature
- Cold Weather Drop: If you pump your tires to 30 PSI inside a warm 70∘F house and take your bike outside into 30∘F winter air, your tire pressure will drop by roughly 4 PSI simply because the cold air contracts.
- Hot Weather Increase: Parking your bike in direct sunlight or inside a hot car trunk expands the trapped air, raising PSI and increasing stress on the tire casing and rim hooks.
9 Common Reasons Bike Tires Lose Air
When a tire loses pressure faster than normal permeation allows, one of nine common mechanical issues is usually responsible.
+-------------------------------------------------------------+
|              COMMON SOURCES OF TIRE AIR LEAKS               |
+-------------------------------------------------------------+
|                     [ 1. Tread Puncture ]                   |
|                        /           \                        |
|   [ 6. Casing Cut ]   /             \   [ 2. Valve Core ]   |
|         |            /               \          |           |
|   [ 4. Bead Seal ]--+  AIR CHAMBER    +--[ 3. Rim Tape ]    |
|                      \               /                      |
|                       \             /                       |
|   [ 7. Rim Dent ]-----\             /----[ 5. Dry Sealant ] |
|                        \           /                        |
|                     [ 8. Pinch Flat ]                       |
+-------------------------------------------------------------+
1. Small Punctures
Micro-punctures caused by fine wires from radial truck tires, small thorns (like goatheads), or tiny glass shards frequently create slow leaks. The puncturing object may remain embedded in the tread rubber, acting like a partial plug that lets air hiss out slowly over several hours or days.
2. Faulty Presta or Schrader Valve
Valves are mechanical check valves that can fail over time:
- Presta Valves: Common on road, gravel, and performance mountain bikes. A loose removable valve core, a bent valve stem, or dirt trapped in the rubber seal will cause a steady leak.
- Schrader Valves: Common on commuter, kids’, and older bikes. A worn internal spring or dirty core mechanism will let air escape from the stem tip.
 PRESTA VALVE MECHANISM                    SCHRADER VALVE MECHANISM
   (Narrow, Lock-Nut)                         (Wide, Internal Core)
         ||                                          |  |
        (  )  <-- Lock Nut                           |  |
        |  |                                         |==| <-- Pin
       /    \                                       /    \
      |      |                                     |      |
      |======| <-- Valve Core Rubber Seal          |======| <-- Core Seal
      |      |                                     |      |
3. Damaged Rim Tape
On both tubed and tubeless setups, protective tape covers the internal spoke holes in the rim bed.
- In tubed setups, sharp metal edges around un-plugged spoke holes can tear into the inner tube.
- In tubeless setups, damaged, lifted, or incorrectly sized rim tape allows pressurized air to enter the internal rim cavity and exit through the spoke nipples or valve hole.
4. Tubeless Bead Leaks
A tubeless tire maintains its air seal by pressing a synthetic aramid bead firmly against the internal shelf and bead lock of a tubeless-ready rim. If the bead is not fully seated, or if dried sealant debris prevents a smooth rubber-to-metal interface, air slowly burps out along the rim perimeter.
5. Low or Dried-Out Tubeless Sealant
Liquid latex sealant contains suspended micro-particles that fill microscopic casing pores and plug minor tread punctures. Over time (typically 2 to 6 months), the liquid carrier evaporates, leaving behind a dry latex film. Once sealant dries out, minor casing pores reopen and fresh thorn punctures fail to seal.
6. Damaged Tire Casing
Riding over sharp rocks or urban debris can slice the structural nylon or cotton cords inside the sidewalls. Even if the rubber surface looks intact, a cut casing allows the inner tube to bulge through or causes tubeless air pressure to leak through the weakened sidewall weave.
7. Rim or Wheel Damage
Hard impacts with potholes, rocks, or curbs can dent aluminum rim flanges or crack carbon rim beds. A bent rim flange prevents the tire bead from making uniform contact, creating a persistent bead leak that liquid sealant cannot bridge.
8. Pinched Inner Tube
A pinch flat (or “snakebite”) occurs when a tire hits a sharp object with insufficient PSI, compressing the tire completely until the inner tube is pinched violently against the metallic rim edges. This creates two parallel slit punctures in the tube wall.
               PINCH FLAT (SNAKEBITE) DYNAMICS

                   Obstacle Impact Force
                            ↓
                   [==== TIRE TREAD ====]
                  /      /        \      \
                 /   (Tube)      (Tube)   \
                +---x------+----+------x---+
                     ^              ^
                Pinch Point 1   Pinch Point 2
                (Sharp Rim Flanges Slice Tube)
9. Tire and Rim Compatibility Problems
Installing an overly wide tire on an ultra-narrow rim forces the tire casing into a bulbous “lightbulb” shape, placing excessive lateral leverage on the bead hooks. Conversely, using non-tubeless-ready tires on hookless carbon rims can lead to bead unseating, sudden pressure drops, or tire blowouts.
How Fast Should a Bike Tire Lose Air?
The expected rate of pressure loss varies significantly by setup, tube material, and volume.
Normal Pressure Loss vs. A Slow Leak
| Situation | Likely Cause | Typical Timeline | Action Required |
|---|---|---|---|
| Gradual pressure drop | Normal air permeation | Drops 1–3 PSI per week (butyl) | Top off with floor pump weekly. |
| Rapid overnight loss | Micro-puncture or valve leak | Drops 10–30+ PSI in 8–12 hours | Inspect valve, tube, or casing. |
| New tubeless loses pressure | Unseated bead or unsealed tape | Drops completely within hours | Shake sealant; re-seat bead at max PSI. |
| Pressure drops in winter | Temperature contraction | Immediate drop upon moving outdoors | Recalibrate PSI to outdoor temperatures. |
| Rear tire repeatedly goes flat | Embedded object or rim burr | Goes soft every 1–2 rides | Inspect tire tread internally; replace tape. |
How to Find a Slow Leak in a Bike Tire
Finding a subtle air leak requires a systematic, step-by-step diagnostic process.
+-------------------------------------------------------------+
|             SLOW LEAK DIAGNOSTIC FLOWCHART                  |
+-------------------------------------------------------------+
| 1. Inflate tire to target testing pressure                  |
|    |                                                        |
|    v                                                        |
| 2. Check Valve Stem (Listen for hissing / Apply soapy water)|
|    |                                                        |
|    v                                                        |
| 3. Coat Tread & Sidewalls with Soapy Water (Watch for bubbles)|
|    |                                                        |
|    +--> [Leak Found] --> Repair tread or plug tubeless      |
|    |                                                        |
|    v                                                        |
| 4. Unmount System                                           |
|    |--> TUBED: Submerge inner tube in water tub             |
|    +--> TUBELESS: Inspect rim tape & check liquid sealant   |
+-------------------------------------------------------------+
Step 1 — Inflate the Tire
Pump the tire up to its maximum safe working pressure (printed on the tire sidewall). Higher internal pressure forces air out of tiny holes faster, making small leaks easier to hear and detect.
Step 2 — Inspect the Valve
Check the valve core first. Tighten removable Presta valve cores using a dedicated core tool. Coat the tip and base of the valve stem with soapy water; expanding bubbles indicate a leaking core or a failed rubber valve-stem grommet.
Step 3 — Use Soapy Water on the Tire
Mix a few drops of dish soap with water in a spray bottle or bowl. Sponge the sudsy mixture over the tire tread, sidewalls, and along the rim bead line. Look closely for growing clusters of micro-bubbles, which pin-point exact leak locations.
Step 4 — Check the Inner Tube (Tubed Setup)
If no bubbles appear on the outside of the tire, remove the wheel, unmount one side of the tire bead, and extract the inner tube. Inflate the tube to twice its normal physical size and submerge it section-by-section in a basin of clean water. A steady stream of tiny bubbles will pinpoint micro-punctures.
Crucial Tip: Before installing a new tube, carefully wipe the inside of the tire casing with a rag or gloved finger to find and extract the sharp thorn, glass shard, or wire that caused the flat.
Step 5 — Check a Tubeless Setup
If a tubeless tire won’t hold air:
- Rotate and shake the wheel horizontally to coat the entire internal casing with liquid sealant.
- Check for white sealant bubbling through sidewall pores or tread cuts.
- If air leaks from the spoke nipples, remove the tire and re-tape the rim bed with fresh tubeless tape.
Featured Snippet: How to Find a Slow Tire Leak
- Inflate: Pump the tire to its maximum safe PSI rating.
- Check Valve: Apply soapy water to the valve stem to check for core leaks.
- Test Tread & Bead: Spray soapy water over the tread, sidewalls, and rim interface; watch for expanding suds.
- Submerge Tube: For tubed tires, submerge the inflated inner tube in a water basin.
- Check Tape & Sealant: For tubeless setups, verify liquid sealant volume and inspect internal rim tape for tears.
Why Do Tubeless Bike Tires Lose Air?
Tubeless bicycle tires offer superior traction, lower rolling resistance, and automatic puncture sealing. However, they rely on a delicate pressure balance between multiple components.
                        TUBELESS SEALING INTERFACE

                            [ TIRE CASING ]
                           /               \
                          /                 \
          Tire Bead ---> |==               ==| <--- Tire Bead
                         |  \             /  |
                         |   |-----------|   |
                         |   | RIM TAPE  |   |
                         +---|-----------|---+
                             | VALVE RIM |
                             +-----------+
How Tubeless Sealant Helps
Tubeless sealant is a liquid latex compound suspended with solid particles (such as micro-fibers, rubber particles, or glitter). When a puncture occurs, escaping air forces the sealant into the hole. The sudden pressure drop and exposure to friction cause the latex to coagulate, trapping the solid particles to form a permanent physical plug within seconds.
Why Tubeless Tires Lose Air Overnight
- Incomplete Bead Seating: If the tire bead hasn’t snapped fully onto the rim’s internal locking shelf, air will seep out around the perimeter.
- Porously Woven Sidewalls: Ultra-lightweight race tires often have thin sidewalls that require multiple liquid sealant coatings to seal completely.
- Tape Degradation: Solvents, tire levers, or mechanical stress can lift the edges of tubeless rim tape, allowing air to escape through the spoke holes.
Why Do Bike Tires Lose Air When They Sit?
When a bicycle sits unused in a garage, basement, or shed for weeks or months, its tires inevitably go flat.
                               STORAGE TIME
  100% PSI +-------------------------------------------------------+
           |                                                       |
           |\  Normal Permeation Curve                             |
           | \                                                     |
           |  \---_                                                |
   0% PSI  +------- \----------------------------------------------+
           Day 0    Week 2       Month 1      Month 3      Month 6
- Continuous Permeation: Microscopic air loss never stops. Over several months, permeation alone will bleed off all functional pressure.
- Sealant Pooling & Drying: When a tubeless wheel remains stationary, liquid sealant settles to the bottom of the tire, leaving the upper casing and bead dry and unsealed.
- Temperature Fluctuations: Seasonal changes in ambient temperature drop internal pressure, accelerating bead separation as the casing relaxes.
Should You Inflate Bike Tires Before Every Ride?
Yes. Checking and correcting your tire pressure before every ride ensures optimal performance and prevents premature flats.
- Road Bikes: Small air volume and high operating pressures make daily pressure checks mandatory.
- Gravel & MTB: Lower operating pressures mean a 3 PSI drop can significantly change cornering stability and increase the risk of rim strikes.
How Tire Pressure Affects Air Loss and Ride Quality
Operating your tires at incorrect pressures causes severe performance trade-offs:
    UNDER-INFLATION (PSI Too Low)           OVER-INFLATION (PSI Too High)
+-----------------------------------+   +-----------------------------------+
| * High risk of pinch flats        |   | * Harsh, tiring ride quality      |
| * Squirmy cornering & poor control|   | * Bounces over road chatter       |
| * Risk of denting carbon/alloy rim|   | * High casing & bead tension      |
| * Higher rolling drag on rough dirt|   | * Reduced traction on loose soil  |
+-----------------------------------+   +-----------------------------------+
What Happens When PSI Is Too Low?
When air pressure drops below safe operational limits, the tire casing loses structural integrity. The tire “squirms” or rolls laterally on the rim during hard cornering, leading to unpredictable handling. Extreme under-inflation leaves the rim exposed to hard impacts from rocks and potholes, causing pinch flats or structural rim damage.
What Happens When PSI Is Too High?
Excessive pressure makes the tire rigid and unyielding. Instead of deforming around surface chatter, rocks, and pavement cracks, an over-inflated tire bounces over obstacles. This vertical displacement wastes pedaling energy (known as impedance loss) and drastically reduces cornering grip on wet or loose surfaces.
How Rider Weight Affects Tire Pressure
System weight (rider + bicycle + gear) dictates the air pressure required to keep the tire casing properly supported. A heavier load compresses the tire contact patch more, requiring higher inflation pressure or larger tire volume to prevent rim impacts.
How to Choose the Right Bike Tire Pressure
Finding your optimal tire pressure requires balancing rider weight, tire width, terrain, and wheel specifications.
Factors That Determine Ideal PSI
- Total System Weight: Rider weight plus bike, bottles, tools, and cargo.
- Measured Tire Width: Actual inflated width (which varies based on internal rim width).
- Surface Roughness: Smooth asphalt requires higher pressure than loose gravel or rocky singletrack.
- Tubeless vs. Tubed: Tubeless setups can safely run 3–6 PSI lower than tubed setups without risking pinch flats.
Recommended Pressure Starting Ranges
| Discipline | Tire Width | Tubed Starting PSI (170 lb Rider) | Tubeless Starting PSI (170 lb Rider) |
|---|---|---|---|
| Road | 28mm | 68 Front / 72 Rear | 60 Front / 64 Rear |
| Gravel | 40mm | 34 Front / 37 Rear | 28 Front / 30 Rear |
| MTB Trail | 2.4″ (61mm) | 24 Front / 26 Rear | 19 Front / 21 Rear |
| E-Bike Commuter | 45mm | 45 Front / 48 Rear | 38 Front / 40 Rear |
How Tire Construction Affects Air Retention
A tire’s ability to hold air and resist flats is heavily influenced by its internal construction features.
                      TIRE CASING CROSS-SECTION

                   +---------------------------+
                   |       RUBBER TREAD        |
                   +---------------------------+
                   |  PUNCTURE PROTECTION BELT |
                   +---------------------------+
                   |  CASING (Woven Threads)   |
                   |  [ Low TPI / High TPI ]   |
                   +---------------------------+
                   |    RUBBER INNER LINER     |
                   +---------------------------+
Tire Casing and TPI
Tire casings are constructed from layers of woven fabric (nylon, cotton, or aramid) coated in rubber. Casing density is measured in TPI (Threads Per Inch):
- Low-TPI (30–60 TPI): Uses thick, heavy nylon threads embedded in thick rubber. These tires are heavier and stiffer, but retain air well and offer excellent sidewall cut resistance.
- High-TPI (120–320 TPI): Uses fine, tightly woven threads with thin rubber coatings. They provide a supple ride feel and low rolling resistance, but their porous construction allows air to permeate faster (especially in tubeless configurations).
Rubber Compound
Tread compounds balance grip, longevity, and rolling speed. Softer rubber compounds (such as 42a durometer rubber used on mountain bike shoulder knobs) conform easily to terrain for cornering traction, but wear down faster than hard rubber compounds (70a durometer) used on commuter tires.
Puncture Protection Belts
Manufacturers place high-density aramid weave belts (such as Kevlar or sub-tread rubber layers) beneath the tread to block sharp thorns and glass. While puncture belts add weight, they dramatically reduce flat tires and slow leaks.
Tire Tread, Rolling Resistance, and Air Pressure
Tire performance is a balance of tread design, rubber compound, casing suppleness, and inflation pressure.
Does Tire Pressure Affect Rolling Resistance?
Yes, but higher pressure does not automatically make a tire roll faster.
                       REAL-WORLD ROLLING RESISTANCE

     Total Drag (Watts)
           |
           |      / (High PSI: High Impedance / Rough Road Vibration)
           |     /
           |    /----\  <-- OPTIMAL PSI (Lowest Total Drag)
           |   /      \
           |  /        \ (Low PSI: Excessive Casing Hysteresis)
           +--------------------------------------------------
             20 PSI      50 PSI      80 PSI     110 PSI
Total rolling resistance consists of two components:
- Hysteresis (Flex Loss): Internal friction generated as the rubber casing deforms against the ground. Lower PSI increases flex loss.
- Impedance (Vibration Loss): Energy wasted when the bike and rider are bumped upward by rough terrain. Higher PSI increases impedance loss.
Setting your tires to the optimal pressure point minimizes both casing flex and rough-surface vibration, maximizing speed and efficiency.
How to Stop Bike Tires From Losing Air
For Inner-Tube Tires
- Replace worn tubes instead of repeatedly using temporary glueless patches on main-use wheels.
- Inspect internal rim tape to ensure no spoke hole edges are exposed.
- Dust new inner tubes with talcum powder before installation to prevent the tube from sticking to the inside of the tire casing.
For Tubeless Tires
- Top off liquid sealant every 2 to 4 months (more frequently in hot, dry climates).
- Replace tubeless rim tape annually or whenever changing tires.
- Clean dried latex build-up off tire beads and rim shelves using isopropyl alcohol during tire changes.
Tubeless vs. Inner Tube: Which Holds Air Better?
| Feature | Inner Tube (Butyl) | Tubeless Setup |
|---|---|---|
| Static Air Retention | High (Needs top-off every 1–2 weeks) | Moderate (Needs top-off every 2–5 days) |
| Small Puncture Protection | Low (Requires tube patch or replacement) | High (Liquid sealant seals punctures automatically) |
| Pinch Flat Risk | High at low PSI | Extremely low |
| Maintenance Level | Low (Install and ride) | Moderate (Requires sealant top-offs & fresh tape) |
| Installation Complexity | Simple (Requires basic tire levers) | Advanced (Requires high-volume pump & tape) |
How Rim Width Affects Tire Performance and Air Loss
Modern bicycle wheels feature wider internal rim widths to better support modern tire profiles.
       NARROW RIM (15mm ID)                  WIDE RIM (25mm ID)
      (Tire Lightbulb Shape)              (Tire Squared Profile)
              /   \                               /   \
             (     )                             |     |
              \   /                               \   /
              |---|                               |---|
Mounting a wide 40mm gravel tire on a narrow 15mm internal width rim squashes the tire base, creating an unstable “lightbulb” profile. This shape subjects the tire bead to excessive lateral forces during cornering, increasing the risk of air burping and bead unseating. Matched rim-and-tire combinations preserve the intended tire profile and maintain an airtight bead seal.
How to Install a Tubeless Bike Tire Correctly
Proper tubeless installation is essential for achieving an airtight seal and preventing unexpected pressure drops.
Step 1 — Check Compatibility
Verify that both the rim and tire are explicitly labeled Tubeless-Ready (TLR) or Tubeless-Compatible (TC).
Step 2 — Install Tubeless Rim Tape
Clean the internal rim bed with isopropyl alcohol. Starting two inches past the valve hole, pull high-tack tubeless tape tightly over the rim channel, ensuring complete coverage over all spoke holes without trapping air bubbles. Overlap the tape by two inches past the valve hole before cutting.
                       TUBELESS RIM TAPE OVERLAP

                        Start Tape Overlap
                             |  2"  |
                       =====[======]=====
                             |  ||  |
                             +--||--+
                             Valve Hole
Step 3 — Install the Tubeless Valve
Pierce a clean round hole through the tape at the valve port using a sharp pick. Push the tubeless valve stem through the hole and hand-tighten the outer lockring until the internal rubber grommet compresses firmly against the rim bed.
Step 4 — Mount the Tire
Push the first tire bead completely over the rim flange into the deep central channel of the rim bed. Mount the second bead, leaving a 6-inch opening at the bottom.
Step 5 — Add Sealant
Pour the manufacturer’s recommended volume of liquid sealant directly into the open tire casing:
- Road (28mm): 1.5–2 oz (45–60 ml)
- Gravel (40mm): 2–3 oz (60–90 ml)
- MTB (2.4″): 3–4 oz (90–120 ml)
Work the remaining tire bead over the rim edge using thumb pressure.
Step 6 — Seat the Bead
Use a high-volume floor pump, compressor, or tubeless booster tank to inject a rapid blast of air into the tire. Continue pumping until you hear distinct “pop” sounds, signaling that the tire beads have snapped firmly onto the rim’s bead shelves.
When Should You Replace a Bike Tire?
Riding on severely worn or aged tires increases your flat risk and compromises handling safety.
         NEW TIRE CROWN                     WORN OUT TIRE CROWN
     (Smooth, Round Profile)              (Squared Flat Center Line)
               /\                                  /------\
              /  \                                /        \
             (    )                              (          )
              \  /                                \        /
Signs of Tire Wear
- Squared-Off Tread: The center crown of the tire tread flattens out, exposing the underlying carcass weave.
- Visible Casing Threads: Rubber has worn away completely, exposing the white nylon or yellow Kevlar casing threads.
- Sidewall Dry Rot: Fine web cracking appears along the sidewalls due to age, UV exposure, or ozone degradation.
- Frequent Micro-Punctures: The sub-tread rubber has become thin, allowing tiny debris to pierce the casing easily.
How Weather and Storage Affect Bike Tire Pressure
Storage conditions and ambient temperature play significant roles in tire pressure stability.
- Cold Storage: Winter temperatures lower tire PSI. Always adjust inflation pressure at the ambient temperature where you plan to ride.
- Direct Sun Exposure: Storing bikes in sun-baked garages or on car racks raises internal pressure, accelerating rubber oxidation and sealant evaporation.
- Long-Term Storage: If storing a bike for winter, hang it from a frame rack or store it upright with inflated tires to prevent permanent casing flat-spots.
Testing Bike Tires for Air Retention and Durability
Professional tire testing laboratories measure air retention alongside rolling resistance and puncture protection:
- Static Air Retention Tests: Inflated tires are stored at constant temperature (68∘F/20∘C) for 14 days, with digital pressure transducers logging daily PSI loss.
- Puncture Force Testing: A blunt steel probe is driven into the tread at a controlled velocity, recording the exact force (in Newtons) required to pierce the puncture belt.
- Drum Hysteresis Testing: Weighted wheels roll against motorized steel drums to measure power loss (in Watts) across varying pressures.
People Also Ask: Why Do Bike Tires Keep Losing Air?
Why does my bike tire lose air but have no hole?
Gradual pressure loss without a puncture is caused by normal air permeation through rubber pores, a loose valve core, porous tubeless sidewalls, or micro-leaks around damaged rim tape.
How often should I pump my bike tires?
Check and inflate your tires weekly for commuter and gravel bikes, before every ride for road bikes, and at least once every 2 weeks for high-volume mountain bikes.
Why does my tubeless tire keep going flat?
Frequent tubeless flats are usually caused by dried-out sealant, torn or misaligned rim tape, a loose valve nut, or a damaged bead lock that prevents an airtight seal.
Can a bike tire lose air without a puncture?
Yes. Microscopic permeation, temperature drops, loose valve cores, and unseated tubeless beads all cause air loss without a puncture hole.
Why does my bike tire lose air overnight?
Rapid overnight air loss indicates a slow leak—most commonly a tiny wire puncture, a loose Presta valve core, or an unsealed tubeless rim tape edge.
Frequently Asked Questions About Bike Tire Air Loss
Do bike tires naturally lose air?
Yes. All pneumatic tires lose pressure over time as air molecules slowly permeate through rubber compounds and inner tube walls.
Is tubeless better than an inner tube for preventing flats?
Tubeless setups drastically reduce flat tires from thorns, glass, and pinch strikes because liquid sealant automatically plugs small holes while riding.
What PSI should I use based on my weight?
Pressure depends on combined rider and bike weight, tire volume, rim width, and terrain. A 170 lb rider on 28mm tubeless road tires typically starts around 60 Front / 64 Rear PSI.
How do I know if my tire is worn out?
Replace your tire when the center tread profile flattens into a square shape, sidewalls display deep cracks, casing threads show through the rubber, or punctures occur frequently.
Can the wrong rim width cause a tire to lose air?
Yes. Mounting a tire on an incompatibly narrow or wide rim distorts the bead angle, causing bead leaks or air burping during hard cornering.
Does a wider tire lose air more slowly?
Wider tires lose pressure at the same rate of permeation, but because they hold a larger total volume of air at lower starting pressures, small air drops have a less dramatic effect on handling.
Should I check tire pressure before every ride?
Yes. Checking pressure with a reliable digital gauge ensures consistent cornering traction, optimal speed, and flat prevention.
Can low tire pressure cause a flat?
Yes. Operating at excessively low PSI causes pinch flats on tubed setups and causes tire burping or rim damage on tubeless setups.
Best Ways to Prevent Bike Tire Air Loss
Maintain consistent performance and stop subtle air leaks by following this practical checklist:
- [ ] Check PSI Before Riding: Use a quality pressure gauge rather than squeezing the tire.
- [ ] Maintain Tubeless Sealant: Refresh liquid sealant every 2 to 4 months.
- [ ] Tighten Valve Cores: Ensure Presta valve cores are securely threaded into stem housings.
- [ ] Inspect Rim Tape: Replace rim tape if it shows tears, lifted edges, or valve hole wear.
- [ ] Extract Embedded Debris: Inspect tire tread weekly and pick out small glass bits or flints before they push through the casing.
Use a Bike Tire Pressure Calculator to Find the Right PSI
Relying on generic pressure charts printed on tire sidewalls often leads to over-inflation, poor traction, and uncomfortable vibration. Modern pressure modeling accounts for your exact total weight, measured tire width, rim width, casing construction, and target terrain.
What to Enter Into a Tire Pressure Calculator
- Total Weight: Combined weight of rider, bicycle, gear, and water bottles.
- Measured Tire Width: The actual width of your tire when mounted on your specific rim.
- Inner Rim Width: The internal width (in mm) between your rim flanges.
- Setup Type: Tubeless, standard butyl tube, or latex tube.
- Surface Type: Smooth pavement, coarse chip-seal, gravel, or technical singletrack.
Why the Right PSI Matters
Finding your ideal tire pressure balances low rolling resistance with maximum comfort and cornering grip, while protecting your rims from hard impacts and preventing unexpected flats.
Final Takeaways: Why Do Bike Tyres Lose Air?
- Air Permeation is Normal: All bike tires gradually lose pressure as air migrates through rubber pores and casing layers.
- Inspect Component Interfaces: Valve core leaks, damaged rim tape, dried sealant, and poor bead seating are the most common causes of slow leaks.
- Temperature Matters: Air contracts in cold weather and expands in heat, dropping or raising PSI by roughly 1 PSI per 10∘F shift.
- Match Pressure to Setup: Use a dedicated pressure calculator to determine the optimal PSI for your weight, tire volume, and riding terrain.
Ready to Optimize Your Tire Setup?
Stop guessing your PSI! Use the Free Bike Tire Pressure Calculator / Tire Finder Tool at TheBikeTires.com to determine the exact pressure settings for your bike, rider weight, and local riding conditions!

Mohidul Islam is a leading cycling technology specialist and bike tire consultant with over 15 years of hands-on experience in the bicycle industry. He holds a Bachelor of Science in Mechanical Engineering from Penn State University, where he focused heavily on material science, tread mechanics, and rubber compound performance. Over the past decade and a half, Alex has conducted extensive field testing, tubeless setup evaluations, and tire pressure modeling for road, mountain, and e-bikes. His practical insights and data-driven approach help cyclists of all levels optimize grip, speed, and durability on every ride.



