
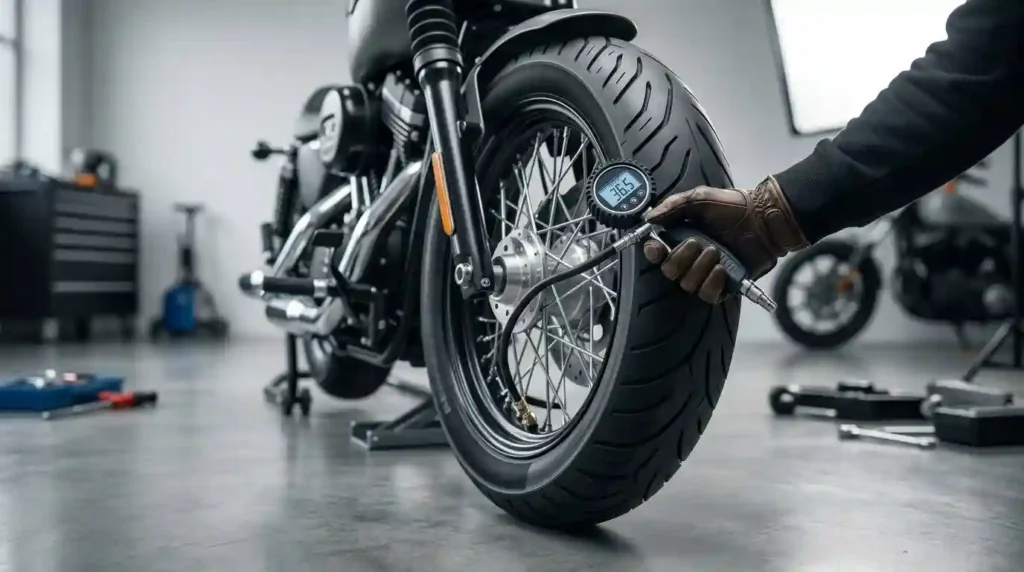
Maintaining your bike tires is the single most effective way to prevent roadside flats, improve cornering grip, and make every pedal stroke feel effortless. Yet, many riders only think about their tires when they suffer a sudden blowout or notice a visibly flat tread.
Whether you navigate glass-strewn urban streets, smooth tarmac, loose Southwestern singletrack, or Pacific Northwest mud, incorrect tire pressure and unnoticed casing damage can ruin your ride. Checking your tires regularly keeps you safe, saves you money on replacement tubes and rims, and dramatically improves your overall riding performance.
This comprehensive guide breaks down exact inspection schedules, pressure formulas, wear indicators, and maintenance routines for road, gravel, mountain, and e-bike setups.
How Often Should You Check Bike Tyres?
Most cyclists should check their tire pressure before every single ride and perform a thorough visual inspection of the tread and sidewalls at least weekly.
Tires naturally lose air over time through microscopic pores in the rubber, inner tube walls, or tubeless sealant interfaces. Riding on underinflated tires increases rolling resistance, degrades cornering traction, and drastically raises your risk of pinch flats and rim damage.
Quick Inspection Schedule Overview
- Before Every Ride: Measure tire pressure with a gauge. Check for visible punctures, embedded glass, sidewall cuts, bulges, or severe tread wear.
- Weekly: Perform a deep visual check of the tread pattern, sidewall casing, valve stem, rim seating, and tubeless sealant levels.
- Monthly: Check for slow air leaks, uneven tread wear, internal casing damage, and confirm your recommended PSI baseline.
+————————————————-+
| PRE-RIDE TIRE CHECK (30 SECONDS) |
+————————————————-+
| 1. Measure PSI with a dedicated pressure gauge |
| 2. Spin wheel to check for wobbles or bulges |
| 3. Scan tread for embedded glass, thorns, rocks|
| 4. Flex sidewalls to inspect for deep cuts |
| 5. Verify valve stem is straight and tight |
+————————————————-+
Why Checking Your Bike Tires Regularly Matters
Maintaining correct tire pressure and healthy rubber protects your equipment while optimizing speed and safety.
Rolling Resistance and Speed
Proper tire pressure reduces rolling resistance—the energy lost as your tire flexes against the road or trail. An underinflated tire deforms excessively, soaking up your leg power and slowing you down. Conversely, overinflating a tire on rough roads causes the bike to chatter and bounce, which wastes forward momentum.
Traction and Cornering Grip
Tires rely on an optimal contact patch to grip the surface. Correct PSI allows the rubber compound and tread knobs to conform to terrain during leaning, braking, and accelerating. Neglecting tire condition leads to reduced cornering grip and unpredictable handling in wet or loose conditions.
Puncture Protection and Tire Life
Regular checks allow you to pick out sharp debris like glass, wire, or small rocks before they work their way deeper into the carcass. Catching small cuts early prevents sudden flats, extends tire life, and protects your wheel rims from harsh impacts.
How Tire Pressure Affects Cycling Performance
Finding the sweet spot for PSI (pounds per square inch) transforms how your bike handles across different terrains.
TIRE PRESSURE BALANCE
UNDERINFLATED OVERINFLATED
+—————–+ +—————–+
| High resistance | | Harsh ride feel |
| Pinch flats | OPTIMAL | Poor wet grip |
| Rim impacts |<—PSI—>| Lower traction |
| Tire squirm | | High chatter |
+—————–+ +—————–+
Underinflation Risks
- Pinch Flats: Hitting a pothole or rock compresses an inner tube against the rim flange, causing two distinct parallel punctures (a “snakebite”).
- Tire Squirm: Low pressure allows the tire casing to fold or squirm under heavy cornering, making steering feel vague and unstable.
- Rim Damage: Impacting severe trail obstacles without enough air cushion can dent, crack, or destroy carbon and alloy rims.
Overinflation Drawbacks
- Reduced Comfort and Traction: Excessively high PSI prevents the tire from absorbing micro-impacts, resulting in a harsh ride quality and slippage on rough terrain.
- Higher Vibration Losses: Overinflated tires bounce off road imperfections rather than rolling over them smoothly, wasting mechanical energy.
What Should You Check on a Bike Tire?
A complete tire check covers five critical zones across your wheel system.
TIRE INSPECTION ZONES
/————-\
/ 1. TREAD \
| & KNOBS |
| |
2. SIDEWALL | 3. CASING | 2. SIDEWALL
& CUTS | & TPI | & CUTS
| |
\ 4. BEAD & /
\ 5. VALVE /
\———–/
1. Check Tire Pressure
Never rely solely on a thumb squeeze test. Always use an accurate analog or digital tire pressure gauge. Compare your reading against your calculated baseline rather than blindly pumping to the maximum PSI printed on the tire sidewall.
2. Check the Tread Pattern
Inspect the center tread line for flat spots, squared-off profiles, or excessive rubber loss. On gravel and mountain bike tires, inspect whether side knobs are tearing, cracking, or wearing down, which drastically reduces cornering traction.
3. Check the Sidewalls and Casing
Examine the tire sidewall for abrasion, exposed threads, cracking, or bulges. High casing TPI (threads per inch) tires feature thinner individual threads for flexibility and speed, making their sidewalls more vulnerable to sharp rock slashes.
4. Check the Valve and Tire Bead
Ensure the valve stem (Presta or Schrader) is straight, tightened securely against the rim bed, and free of corrosion. Confirm that the tire bead is seated evenly along the entire rim circumference with no visible gaps or uneven lines.
5. Check for Embedded Debris
Slowly rotate each wheel under bright light. Look for hidden bits of glass, wire, metal shavings, or thorns embedded in the tread block, and carefully remove them using small tweezers.
How Often Should You Check Tubeless Bike Tires?
Tubeless tire systems use liquid sealant instead of inner tubes to instantly seal small punctures. However, tubeless setups naturally lose air slightly faster than traditional tubed tires through microscopic pores in the tire casing and bead interface.
Tubeless Maintenance Routine
- Air Pressure: Check before every single ride. Tubeless setups lose roughly 1–3 PSI per day depending on casing thickness and rim tape seal.
- Sealant Levels: Check sealant every 2 to 4 months. Hot, dry climates (such as the US Southwest) evaporate sealant faster than cool, humid areas (such as the Pacific Northwest).
- Valve Core Inspection: Remove and inspect the valve core monthly. Liquid sealant often hardens inside Presta valve cores, restricting air flow during inflation.
+————————————————-+
| TUBELESS SEALANT MAINTENANCE |
+————————————————-+
| Climate Condition | Check/Top-Up Frequency|
+————————–+———————-+
| Hot & Dry (Arid/Summer) | Every 1.5 – 2 Months |
| Moderate / Mixed | Every 3 – 4 Months |
| Cool & Wet | Every 4 – 6 Months |
+————————————————-+
Signs of a Tubeless Leak
- Rapid PSI Loss: Losing more than 5 PSI overnight indicates a weak bead seat, deteriorating rim tape, or a dried-out sealant supply.
- Wet Residue on Sidewalls: Visible liquid or bubbling wet spots along the sidewall casing or rim edge signal small weeping punctures that require fresh sealant.
Signs Your Bike Tire Needs Replacing
Knowing when a tire has reached the end of its functional life keeps you safe on fast descents and technical corners.
TIRE REPLACEMENT INDICATORS
[Square Tread] [Exposed Threads] [Sidewall Bulge]
(____) (/////) (__/ \__)
Excessive Wear Casing Damage Internal Failure
Replace Immediately Replace Immediately Replace Immediately
Critical Replacement Triggers
- Exposed Casing or Threads: If you see cross-hatched fabric or nylon threads showing through worn center tread or slash marks, replace the tire immediately.
- Flat-Spotted Tread Profile: A tire whose rounded crown has worn down into a completely flat center line hampers handling and turns sluggishly.
- Sidewall Bulges or Deformities: A bulge indicates broken internal casing threads. The tire is structurally unsafe and can burst under normal inflation pressure.
- Frequent Repeat Punctures: As protective rubber thins out, small road debris punctures the casing much more easily, signaling that the puncture belt is spent.
- Dry Rot and Deep Rubber Cracking: Age and UV exposure degrade rubber compounds over time, causing structural cracking along the tread shoulders and sidewalls.
How Long Do Bike Tires Usually Last?
Tire lifespan depends on rubber durometer (rubber hardness), system weight, road surfaces, and riding aggressive styles.
| Bike & Tire Category | Average Rear Tire Life | Average Front Tire Life | Primary Wear Factors |
| Road Bikes | 1,500 – 3,000 miles | 2,500 – 4,000 miles | High PSI, road debris, rear weight bias |
| Gravel Bikes | 1,200 – 2,500 miles | 2,000 – 3,500 miles | Coarse gravel, sharp rock impacts, braking skid |
| Mountain Bikes (MTB) | 600 – 1,500 miles | 1,000 – 2,000 miles | Soft rubber durometer, aggressive trail braking |
| Commuter / Urban | 2,000 – 4,500 miles | 3,000 – 5,000 miles | Potholes, glass, daily pavement wear |
| Electric Bikes (E-Bikes) | 800 – 1,800 miles | 1,200 – 2,500 miles | Heavy motor torque, high bike weight, acceleration |
How Often Should You Check Bike Tires on an E-Bike?
Electric bicycles require more frequent tire monitoring than traditional bicycles. E-bikes weigh significantly more due to onboard batteries and drive motors, while motor assistance generates intense instant torque at the rear wheel.
Key E-Bike Tire Considerations
- Daily PSI Checks: Higher total system weight makes e-bike tires far more susceptible to pinch flats and rim strikes at lower pressures.
- Rear Tire Acceleration Wear: High torque accelerates rear tire tread loss up to 50% faster than standard pedal-only bikes.
- E-50 Certification: Ensure replacement tires carry proper speed ratings (such as ECE-R75 / E-50 approval) built with reinforced casing plies to safely manage high loads and 28 mph assistance speeds.
Maintenance Schedules by Cycling Discipline
Different cycling disciplines impose distinct demands on tire casings and tread rubber.
DISCIPLINE INSPECTION PROFILE
ROAD BIKES MTB / TRAIL GRAVEL BIKES COMMUTER
+————–+ +————–+ +————–+ +————–+
| High PSI | | Low PSI | | Variable | | High Debris |
| Fast Wear | | Sidewall Cuts| | Sharp Rocks | | Glass/Wire |
| Check Daily | | Check Daily | | Check Daily | | Check Daily |
+————–+ +————–+ +————–+ +————–+
Daily Commuters
- Focus: Debris inspection and glass removal.
- Tip: Clean glass shards out of your tread daily using a small pick before they penetrate the internal puncture belt. Keep a pump and spare tube handy for unexpected commuters’ flats.
Mountain Bikers (MTB)
- Focus: Sidewall slashes and bead integrity.
- Tip: Inspect tire sidewalls thoroughly after riding through jagged Southwestern rock gardens or sharp granite fields. Mountain bike tires operate at low pressures where rim strikes can crack rim walls or cut casing plies.
Road Cyclists
- Focus: Pressure optimization and casing cuts.
- Tip: Road tires feature thin, high-speed tread compounds. Inspect the centerline closely after wet rides; rain washes sharp sand and metal wire out onto road shoulders.
Gravel Riders
- Focus: Shoulder knob condition and tubeless sealant levels.
- Tip: Gravel riding subjects tread shoulders to extreme abrasive wear. Check for weeping sealant along the rim bead after navigating coarse flint, shale, or crushed limestone paths.
What Is the Best Tire Pressure for Your Bike?
Finding your ideal tire pressure involves balancing rider weight, bike weight, tire width, inner rim width, and terrain type.
Calculating Recommended Tire Pressure (PSI)
A baseline calculation factors total system weight (Rider Weight + Bike Weight) against tire width:
BasePSI=TotalWeight(lbs)428TireWidth(mm)
Adjustments:
- Rear Tire Bias: Add 5% to 10% more pressure to the rear tire ( rear wheel carries ~60% of total system weight).
- Tubeless Setup: Subtract 3 to 5 PSI compared to a tubed setup.
- Wet / Loose Surfaces: Subtract 3 to 5 PSI to expand the contact patch and improve traction.
+————————————————-+
| SAMPLE TIRE PRESSURE MATRIX (TUBED / DRY) |
+————————————————-+
| Rider Weight | 28mm Road | 40mm Gravel | 2.4″ MTB |
+————–+————+————-+———-+
| 140 lbs | 65-70 PSI | 32-35 PSI | 20-22 PSI|
| 170 lbs | 75-80 PSI | 38-41 PSI | 23-25 PSI|
| 200 lbs | 85-90 PSI | 44-47 PSI | 26-28 PSI|
+————————————————-+
Does Rim Width Affect Tire Pressure?
Internal rim width directly alters a tire’s mounted shape, casing volume, and structural stability.
INTERNAL RIM WIDTH COMPATIBILITY
NARROW RIM (17mm) MODERN RIM (21mm) WIDE RIM (25mm)
Tire Bulges Ideal Tire Profile Tire flattens out
“Lightbulb Shape” Optimal Support Risk of Rim Strike
\_______/ \_______/ \_______/
| | | | | |
[_________] [_________] [_________]
Impact of Internal Rim Width
- Narrow Rims (Under 19mm): Cause wide tires to bulge into a “lightbulb” profile, requiring higher PSI to prevent the casing from squirming under cornering loads.
- Wide Rims (21mm to 25mm+): Provide structural sidewall support, allowing you to safely run lower pressures for increased traction and vibration absorption without risking rim strikes.
- Hookless vs. Hooked Rims: Modern hookless carbon rims feature straight sidewalls without traditional bead hooks. They carry strict maximum pressure limits (typically 73 PSI / 5.0 bar) to prevent the tire bead from blowing off the rim. Always verify compatibility before mounting tires.
How Tire Construction Changes Inspection Needs
Understanding how your tire is manufactured helps you spot early signs of damage and material degradation.
TIRE CROSS-SECTION ARCHITECTURE
+—————————–+
| Outer Tread Rubber |
+—————————–+
| Puncture Belt / Breaker |
+—————————–+
| Casing Ply 1 (High/Low TPI) |
+—————————–+
| Casing Ply 2 (High/Low TPI) |
+—————————–+
| Kevlar / Steel Wire Bead |
+—————————–+
Key Technical Terms
- Casing TPI (Threads Per Inch): High TPI casings (120–320 TPI) use finer nylon or cotton threads, creating a supple, ultra-fast tire that conforms easily to terrain but demands frequent sidewall checks. Low TPI casings (30–60 TPI) use thicker threads that resist cuts and abrasions better but offer a stiffer ride.
- Dual/Triple Rubber Durometer: Manufacturers mix firm rubber along the center tread for lower rolling resistance with soft, low-durometer rubber on the side shoulders for cornering traction. Inspect the transitions between compounds for separation over time.
- Puncture Belts: Sub-tread layers made of woven aramid, Kevlar, or nylon fibers protect against glass and thorns. Once tread rubber wears down to expose this protective belt, tire replacement is required.
Simple 10-Step Tire Inspection Checklist
Follow this quick step-by-step procedure to keep your setup running smoothly:
- Attach Pressure Gauge: Measure PSI before riding; adjust to match current terrain conditions.
- Inspect Valve Stem: Ensure Presta or Schrader valve lock-nuts are snug and valve cores are clear of dried tubeless sealant.
- Spin the Wheel: Rotate the wheel slowly while looking down the centerline to detect wobble, tire hopping, or uneven bead seating.
- Scan Center Tread: Look for sharp glass shards, small wire strands, embedded thorns, or large tread cuts.
- Examine Tread Wear: Check depth indicators or verify that the tire crown hasn’t squared off.
- Flex Sidewalls: Gently squeeze sidewalls to expose hidden micro-cracks, UV dry rot, or slash lines.
- Check Casing Fabrics: Confirm no white threads or woven casing cords are visible through the rubber.
- Inspect Rim Flanges: Check the interface between the tire bead and wheel rim for burrs, dented rim lips, or leaking tubeless fluid.
- Check Tubeless Fluid: Shake the wheel off the bike—listen for a wet sloshing sound to confirm liquid sealant is present inside.
- Perform Field Flex Test: Squeeze the tire firmly to confirm proper inflation before rolling out on your ride.
Step-by-Step Guide: How to Inspect and Inflate Bike Tires
TIRE INSPECTION FLOW
[Measure PSI] —> [Scan Tread Debris] —> [Flex Sidewalls]
| |
v v
[Adjust Inflation] <— [Verify Bead Line] <— [Check Rim Seat]
Step 1 — Measure and Adjust Pressure
Remove valve caps. For Presta valves, unscrew the brass top nut completely and tap it once to free the internal valve mechanism. Press your tire gauge firmly onto the valve stem to read pressure cleanly. Add or release air in small increments until you reach your target PSI.
Step 2 — Inspect the Tread Surface
Elevate the wheel and spin it slowly under bright light. Use a small pick or tweezers to clear out debris embedded in tread voids. If a cut extends deep into the internal casing ply, replace the tire before riding fast downhills or rough terrain.
Step 3 — Inspect Sidewalls and Casing
Look closely along both sides of the tire casing for cuts or fraying. If you notice a visible bulge while the tire is fully inflated to normal pressure, deflate it immediately—a casing thread has snapped and the tire is at risk of blowing off the rim.
Step 4 — Check the Rim Line Interface
Inspect the thin molded rubber witness line running parallel to the rim lip. This line must sit at an even distance above the rim edge all the way around the wheel. An uneven line indicates an unseated tire bead, which can cause severe wheel wobble.
Step 5 — Test Ride & Re-Check
Roll the bike forward, apply front and rear brakes firmly, and lean the bike slightly side to side. Listen for rubbing noises or creaking sounds. Recheck PSI after your initial test roll if you suspect a slow leak.
Common Bike Tire Problems You Can Catch Early
Diagnosing simple issues early prevents roadside breakdowns:
Slow Air Leaks
- Cause: Micro-punctures, loose Presta valve cores, failing rim tape, or dried tubeless sealant.
- Fix: Submerge an inflated inner tube in a water basin to spot bubbles. For tubeless setups, tighten the valve core and inject 1–2 ounces of fresh liquid sealant.
Uneven Tread Wear
- Cause: Improper wheel dishing, incorrect tire alignment, uneven brake pad rub, or skidding.
- Fix: Ensure your wheel axle sits straight in frame dropouts, align rim brake pads clear of the tire rubber, and replace worn tires early to maintain linear handling.
Frequent Repeat Flat Tires
- Cause: A sharp piece of wire or thorn remains embedded inside the tire casing, or damaged rim tape exposes sharp spoke holes inside the rim bed.
- Fix: Carefully run a soft cloth around the inner lining of the tire casing to locate hidden debris before installing a new inner tube. Replace worn rim tape if spoke holes are exposed.
Summary Checklist: Recommended Inspection Schedule
| Inspection Task | Recommended Frequency | Target Checklist Zone |
| Tire Pressure (PSI) | Before Every Ride | Presta/Schrader Valve & Gauge |
| Surface Debris Check | Before Every Ride | Center Tread & Knobs |
| Sidewall & Casing Inspection | Weekly | Sidewalls & TPI Threads |
| Bead Seating & Rim Line | Weekly | Rim Flange Interface |
| Tubeless Sealant Check | Monthly / Bi-Monthly | Internal Tire Chamber / Valve Core |
| Full Structural Assessment | Monthly / Post-Impact | Total System Wear & Deformities |
Frequently Asked Questions
Should bike tires be checked before every ride?
Yes. Checking pressure before every ride prevents pinch flats, improves rolling efficiency, and ensures maximum cornering grip.
How often should I put air in my bike tires?
Most bike tires lose 1 to 3 PSI per day through natural diffusion. High-pressure road tires and lightweight tubeless setups usually require topping off before every ride.
How do I know if my bike tires are worn out?
Replace tires when you see exposed casing threads, flat spots on center tread, sidewall bulges, severe dry rot cracks, or when you experience frequent repeat flat tires.
Is higher PSI always better for bike tires?
No. Overinflating tires reduces traction, increases vibration, and causes a harsh ride on rough roads or loose trails.
Can I ride a bike tire with small sidewall cracks?
Minor cosmetic surface weathering is common, but deep cracks that expose internal casing threads are dangerous and require tire replacement.
Why do e-bike tires wear down faster than regular bike tires?
E-bikes weigh significantly more and produce strong instant electric motor torque at the rear wheel, accelerating tread wear under heavy acceleration.
Calculate Your Exact Tire Pressure
Stop guessing your tire pressure before heading out on the road or trail. Using the right PSI improves speed, cornering traction, puncture resistance, and ride comfort.
Use the Free Bike Tire Pressure Calculator / Tire Finder Tool at TheBikeTires.com to calculate customized PSI recommendations based on your weight, bike type, rim width, and riding terrain.

Mohidul Islam is a leading cycling technology specialist and bike tire consultant with over 15 years of hands-on experience in the bicycle industry. He holds a Bachelor of Science in Mechanical Engineering from Penn State University, where he focused heavily on material science, tread mechanics, and rubber compound performance. Over the past decade and a half, Alex has conducted extensive field testing, tubeless setup evaluations, and tire pressure modeling for road, mountain, and e-bikes. His practical insights and data-driven approach help cyclists of all levels optimize grip, speed, and durability on every ride.



