
Accurate bicycle tire measurement is essential when buying replacements, upgrading wheelsets, or adjusting tire clearance.
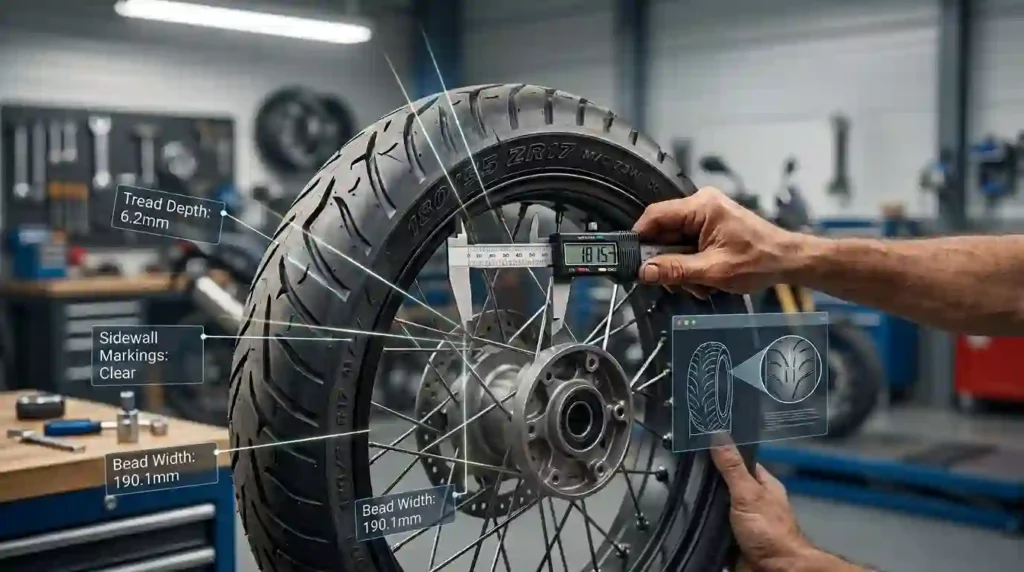
Taking precise measurements involves three key parameters: overall outer diameter, inflated casing width, and the exact bead-seat diameter (BSD). While printed sidewall stamps provide quick guidance, physical measurements using calipers or tape measures remain the gold standard when factory labels are rubbed off or missing.
BIKE TIRE MEASUREMENT PARAMETERS
┌──────────────────────────────────────────────────────────────────┐
│
│ ◄──────────────── Outer Diameter ────────────────► │
┌──────────────────────────────────────────────────────┐ │
│ │ │ │
▲ │ ┌────────────────────┐ │ │
│ │ │ │ │ │ │
Width│ │ Bead-Seat Diameter│ │ │
│ │ │ (BSD) │ │ │
▼ │ └────────────────────┘ │ │
│ └──────────────────────────────────────────────────────┘ │
└──────────────────────────────────────────────────────────────────┘
However, relying solely on outer diameter labels can be misleading when checking fitment. Consequently, standardized ETRTO/ISO specifications offer the most reliable reference for tire-to-rim compatibility.
Featured Snippet Target: How to Measure a Bike Tire
To measure a bike tire, inflate it to riding pressure and measure across the widest point of the casing for width. Next, measure straight from one outer edge through the wheel center to the opposite edge for total diameter. For guaranteed fitment, always verify the tire’s ETRTO bead-seat diameter (e.g., 622 mm) and internal rim width.
What You Need to Measure a Bike Tire
Having the right tools ensures accurate dimensional data before purchasing new tires:
- Vernier or Digital Calipers: This is the best tool for measuring physical casing width without squeezing the tread.
- Flexible Measuring Tape / Ruler: Use this simple tool for outer diameter and total circumference checks.
- Tire Pressure Gauge: This gauge verifies consistent inflation pressure before taking width measurements.
┌──────────────────────────────────────────────────────────────────┐
│ TIRE MEASUREMENT TOOLKIT │
├─────────────────────┬────────────────────────────────────────────┤
│ Tool │ Primary Application │
├─────────────────────┼────────────────────────────────────────────┤
│ Digital Calipers │ Mounted Casing Width & Internal Rim Width │
│ Flexible Tape │ Outer Diameter & Rolling Circumference │
Pressure Gauge │ Standardizing Baseline PSI │
└─────────────────────┴────────────────────────────────────────────┘
Furthermore, always measure tires fully inflated to everyday riding pressure. This approach helps you account for casing stretch under real-world load.
How to Measure Bike Tire Width
Step-by-Step Tire Width Measurement
MEASURING TIRE CASING WIDTH
┌──────────────────────────────────────────────────────────────────┐
│ STEP 1: Inflate tire to target riding PSI │
│ │
STEP 2: Position bike upright on a flat surface │
│ │
STEP 3: Align caliper jaws across the widest point of tread/casing│
│ │
STEP 4: Record actual width in millimeters (mm) │
└──────────────────────────────────────────────────────────────────┘
- Inflate the Tire: First, fill the tire to your standard riding pressure (e.g., 28 PSI for trail or 75 PSI for road).
- Position Calipers: Next, place digital caliper jaws across the widest point of the tire, including side knobs if present.
- Record in Millimeters: Finally, write down the measured value in millimeters (and inches for MTB setups).
Why Tire Width Measurements Can Differ
Printed sidewall labels indicate nominal size, but mounted width often varies. For instance, consider these key factors:
- Internal Rim Width: Mounting a tire on a wider rim automatically increases its measured width.
- Casing TPI: High-TPI flexible casings expand slightly more under pressure than rigid casings.
- Tubeless Bead Seating: Modern tubeless setups often sit wider once fully locked onto the rim hooks.
Featured Snippet Target: How to Measure Bike Tire Width
To measure bike tire width, inflate the tire to normal operating pressure first. Then, measure straight across its widest point—including side knobs—from sidewall to sidewall using calipers. Finally, record the exact result in millimeters.
How to Measure Bike Tire Diameter
Measuring total outer diameter helps verify frame clearances, but it does not guarantee rim compatibility.
MEASURING TOTAL OUTER DIAMETER
┌──────────────────────────────────────────────────────────────────┐
│
┌─────────────────── Wheel Center ───────────────────┐ │
▼ ▼ │
[Ground Contact] ◄─────── Measured Radius ────────► [Axle Center]
│ │ │
│ └────────── Total Diameter = Radius x 2 ─────────────┘ │
└──────────────────────────────────────────────────────────────────┘
Measuring Diameter With the Wheel on the Bike
First, position the bike vertically on level ground. Next, measure from the ground straight up through the wheel axle center to the top edge of the tire tread. Alternatively, measure from the axle center to the outer tread edge (radius) and multiply that number by two.
Measuring Diameter With the Wheel Removed
Start by laying the wheel flat or holding it upright on a bench. After that, place a measuring tape straight across the center hub from tread edge to tread edge. Finally, take a second measurement at 90 degrees to cross-check overall accuracy.
Bead-Seat Diameter: The Most Important Measurement
The Bead-Seat Diameter (BSD) defines the exact fitment boundary where the tire bead seats onto the rim.
┌──────────────────────────────────────────────────────────────────┐
│ COMMON BEAD-SEAT DIAMETERS │
├──────────────────────┬────────────────────┬──────────────────────┤
│ Common Marketing Label│ ETRTO BSD Metric │ Typical Bike Type │
├──────────────────────┼────────────────────┼──────────────────────┤
│ 700c / 29-inch │ 622 mm │ Road, Gravel, 29er │
│ 650b / 27.5-inch │ 584 mm │ Gravel, Modern MTB │
26-inch │ 559 mm │ Vintage MTB, Cruiser │
└──────────────────────┴────────────────────┴──────────────────────┘
Why BSD Matters
If a tire’s bead-seat diameter does not match the rim’s BSD exactly, the tire cannot be safely installed. Therefore, a 584 mm tire will never fit a 622 mm rim, regardless of marketing names like “27.5-inch” or “700c”.
How to Measure Bike Tire Size Without Removing the Tire
Before taking physical measurements, inspect the tire sidewall for existing markings:
SIDEWALL MARKING FORMATS
┌──────────────────────────────────────────────────────────────────┐
│ French Metric Format: 700 x 28C (Nominal Dia x Width) │
│ Imperial MTB Format: 29 x 2.25 (Nominal Dia x Width in inches)│
ETRTO Metric Standard: 28-622 (Width mm – BSD mm) │
└──────────────────────────────────────────────────────────────────┘
However, if these codes are unreadable, take manual physical measurements with calipers and a tape measure.
How to Read ETRTO Bike Tire Measurements
The ETRTO (ISO 5775) system eliminates sizing confusion by specifying two clear values:
ETRTO CODE FORMAT: 37-622
37 – 622
│ │
│ └─ Bead-Seat Diameter (mm)
└─────────── Mounted Casing Width (mm)
Featured Snippet Target: What does an ETRTO measurement mean?
An ETRTO tire rating such as 37-622 indicates that the tire has an inflated casing width of approximately 37 mm. Additionally, it shows that the tire fits a wheel rim with a 622 mm bead-seat diameter.
How to Measure a Bike Rim
Measure Rim Internal Width
Remove the tire and measure the internal distance between the inside faces of the rim hooks.
INTERNAL RIM WIDTH MEASUREMENT
◄─── Internal Rim Width ───►
┌───┐ ┌───┐
│ │ │ │
│ └───────────────────────┘ │
RIM CHANNEL │
└───────────────────────────────┘
PAA Target Answer: How do I measure my bike rim for a new tire?
Remove the tire and use digital calipers to measure the internal distance between the inside rim hooks in millimeters. As a result, you can cross-reference this internal width against compatibility charts to select a suitable tire width.
How Rim Width Changes Tire Measurements
A tire’s shape and actual width change significantly when mounted on different rim profiles:
┌──────────────────────────────────────────────────────────────────┐
│ RIM WIDTH COMPATIBILITY TABLE │
├────────────────────────┬─────────────────────────────────────────┤
│ Internal Rim Width │ Approved Tire Width Range │
├────────────────────────┼─────────────────────────────────────────┤
│ 17 mm – 19 mm │ 23 mm – 32 mm │
21 mm – 23 mm │ 28 mm – 45 mm │
25 mm – 27 mm │ 42 mm – 2.25 in (57 mm) │
│ 29 mm – 31 mm │ 2.25 in (57 mm) – 2.6 in (66 mm) │
└────────────────────────┴─────────────────────────────────────────┘
For instance, mounting a tire on a wider rim flattens its tread profile and increases its measured casing width.
How Tire Pressure Affects Measurements
Tire width expands slightly as inflation pressure increases. Therefore, standardize your pressure before taking measurements to maintain consistency.
PSI BASELINE BY SYSTEM WEIGHT
┌──────────────────────┬─────────────┬─────────────┬───────────────┐
│ Total System Weight │ Road (28mm) │ Gravel(40mm)│ MTB (2.4″) │
├──────────────────────┼─────────────┼─────────────┼───────────────┤
150 lbs (68 kg) │ 62 PSI │ 33 PSI │ 20 PSI │
│ 180 lbs (82 kg) │ 72 PSI │ 38 PSI │ 23 PSI │
│ 210 lbs (95 kg) │ 82 PSI │ 43 PSI │ 26 PSI │
└──────────────────────┴─────────────┴─────────────┴───────────────┘
PAA Target Answer: Does tire pressure affect tire size?
Yes, it does. Higher inflation pressure expands the tire casing, which increases its physical width and overall diameter slightly. Consequently, you should always measure tires at your target riding PSI.
How to Measure Tire Circumference
Calculating precise rolling circumference is required for calibrating cycle computers and GPS units:
ROLL-OUT MEASUREMENT METHOD
┌──────────────────────────────────────────────────────────────────┐
│ 1. Align valve stem with a line marked on the floor │
│ 2. Roll bike forward in a straight line for one full rotation │
│ 3. Mark the ground where the valve stem reaches the bottom again │
│ 4. Measure the distance between marks in millimeters │
└──────────────────────────────────────────────────────────────────┘
Tire Size vs. Actual Measured Size
Printed sizes are nominal figures. For example, a tire labeled 700 x 28C may measure 29.2 mm wide on a modern 21 mm internal rim. Thus, you must account for rim dimensions when evaluating casing clearance.
How Tire Measurements Affect Rolling Resistance
┌──────────────────────────────────────────────────────────────────┐
│ PERFORMANCE TRADE-OFF MATRIX │
├─────────────────┬──────────────────────┬─────────────────────────┤
│ Metric │ Narrower Tire │ Wider Tire │
├─────────────────┼──────────────────────┼─────────────────────────┤
│ Contact Patch │ Long and narrow │ Short and wide │
Comfort │ Lower shock absorption│ Higher shock absorption │
│ Rough Surface │ Higher rolling drag │ Lower rolling drag │
└─────────────────┴──────────────────────┴─────────────────────────┘
In fact, wider tires run at lower pressures flex more easily over road imperfections. This reduces overall rolling drag on real-world surfaces.
How Tire Measurements Affect Tread and Cornering Grip
Tread design should be selected based on surface conditions:
- Slick Treads: These offer a smooth profile for maximum asphalt grip.
- Semi-Slick Treads: These combine a fast center ridge with raised cornering knobs.
- Knobby Treads: These feature deep lugs for traction in loose dirt and heavy mud.
Tire Measurement, Casing TPI, and Puncture Protection
- Low TPI (27–60 TPI): Thicker nylon threads offer durability and higher puncture resistance.
- High TPI (120–320 TPI): Finer threads produce a flexible, fast-rolling casing.
Additionally, sub-tread puncture belts provide extra resistance against flats from road debris.
Measuring Tires for Tubeless Setup
TUBELESS INSTALLATION CHECKLIST
┌──────────────────────────────────────────────────────────────────┐
│ [ ] Verify rim and tire both carry tubeless compatibility ratings│
│ [ ] Apply airtight tubeless rim tape across spoke holes │
[ ] Install tubeless valve stem and seat tire beads │
[ ] Add recommended tubeless sealant (2–4 oz) │
[ ] Inflate to seat bead, then record final mounted width │
└──────────────────────────────────────────────────────────────────┘
PAA Target Answer: How do I know if my tire and rim are tubeless compatible?
First, check both components for explicit tubeless labels like TLR, TC, or Tubeless Compatible. As a safety precaution, standard tube-type tires should never be run tubeless.
How to Measure Tires for Different Types of Bikes
- Road Bikes: Common sizes typically range from 25 mm to 32 mm.
- Gravel Bikes: Typical width ranges usually span from 38 mm to 45 mm.
- Mountain Bikes: Off-road widths normally range from 2.3″ to 2.6″.
- E-Bikes: These require heavy-duty, ECE-R75 certified casings to handle higher motor torque.
How to Measure Bike Tire Clearance
FRAME CLEARANCE MEASUREMENT
┌─────────────────────────┐
│ FORK CROWN │
└───────────┬─────────────┘
│ ◄── Min 6mm Gap
┌──────────┴──────────┐
│ TIRE TREAD │
└─────────────────────┘
PAA Target Answer: How much clearance should a bike tire have?
Maintain a minimum gap of 6 mm between the tire and any part of the frame, fork, or brakes. This extra space easily allows room for mud buildup and wheel flex.
How to Measure a Bike Tire Step by Step
- Locate Sidewall Markings: Note all printed sizing numbers first.
- Inflate Tire: Fill the casing to your target operating pressure.
- Measure Casing Width: Use calipers across the widest point of the tread.
- Measure Diameter: Take an end-to-end measurement through the hub center.
- Confirm BSD: Verify the official ETRTO rim diameter (e.g., 622 mm).
- Check Rim Channel: Measure internal rim width with calipers.
- Check Frame Clearances: Finally, ensure at least 6 mm of space around stays.
Common Bike Tire Measurement Mistakes
- Measuring an underinflated tire before reaching full pressure.
- Confusing external rim width with internal rim width.
- Relying solely on nominal outer labels (e.g., “29-inch”) rather than exact ETRTO codes.
- Forgetting that mounting a tire on a wider rim increases its installed width.
How to Choose a Replacement Tire After Measuring
- Always match the ETRTO Bead-Seat Diameter exactly.
- Furthermore, confirm that the width fits within your internal rim channel recommendations and frame tolerances.
- Finally, select the tread, casing TPI, and puncture protection best suited to your local riding conditions.
Data-Backed Tire Measurement and Testing
Professional tire testing relies on actual caliper-measured widths at calibrated inflation pressures. As a result, testers can evaluate rolling efficiency and casing compliance accurately.
Frequently Asked Questions About Measuring Bike Tires
How do I measure my bike tire size?
Inflate the tire first, then measure its width with calipers and its outer diameter with a tape measure. After that, check the ETRTO code for precise fitment.
How do I measure bike tire width?
Inflate the tire to standard PSI and measure straight across the widest part of the casing using digital calipers.
How do I measure my bike rim width?
Remove the tire and measure the internal distance between the inside rim hooks in millimeters.
Does tire pressure change the measured tire width?
Yes, it does. Higher pressure expands the casing slightly, which increases the measured width.
Can I put a wider tire on my bike?
Yes, provided your internal rim width supports it and you maintain at least 6 mm of clearance around frame stays.
Are 700C and 29-inch tires interchangeable?
Both share a 622 mm bead-seat diameter. However, 29-inch tires are wider and require wider rims and larger frame clearance.
Final Takeaways: How to Measure a Bike Tire
- Use calipers to measure physical casing width at full operating pressure.
- Always match the ETRTO bead-seat diameter to guarantee perfect rim fitment.
- Measure internal rim width and verify at least 6 mm of frame clearance before changing tire sizes.
Ready to select your next tire or verify ideal operating pressures? Head over to TheBikeTires.com and use our free Bike Tire Pressure Calculator & Tire Finder Tool today!

Mohidul Islam is a leading cycling technology specialist and bike tire consultant with over 15 years of hands-on experience in the bicycle industry. He holds a Bachelor of Science in Mechanical Engineering from Penn State University, where he focused heavily on material science, tread mechanics, and rubber compound performance. Over the past decade and a half, Alex has conducted extensive field testing, tubeless setup evaluations, and tire pressure modeling for road, mountain, and e-bikes. His practical insights and data-driven approach help cyclists of all levels optimize grip, speed, and durability on every ride.



