
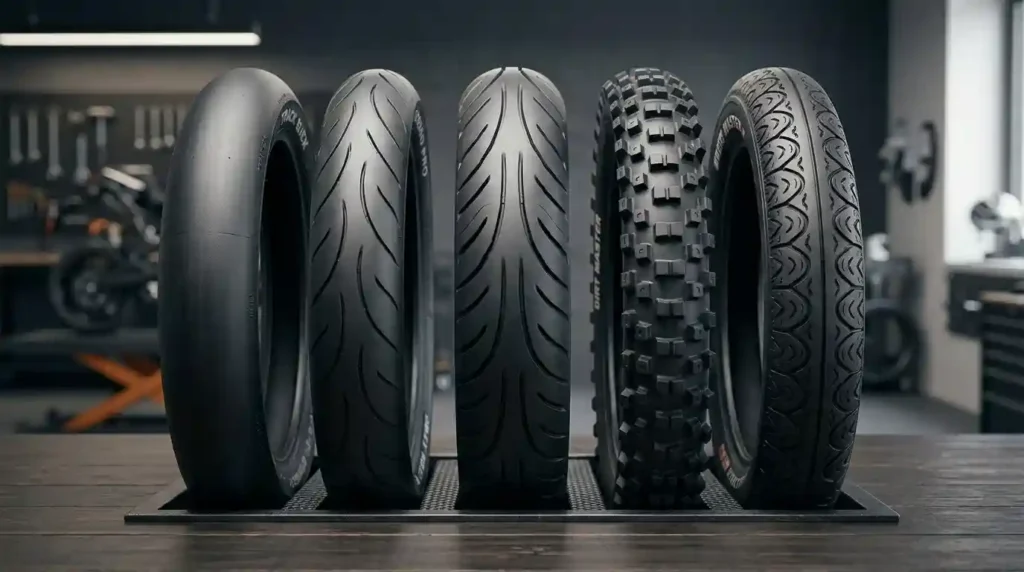
Cycling across America means tackling drastically different terrain. You might cruise smooth asphalt along California’s Pacific Coast Highway or battle slick mud in the Pacific Northwest. You could also face sharp, loose rocks in the Southwestern deserts. Every surface poses a unique challenge to your bike’s contact patch.
Choosing the wrong tire tread leads to frequent flat tires, poor cornering grip, inefficient pedaling, and premature tire wear. Matching your tire tread to your riding conditions—and running the correct tire pressure (PSI)—directly impacts your safety, speed, and overall comfort.
Tread patterns are engineered to handle distinct surfaces, speeds, weather conditions, and riding styles. Every design balances four core performance factors:
- Rolling Resistance: How easily the tire rolls over a surface.
- Cornering Grip: Traction when leaning the bicycle into turns.
- Traction & Braking: Mechanical bite into the ground for accelerating and stopping.
- Durability & Puncture Resistance: Protection against sharp debris, glass, and wear.
Different cycling disciplines—including road, gravel, mountain biking (MTB), daily commuting, and high-torque e-bikes—rely on tailored tread designs to optimize this balance.
Featured Snippet: Why Do Bike Tires Have Different Tread Patterns?
Bike tires have different tread patterns because each pattern is designed to balance grip, rolling resistance, water or mud clearance, cornering control, and durability for a specific riding surface.
What Is a Bike Tire Tread Pattern?
The tread is the outer rubber layer of the tire that physically makes contact with the road or trail surface.
Tread design goes beyond aesthetics. It determines how a tire deforms, grips, and sheds debris under load. Engineers manipulate four key design variables to alter tire performance:
- Tread Blocks (Knobs): Raised rubber sections that dig into loose soil, dirt, and gravel.
- Grooves & Sipes: Channels carved into the rubber to channel water, mud, or slush away from the contact patch.
- Spacing: The distance between tread blocks, which controls mud shedding and rolling efficiency.
- Surface Texture: Micro-textures on smooth tires that add subtle mechanical friction on paved surfaces.
+———————————————————————————–+
| TREAD PATTERN CATEGORIES |
+————————–+————————–+—————————–+
SLICK | SEMI-SLICK | AGGRESSIVE / KNOBBY |
| • Completely smooth | • Smooth center strip | • Tall, pronounced knobs |
• Max pavement contact | • Knobby shoulder blocks | • Deep spacing for clearance|
• Lowest rolling resist. | • Blends speed + grip | • Maximum off-road traction |
+————————–+————————–+—————————–+
What Do Tread Blocks and Grooves Do?
Tread blocks act as mechanical claws on loose or soft terrain. When you ride on dirt or sand, the weight of the bike forces these rubber knobs into the ground, creating mechanical keying for traction.
Grooves create sharp rubber edges that bite into the surface during hard braking and aggressive cornering.
Larger gaps between tread blocks prevent mud buildup. When a tire rotates, a wide gap allows packed dirt and mud to fling off, keeping the tread clear for continuous grip.
Does Tread Pattern Affect Rolling Resistance?
Yes. Excessive tread movement increases energy loss. As tall rubber knobs flex and deform against a hard surface, energy from your legs is lost as internal heat—a process known as hysteresis loss.
Smooth tires roll most efficiently on paved surfaces because the rubber remains stable under load without unnecessary flexing.
However, tread pattern is only one factor in rolling resistance. Other key variables include:
- Tire Pressure (PSI): Incorrect pressure causes unnecessary casing deformation or vibration loss.
- Casing TPI (Threads Per Inch): Higher TPI casings flex more easily, reducing energy loss.
- Rubber Compound (Durometer): Softer rubber increases grip but creates more drag; harder compounds roll faster.
- Inner Rim Width: Proper rim width supports the tire casing, optimizing the contact patch shape.
Why Do Road Bike Tires Have Different Treads?
Road bike tires run on hard, smooth asphalt or concrete. Because paved surfaces do not deform under a bicycle tire, road tires do not need deep tread blocks to create grip.
+———————————————————————————–+
| ROAD TIRE DESIGN PRIORITIES |
+————————–+————————–+—————————–+
| TREAD PROFILE | PRIMARY BENEFIT | KEY MECHANICAL ADVANTAGE |
+————————–+————————–+—————————–+
Full Slick | Maximum Speed & Efficiency| Highest rubber contact area |
| Micro-Textured Shoulder | Cornering Confidence | Subtle friction on asphalt |
Shallow Directional Sipes| Water Channelling | Psychologically reassuring |
+————————–+————————–+—————————–+
Road tires prioritize low rolling resistance at higher speeds. Eliminating deep grooves maximizes the rubber-to-asphalt contact area, providing maximum friction and predictable cornering.
Are Slick Bike Tires Faster?
Yes, slick tires are significantly faster on clean pavement. A smooth tread profile eliminates knob flex, allowing nearly all your pedaling energy to propel you forward.
Tread is not required for grip on dry asphalt. Bicycle tires are narrow enough to achieve direct rubber-to-road contact without needing knobs to bite into the surface.
A tire’s speed and grip depend on a combination of factors:
- Rubber Compound: High-performance silica-infused compounds maximize grip without adding rolling resistance.
- Casing Construction: Flexible 120+ TPI casings conform smoothly to road imperfections.
- Tire Pressure: Correct PSI ensures the tire doesn’t bounce over rough road surface patches.
- Road Surface Quality: Smoother asphalt allows for higher pressure and lower rolling resistance.
Do Road Bike Tires Need Tread in the Rain?
No, road bike tires do not need deep tread grooves to prevent hydroplaning. Hydroplaning occurs when a layer of water builds up between a tire and the road surface, causing a complete loss of traction.
Because road bicycle tires are narrow (typically 25mm to 32mm) and run at relatively high pressures, the contact patch easily slices through surface water. Hydroplaning on a road bike would require speeds well over 100 mph.
Modern wet-weather road tires rely on soft rubber compounds that remain flexible in cold, wet conditions. To stay safe riding on wet roads:
- Lower Your PSI: Drop tire pressure by 5 to 10 PSI to enlarge the contact patch and boost wet grip.
- Increase Tire Width: Switch from 25mm to 28mm or 32mm tires for improved traction and stability.
- Adjust Technique: Avoid painted road lines, wet metal manhole covers, and oily center-lane patches while keeping the bike upright in turns.
Why Do Mountain Bike Tires Have Aggressive Tread?
Mountain bike (MTB) tires operate on soft, unpredictable terrain like loose dirt, sharp rocks, wet roots, and mud. They feature aggressive tread patterns with large, prominent knobs that bite mechanically into the ground.
+———————————————————————————–+
| MOUNTAIN BIKE TREAD ANATOMY |
+————————–+————————–+—————————–+
| KNOB TYPE | LOCATION | PRIMARY FUNCTION |
+————————–+————————–+—————————–+
Center Knobs | Middle strip | Braking & climbing traction |
Transition Knobs | Between center & edge | Smooth cornering engagement |
Shoulder Knobs | Outer tire edges | Maximum cornering lean grip |
+————————–+————————–+—————————–+
Knob spacing plays a critical role in off-road tire design:
- Tight Knob Spacing: Reduces rolling resistance on hard-packed dirt and XC (cross-country) trails.
- Wide Knob Spacing: Allows mud and debris to clear quickly, preventing the tire from clogging up into a smooth, slick ball of clay.
How Do MTB Tread Patterns Improve Cornering?
MTB tires use tall, sturdy side knobs (shoulder blocks) along the outer edges of the casing. When you lean the bike into a high-speed turn, these side knobs dig into loose dirt to hold your line.
Transition knobs placed between the center and shoulder rows ensure a predictable feel as you lean the bike over.
To maximize cornering grip, adjust your tire pressure to match your rider weight, trail terrain, casing stiffness, and rim width.
Why Are Some MTB Tire Knobs So Large?
Tall, aggressive tread blocks are engineered for gravity-oriented riding like Enduro and Downhill (DH).
- Soft Soil Bite: Large knobs penetrate deep into loose dirt and loam to find solid ground underneath.
- Braking Power: Wide, paddle-shaped center blocks provide massive braking traction when descending steep gradients.
- Trade-Off: These aggressive designs create significant rolling resistance and feel sluggish when ridden on hard pavement or smooth fire roads.
Gravel Tire Tread Patterns Explained
Gravel riding spans everything from smooth asphalt and hard-packed dirt roads to coarse crushed stone and singletrack trails. Consequently, gravel tires feature diverse tread designs.
+———————————————————————————–+
| GRAVEL TREAD SPECTRUM |
+————————+————————–+——————————-+
| TYPE | TERRAIN PROFILE | TREAD CONFIGURATION |
+————————+————————–+——————————-+
Semi-Slick | 70% Pavement / 30% Dirt | Smooth center, light side knobs|
Fine File-Tread | Hard-pack gravel & dry | Diamond-grid micro-knobs |
Aggressive Knobby | Loose dirt, mud, rocks | Spaced, pronounced MTB knobs |
+————————+————————–+——————————-+
Gravel tires balance pavement rolling speed with off-road traction. Achieving optimal performance involves balancing several features:
- High TPI Casing: Supple 60–120 TPI casings absorb gravel chatter for a smoother ride.
- Puncture Belts: Sub-tread nylon or aramid layers protect against sharp flint and thorns.
- Tire Width: Ranging from 38mm to 50mm (1.5″ to 2.0″) to balance air volume and mud clearance.
- Tubeless Setup: Running tubeless allows for lower PSI without the risk of pinch flats.
Slick vs. Knobby Gravel Tires
- Slick / Semi-Slick: Ideal for hard-packed dirt and routes with significant pavement. Features a smooth central line for efficient rolling, paired with subtle side knobs for cornering support.
- Small Knobs (File-Tread): Feature tightly packed diamond patterns. These excel on dry gravel, sandy roads, and light trails by offering consistent, predictable traction.
- Large Knobs: Feature widely spaced tread blocks that grip in mud, loose soil, and technical terrain, similar to a cross-country MTB tire.
How Does Gravel Tire Pressure Affect Tread Performance?
Setting the right tire pressure ensures your gravel tread functions as intended.
+———————————————————————————–+
| GRAVEL TIRE PRESSURE EFFECTS |
+———————————-+————————————————+
| TOO HIGH (e.g., > 50 PSI) | TOO LOW (e.g., < 20 PSI) |
+———————————-+————————————————+
• Tire bounces over rough gravel | • Excessive casing squirm in turns |
| • Smaller contact patch | • Increased risk of rim damage / strikes |
• Reduced traction & fatigue | • Higher rolling resistance from flex |
+———————————-+————————————————+
To set your baseline gravel PSI, factor in total system weight (rider + bike), tire width, inner rim width, casing construction, and terrain harshness.
How Tread Pattern Affects Bike Tire Grip
Tread edges act as mechanical stops against surface irregularities, generating traction under acceleration, braking, and cornering.
Different riding surfaces require specific tread profiles:
- Hard/Smooth Surfaces (Asphalt): Require maximum surface contact via rubber adhesion.
- Loose Surfaces (Dirt/Gravel): Require mechanical interlock via tread knobs digging into the ground.
DIRECT TRACTION TYPES
|
+———————————+———————————+
| | |
v v v
+—————+ +—————+ +—————+
| STRAIGHT-LINE | | CORNERING | | BRAKING |
TRACTION | | GRIP | | TRACTION |
+—————+ +—————+ +—————+
Center knobs | | Shoulder knobs| | Square-edged |
| paddle into | | dig in during | | horizontal |
soft dirt | | lean angles | | center blocks |
+—————+ +—————+ +—————+
Tread vs. Rubber Compound
The Tread shape controls physical traction with the terrain, while the rubber compound controls friction at a molecular level.
Rubber hardness is measured in durometer (A):
- Hard Compound (60a–70a): Fast-rolling, durable, highly resistant to wear; lower grip on wet rocks/roots.
- Soft Compound (40a–50a): Exceptional grip on slick surfaces; wears faster and increases rolling resistance.
A well-designed tread pattern cannot overcome a poor rubber compound. A hard compound knob will slide off a wet rock, regardless of how tall or sharp the knob is.
How Do Tire Knobs Affect Cornering?
As you lean your bike into a turn, weight shifts from the center tread to the shoulder knobs.
Tire manufacturers carefully calculate the size, angle, and spacing of shoulder knobs to create a seamless transition when leaning:
- Channel Cutouts: A gap between center and edge knobs allows side knobs to bite into soft dirt during turns.
- Siped Shoulder Knobs: Small slits in side knobs allow individual rubber blocks to flex, molding around rocks and roots for continuous grip.
- Casing Support: If tire pressure is too low, shoulder knobs can roll under the rim, resulting in a sudden loss of traction.
How Tread Pattern Affects Rolling Resistance
Rolling resistance is the energy lost as a tire deforms while rolling under load.
Tread deformation, casing flex, tire inflation pressure, and rubber compound interact to dictate how much energy is required to maintain forward momentum.
+———————————————————————————–+
| ROLLING RESISTANCE COMPARISON |
+———————–+——————–+——————+——————-+
| CATEGORY | TREAD STYLE | TYPICAL PSI | WATT LOSS (EFFORT)|
+———————–+——————–+——————+——————-+
| Road Race | Full Slick | 70 – 90 PSI | Very Low (10-14W) |
| Gravel File-Tread | Semi-Slick | 30 – 45 PSI | Low (18-24W) |
| XC Mountain | Low-Profile Knobs | 20 – 28 PSI | Moderate (28-35W) |
| Enduro / DH | Heavy Knobs | 16 – 24 PSI | High (45W+) |
+———————–+——————–+——————+——————-+
Why Do Knobby Tires Feel Slower on Pavement?
Riding an aggressive mountain bike tire on smooth asphalt feels sluggish for three main reasons:
- Knob Squirm: Individual rubber knobs twist and compress against hard pavement, wasting pedaling energy as heat.
- Vibration Loss: Prominent tread blocks continuously lift and drop the tire, generating frame vibration and road noise.
- Aerodynamic Drag: Tall, widely spaced knobs disrupt airflow around the wheel at higher speeds.
For paved commuting or road-focused endurance riding, smooth or micro-textured tires preserve energy and make pedaling much easier.
Can Lower Rolling Resistance Reduce Grip?
Yes, prioritizing ultra-low rolling resistance often involves performance trade-offs.
A tire engineered solely for speed may feature a hard rubber compound, minimal casing rubber, and a slick tread profile. While fast on dry pavement, this tire may offer poor grip on wet roads, cold surfaces, or loose gravel.
Choose tires based on your typical riding surface rather than chasing minimal rolling resistance alone.
Tread Patterns for Different Types of Cycling
+———————————————————————————–+
| TREAD PATTERNS BY CYCLING DISCIPLINE |
+—————–+——————————-+———————————+
| DISCIPLINE | RECOMMENDED TREAD DESIGN | KEY PERFORMANCE PRIORITIES |
+—————–+——————————-+———————————+
| Road Cycling | Full slick or micro-textured | Ultra-low drag, wet grip |
| Mountain Bike | Tall, widely spaced knobs | Off-road bite, mud shedding |
| City Commuting | Deep siping with smooth spine | Puncture defense, durability |
| E-Bikes (e-MTB) | Heavy-duty reinforced knobs | High torque handling, load |
+—————–+——————————-+———————————+
Road Cycling
- Tread Design: Slick center with light shoulder siping or full slick profile.
- Key Focus: Low rolling resistance, low weight, precise cornering, and wet grip.
- Best Practice: Run modern wider tire sizes (28mm to 32mm) at optimized lower PSI for increased speed and comfort over real-world asphalt.
Mountain Biking
- Tread Design: Tall center blocks for braking/climbing paired with aggressive shoulder blocks for cornering.
- Key Focus: Mechanical bite, mud shedding, and sidewall impact protection.
- Best Practice: Select tread profiles tailored to your local terrain (e.g., XC file-treads for dry trails vs. widely spaced spikes for wet clay).
Daily Bike Commuting
- Tread Design: Smooth center tread for fast rolling, paired with deep water grooves (siping) to shed urban road grime.
- Key Focus: Exceptional puncture protection, wet grip, and long wear life.
- Best Practice: Prioritize thick, durable tread rubber and integrated aramid/nylon breaker belts to resist glass, wire, and debris.
E-Bikes
- Tread Design: Stiffer, wider tread blocks paired with reinforced underlying casings.
- Key Focus: Handling high electric motor torque, managing heavy system weights (50+ lbs), and minimizing tire wear.
- Best Practice: Look for tires explicitly rated for e-bike speeds (e.g., ECE-R75 approval for speeds up to 30 mph / 50 km/h).
Front vs. Rear Tire Tread Patterns
Front and rear tires handle different forces during a ride, leading many cyclists to run front/rear-specific tread designs.
TIRE ROLE DIVISION
|
+———————————+———————————+
| | |
v v v
+—————+ +—————+ +—————+
| FRONT TIRE | | REAR TIRE | | COMBINED RESULT|
+—————+ +—————+ +—————+
| • Control | | • Power | | Maximum speed |
| • Cornering | | • Propulsion | | without losing|
| • Steering | | • Braking | | control |
+—————+ +—————+ +—————+
Why Use a More Aggressive Front Tire?
A front-wheel skid usually leads to a crash, whereas a rear-wheel slide is easier to manage.
The front tire handles steering direction and aggressive lean angles during turns. Running a wider front tire with taller shoulder knobs provides:
- Maximum cornering bite in loose soil.
- Precise steering response and tracking through rock gardens.
- Added rider confidence when descending technical terrain.
Why Use a Faster Rear Tire?
The rear tire carries approximately 60% of the rider’s weight and transfers all pedaling power to the ground.
Running a slightly narrower, lower-profile rear tire helps to:
- Reduce total rolling drag on flat sections and climbs.
- Accelerate faster out of corners.
- Resist wear caused by drivetrain torque and rear braking forces.
How Tire Pressure Changes Tread Performance
Tread design and tire pressure are inherently linked. Even the most advanced tread profile will underperform if inflated to the wrong PSI.
+———————————————————————————–+
| TIRE PRESSURE BALANCING ACT |
+———————————-+————————————————+
| TOO LOW PSI | TOO HIGH PSI |
+———————————-+————————————————+
| • Casing squirm in turns | • Harsh, uncomfortable ride quality |
| • Increased rim strikes & flats | • Deflects off obstacles, losing grip |
| • Sluggish acceleration | • Reduced contact patch size |
+———————————-+————————————————+
What PSI Should You Use?
Inflation pressure should be customized for each ride. Always start by consulting the manufacturer’s safe operating PSI range printed on the tire sidewall.
Adjust your PSI based on five core variables:
- Total System Weight: Combined weight of rider, bicycle, and gear.
- Tire Volume / Width: Wider tires require lower PSI to support the same load safely.
- Inner Rim Width: Wider rims support tire sidewalls better, allowing for slightly lower pressures.
- Terrain Harshness: Rougher roads and sharp rock trails require balanced pressure to prevent rim damage.
- Inner Tubes vs. Tubeless: Tubeless setups can safely run 5–10 PSI lower than tubed setups without risk of pinch flats.
Practical Pressure Formula & Calculation
Calculate a practical baseline road tire pressure using this weight-ratio formula:
Base Front PSI=4.5Total Weight (lbs)
Base Rear PSI=Base Front PSI+5
Example: A 170 lb rider on a 20 lb road bike (190 lbs Total System Weight):
Base Front PSI=4.5190≈42 PSI
Base Rear PSI=42+5=47 PSI
(Note: Adjust for tire width. Multiply result by 0.75 for gravel tires or 0.45 for MTB tires).
+———————————————————————————–+
| QUICK-REFERENCE STARTING TIRE PRESSURE CHART (TUBED) |
+——————-+—————-+——————+—————————+
| RIDER WEIGHT (LBS)| ROAD (28MM) | GRAVEL (40MM) | MTB (2.4″ 29er) |
+——————-+—————-+——————+—————————+
| 130 – 150 lbs | 55 – 60 PSI | 32 – 35 PSI | 19 – 21 PSI |
| 150 – 180 lbs | 65 – 72 PSI | 36 – 40 PSI | 22 – 25 PSI |
| 180 – 210 lbs | 75 – 82 PSI | 41 – 45 PSI | 26 – 29 PSI |
| 210+ lbs | 85 – 92 PSI | 46 – 50 PSI | 30 – 33 PSI |
+——————-+—————-+——————+—————————+
*Subtract 3–5 PSI for Tubeless Setups.*
Simple Tire Pressure Setup Steps
- Check Limits: Verify maximum/minimum PSI ratings on tire and rim sidewalls.
- Set Baseline: Set your starting PSI using your system weight and tire width.
- Test Ride: Ride a short loop with typical corners, climbs, and rough surfaces.
- Adjust Incrementally: Increase or decrease pressure by 1–2 PSI at a time to fine-tune grip and comfort.
Featured Snippet: What Is the Best Bike Tire Pressure?
The best bike tire pressure depends on rider weight, tire width, rim width, casing construction, terrain, and whether the tire uses an inner tube or tubeless sealant.
Tread Pattern, Tire Construction, and Puncture Protection
Tread is only one layer of a modern bike tire. Overall handling, durability, and ride feel depend heavily on internal construction.
+———————————————————————————–+
| TYPICAL TIRE CROSS-SECTION |
+———————————————————————————–+
| [ Tread Rubber Layer (Tread Blocks / Siping / Grooves) ] |
| [ Sub-Tread Protection Belt (Aramid / Nylon Puncture Breaker) ] |
| [ Flexible Casing Fabric (60 – 120+ TPI Woven Threads) ] |
| [ Sidewall Protective Layer (EXO / SnakeSkin Apex Reinforcement) ] |
| [ Inner Tubeless Air-Sealing Liner / Tube Cavity ] |
| [ Bead Construction (Folding Kevlar or Rigid Steel Wire Bead) ] |
+———————————————————————————–+
Does Higher TPI Mean a Better Tire?
TPI stands for Threads Per Inch. It measures the thread density in the woven casing fabric beneath the tread rubber:
- Low TPI (27–60 TPI): Uses thicker nylon threads. Produces a heavier, stiffer tire that resists cuts and punctures. Common on entry-level, commuter, and downhill tires.
- High TPI (120–320 TPI): Uses finer, tightly woven threads. Produces a flexible casing that conforms to bumps, offering lower rolling resistance and improved comfort. Common on high-end road, gravel, and XC race tires.
High TPI does not automatically make a tire “better.” A supple 120 TPI race tire may wear out faster or puncture more easily on rough gravel than a sturdy 60 TPI tire with dedicated anti-puncture belts.
How Does Tread Thickness Affect Tire Life?
Thicker center tread provides a larger rubber buffer before sharp objects reach the casing, increasing wear life and puncture resistance.
However, thick rubber adds rotational mass and stiffness, which increases rolling resistance. Off-road tires with tall knobs can also wear rapidly if ridden frequently on hard asphalt.
Check your tires regularly for signs of wear:
- Center tread flattened or squared-off.
- Knobs rounded, torn, or showing base cracks.
- Cuts, gouges, or woven casing threads showing through the rubber.
Tread Patterns and Tubeless Bike Tires
Tubeless systems eliminate the inner tube entirely. They rely on an airtight seal between a tubeless-compatible tire bead and rim tape, filled with liquid latex tubeless sealant to automatically seal small punctures.
+———————————————————————————–+
| TUBED VS. TUBELESS COMPARISON |
+———————————-+————————————————+
| INNER TUBE SYSTEM | TUBELESS SYSTEM |
+———————————-+————————————————+
| • High risk of pinch flats | • Eliminates pinch flats almost entirely |
| • Requires higher PSI to protect | • Permits lower PSI for maximum traction |
| • Sudden air loss on punctures | • Liquid sealant seals small punctures instantly|
| • Heavy inner tube weight | • Lower rolling resistance and weight |
+———————————-+————————————————+
Does Tread Matter More With Tubeless Tires?
Tread design and tubeless technology work together to optimize performance.
Because tubeless setups allow you to run lower tire pressures without pinch-flatting, tread knobs can conform better to uneven trail surfaces. This maximizes the effective contact patch, allowing subtle tread details to provide increased traction.
Caution: Always verify that both your tire and rim are explicitly marked as Tubeless Compatible (TC) or Tubeless Ready (TLR) before setting up tubeless.
+———————————————————————————–+
| RIM TYPE COMPATIBILITY GUIDE |
+——————-+—————————-+———————————-+
| RIM TYPE | HOOKED (CROCHET) | HOOKLESS (STRAIGHT-SIDE) |
+——————-+—————————-+———————————-+
| Sidewall Shape | Prominent internal lip | Straight, smooth inner wall |
| Pressure Limits | High pressure safe (>80PSI)| Strictly capped (max 73 PSI) |
| Tire Requirement | Tubed or Tubeless tires | Approved Tubeless-Only tires |
+——————-+—————————-+———————————-+
Basic Tubeless Setup Guide
- Inspect Equipment: Ensure both the rim and tire are labeled Tubeless-Ready.
- Apply Rim Tape: Install tubeless-compatible rim tape smoothly across the rim bed to seal spoke holes.
- Install Valve: Insert a tubeless valve stem and tighten the lockring securely.
- Mount Tire: Push one tire bead into the rim channel, then work the second bead over the rim edge.
- Add Sealant: Pour 2–4 oz of liquid sealant into the tire casing (or inject it through the valve core).
- Seat the Bead: Inflate rapidly using a high-volume tubeless floor pump or air compressor until the tire bead clicks into place.
- Distribute Sealant: Rotate and shake the wheel to coat the entire inner surface and check for air leaks.
How to Choose the Right Bike Tire Tread Pattern
Match Tread to Your Riding Surface
- Pavement / Asphalt: Choose slick or micro-textured tread for maximum speed and efficient cornering.
- Hard-Packed Dirt & Dry Gravel: Choose semi-slick or fine file-tread patterns to balance rolling speed with cornering grip.
- Loose Dirt & Mixed Terrain: Choose medium-height knobs with moderate spacing to ensure bite and stability.
- Deep Mud & Loam: Choose tall, widely spaced tread blocks that dig through soft topsoil and shed sticky mud.
+———————————————————————————–+
| INNER RIM WIDTH MATCHING CHART |
+———————–+—————————–+—————————–+
| TIRE WIDTH RANGE | OPTIMAL INNER RIM WIDTH | TIRE PROFILE BEHAVIOR |
+———————–+—————————–+—————————–+
| 25mm – 28mm (Road) | 19mm – 21mm | Smooth aero transition |
| 38mm – 45mm (Gravel) | 23mm – 25mm | Stable sidewall support |
| 2.3″ – 2.5″ (MTB) | 28mm – 30mm | Square contact patch |
+———————–+—————————–+—————————–+
Consider Your Riding Priorities
- Speed: Prioritize slick treads, high TPI casings, and lightweight rubber compounds.
- Traction & Control: Choose aggressive shoulder knobs, widely spaced tread blocks, and softer durometer rubber.
- Durability: Select thicker tread rubber, reinforced sidewall casings, and integrated puncture belts.
Consider Tire and Rim Compatibility
Always verify tire clearance on your frame, fork, and fenders before upgrading to wider tires.
Mismatching tire width to inner rim width can alter the intended tread shape. Mounting a wide tire on a narrow rim causes a “lightbulb” profile, leading to sidewall squirm in turns. Conversely, mounting a narrow tire on a wide rim flattens the profile, squarering off shoulder knobs prematurely.
Common Bike Tire Tread Mistakes to Avoid
- Riding Aggressive Knobs on Pavement: Wastes pedaling energy, generates loud road noise, and wears down expensive off-road tread blocks rapidly.
- Riding Slick Tires in Mud: Causes traction loss and skidding under cornering or braking on loose, wet terrain.
- Ignoring Tire Pressure: Incorrect PSI prevents the tread contact patch from interacting properly with the surface, regardless of tire quality.
- Over-Inflating Tubeless Tires: Exceeding 73 PSI on hookless carbon rims can blow the tire off the rim flange, causing wheel damage or injury.
- Running Reversed Directional Tread: Many tires feature directional tread patterns designed to roll in one direction. Check the directional arrow on the sidewall before mounting.
Can You Put Any Tread Pattern on Any Bike?
No. Tire fitment is limited by frame clearance, fork width, rim dimensions, fender mounts, and drivetrain spacing.
Always consult your bike manufacturer’s maximum tire clearance specifications before purchasing wider or more aggressive tires.
How to Tell When a Tire Tread Is Worn Out
Check your tires regularly for visible signs of wear and age:
+———————————————————————————–+
| TIRE INSPECTION CHECKLIST |
+———————–+———————————-+————————+
| VISUAL SYMPTOM | UNDERLYING ISSUE | RECOMMENDED ACTION |
+———————–+———————————-+————————+
| Flat Center Spine | Rubber wear from high mileage | Replace soon |
| Missing / Torn Knobs | Off-road shear stress | Replace immediately |
| Cracking Sidewalls | UV damage or dry rot aging | Replace immediately |
| Exposed Casing Threads| Complete tread layer wear | DO NOT RIDE – Replace |
+———————–+———————————-+————————+
Does a Bike Tire Need Visible Tread to Be Safe?
On smooth asphalt, road bicycle tires do not require tread grooves to maintain grip. A completely smooth road tire provides maximum grip on dry pavement by maximizing the rubber contact area.
However, once the rubber layer wears down and exposes the inner casing threads, the tire is unsafe and prone to sudden blowouts.
How Tread Patterns Are Tested
Professional testing measures rolling resistance, cornering grip, puncture resistance, and rubber wear using controlled laboratory and field setups.
Laboratory drum testing measures energy loss in watts at set speeds, loads, and inflation pressures. Field testing evaluates cornering stability, traction, and mud shedding across real-world trail conditions.
What Makes a Good Tire Test?
Accurate tire testing relies on standardized parameters:
- Controlled Pressure: Standardized PSI matched to casing volume.
- Consistent System Load: Standardized weight simulating rider and equipment.
- Replicated Test Surface: Smooth steel drums for rolling resistance; standardized test track sections for real-world grip.
Frequently Asked Questions
Tubeless vs. Inner Tube: Which Is Better?
Tubeless setups lower rolling resistance, allow for lower pressures without pinch flats, and seal small punctures automatically. Inner tubes remain simpler to install, budget-friendly, and easier to service at home without specialized equipment.
What PSI Should I Use for My Bike Tires?
Start within the pressure range stamped on your tire’s sidewall. Fine-tune your PSI based on rider weight, tire width, inner rim width, terrain, and whether you run tubed or tubeless setups.
Does Rim Width Affect Tire Performance?
Yes. Matching tire width to inner rim width ensures the proper contact patch shape, supports tire sidewalls during cornering, and prevents tire squirm or burping.
Does Higher TPI Make a Bike Tire Faster?
Generally, yes. Higher TPI casings flex more easily, absorbing surface roughness and reducing energy loss (rolling resistance). However, they may require additional puncture-protection layers for off-road durability.
What Is the Best Tread Pattern for Commuting?
A slick or semi-slick tread with shallow grooves (siping) offers fast rolling speeds on asphalt while channeling away water and road grime. Choose tires with integrated sub-tread puncture protection belts for city riding.
What Is the Best Tread Pattern for Mountain Biking?
Match your MTB tread to your local terrain. Dry, hard-packed trails benefit from low-profile, tightly spaced center knobs. Loose dirt, loam, and wet rocks require tall, widely spaced knobs with aggressive shoulder blocks.
Can I Use MTB Tires on the Road?
Yes, provided your frame and rims are compatible. However, aggressive MTB knobs generate high rolling resistance, create noise, and wear down quickly when used on hard pavement.
When Should I Replace My Bike Tires?
Replace your tires if you notice a squared-off center profile, missing off-road knobs, visible casing threads, deep sidewall cuts, or dry-rot cracking.
Final Verdict: Choosing the Right Tread Pattern
Bike tire tread is an active performance component—not a visual decoration.
To choose the right tire tread:
- Analyze Your Terrain: Identify the primary surfaces you ride on (asphalt, packed gravel, loose dirt, or mud).
- Determine Priorities: Balance your need for speed, cornering traction, and puncture durability.
- Fine-Tune Tire Pressure: Adjust your PSI based on your system weight, rim width, and tire setup.
A well-matched tire tread—inflated to the correct pressure—will transform your ride quality, handling confidence, and overall safety.
Find Your Ideal Tire Setup
Optimize your bicycle tire performance using our interactive site tools:
- Calculate your exact inflation pressure with our Free Bike Tire Pressure Calculator at TheBikeTires.com.
- Compare tread styles, casing options, and tire dimensions using our Tire Finder Tool.
- Test small 1–2 PSI adjustments on your local routes to experience the difference firsthand.

Mohidul Islam is a leading cycling technology specialist and bike tire consultant with over 15 years of hands-on experience in the bicycle industry. He holds a Bachelor of Science in Mechanical Engineering from Penn State University, where he focused heavily on material science, tread mechanics, and rubber compound performance. Over the past decade and a half, Alex has conducted extensive field testing, tubeless setup evaluations, and tire pressure modeling for road, mountain, and e-bikes. His practical insights and data-driven approach help cyclists of all levels optimize grip, speed, and durability on every ride.



