
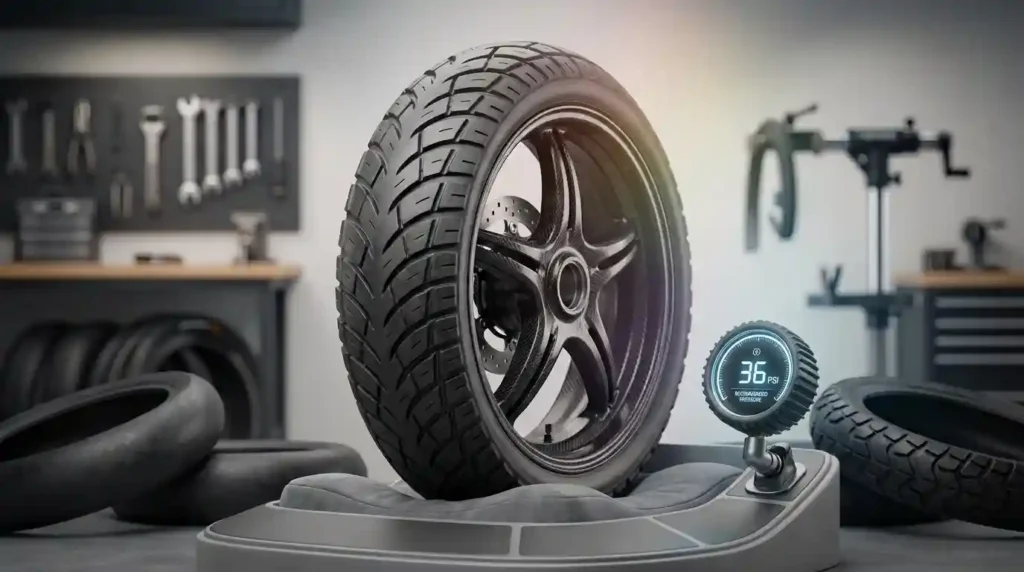
Most bike tires need between 5 and 100 PSI, depending on the bike. Road bikes often run 60 to 100 PSI. Hybrid and city bikes run 40 to 70 PSI. Gravel bikes run 25 to 50 PSI, mountain bikes 20 to 35 PSI, and fat bikes 5 to 15 PSI. These are starting points, not rules.
If you ask how much air should I put in bike tyres, the honest answer is “it depends.” The right tire pressure (PSI) depends on tire width, total rider and bike weight, terrain, tire build, and riding style. Get it wrong and you face flats, a harsh ride, weak cornering traction, and faster wear.
Always read the pressure range printed on the tire sidewall. Then follow the limits set by the tire and rim makers. This guide gives you a chart, a simple formula, and a step-by-step method to find your number.
New to tire basics? Start with how bike tires work and what makes a good bike tyre. To see how we review tires, read our testing process.
Quick note: Correct pressure changes safety, speed, and comfort on every ride. It is also free to fix.
How Much Air Should You Put in Bike Tires?
Short answer: Start with the middle of your bike type’s range, stay inside the tire and rim limits, then adjust for your weight, surface, and comfort. Wider tires usually run lower pressure than narrow ones. Use a gauge, not a squeeze test.
- There is no single PSI for every bike.
- Start within the tire and rim makers’ limits, then adjust for load, surface, and comfort.
- Use a reliable pressure gauge. Squeezing the tire tells you very little.
Quick Bike Tire Pressure Ranges by Bike Type
| Bike type | Illustrative starting range |
|---|---|
| Road bike | 60 to 100 PSI |
| Hybrid or city bike | 40 to 70 PSI |
| Gravel bike | 25 to 50 PSI |
| Mountain bike | 20 to 35 PSI |
| Fat bike | 5 to 15 PSI |
These are broad examples, not universal recommendations. Actual safe and effective pressure depends on tire width, load, casing, rim limits, and whether the setup is tubeless.
Where to Find Your Tire’s Pressure Limits
- Check the tire sidewall for a minimum and maximum PSI or bar rating.
- Check the rim or wheel maker’s instructions, especially with tubeless and hookless rims.
- Never exceed the lowest pressure limit that applies to your tire and wheel setup.
Sidewall codes can look confusing. See how to read bike tire size, what the numbers on bike tyres mean, and bike tyre markings explained.
Many labels show bar. Use this table to convert.
| PSI | Bar | kPa |
|---|---|---|
| 20 | 1.4 | 138 |
| 40 | 2.8 | 276 |
| 60 | 4.1 | 414 |
| 80 | 5.5 | 552 |
| 100 | 6.9 | 690 |
What Factors Affect the Right Bike Tire Pressure?
Pressure changes grip, comfort, rolling resistance, and the risk of pinch flats or rim strikes. The ideal setting gives enough support while letting the tire flex to follow the ground. Test changes in small steps and write down the results.
Tire Width and Rim Width
Wider tires often run at lower PSI. They hold more air, so they can carry the same load at less pressure.
Rim width shapes the tire and changes its support. Check the tire and rim makers’ compatibility charts. Do not assume a tire fits just because the diameter matches. See bike tire width explained and what tire width to choose.
Use this table for a general guide, and confirm with the makers.
| Inner rim width | Common tire width range | Typical use |
|---|---|---|
| 17 to 19 mm | 25 to 32 mm (1.0 to 1.25 in) | Road, commuter |
| 19 to 21 mm | 28 to 40 mm (1.1 to 1.6 in) | Endurance, light gravel |
| 22 to 25 mm | 35 to 50 mm (1.4 to 2.0 in) | Gravel |
| 25 to 30 mm | 2.1 to 2.5 in (53 to 63 mm) | Trail mountain bike |
Our will this tire fit my wheel checklist and the tire size compatibility guide can help.
Rider Weight and Total System Weight
Count the rider, bike, clothing, water, bags, and cargo. That is your total system weight.
Heavier loads often need more pressure. The right increase depends on tire size and build. Front and rear tires may also need different pressures, since the rear usually carries more.
Terrain, Weather, and Riding Style
Smooth pavement may suit a firmer setup. Rough roads often feel better with a little less pressure.
Loose gravel and mountain trails need enough grip without rim strikes or burping air. Southwestern loose rock and Pacific Northwest mud call for different tuning.
Use this table for quick adjustments from your base number.
| Condition | Suggested change |
|---|---|
| Smooth, dry pavement | Use your base PSI |
| Rough or patched pavement | Subtract 5 to 10 percent |
| Loose gravel or dirt | Subtract 5 to 10 percent |
| Wet roads | Subtract 5 to 10 percent |
| Added cargo | Recalculate with the new total weight |
Learn more in how to choose bike tires for rough roads and how to choose bike tires for gravel roads.
Hooked vs. Hookless Rim Limits
Hooked rims have a small lip that locks the tire bead in place. Hookless rims have straight walls and no lip. Hookless rims often have lower pressure limits. Many cap near 72.5 PSI (5 bar), so read the rim label.
Use only tires approved for your rim type. For more on standards, see ETRTO bike tire sizes and bike wheel size vs tire size.
Wet Weather Pressure Adjustments
Wet roads may call for a small drop in pressure. A softer tire can grip better on slick pavement. A drop of about 5 to 10 percent is a safe place to test.
Avoid big changes without testing. See how to choose bike tires for wet weather for tire advice too.
Bike Tire Pressure Chart by Tire Type
Use this chart as a quick starting point. All ranges are estimates, not fixed rules. Confirm the tire, rim, and wheel limits before you inflate.
| Tire category | Illustrative PSI range | Main priority |
|---|---|---|
| Narrow road tires | 70 to 100 PSI | Support and efficient riding |
| Wider road tires | 50 to 80 PSI | Speed with added comfort |
| Hybrid or commuter tires | 40 to 70 PSI | Comfort and daily reliability |
| Gravel tires | 25 to 50 PSI | Grip on mixed surfaces |
| Mountain bike tires | 20 to 35 PSI | Traction and impact control |
| Fat bike tires | 5 to 15 PSI | Float on soft terrain |
Using a Tire Pressure Chart
- Find your bike type and actual tire width, then check the maker’s limits.
- Begin conservatively within those limits and adjust based on handling and comfort.
- Recheck pressure with the same gauge so your tests stay consistent.
Tire build also matters. See what bike tires are made of to learn how layers change feel.
Does Rider Weight Change Bike Tire PSI?
Yes. More weight squashes the tire more. Pressure may need to rise to prevent squirm and rim hits.
Weight alone cannot give an exact PSI. Tire width, front and rear load, and casing stiffness matter too. A calculator gives a starting point, but real testing still counts.
This table shows tube-type starting points by total system weight. Subtract about 10 percent for tubeless.
| Tire width | 120 lb | 150 lb | 180 lb | 210 lb | 240 lb |
|---|---|---|---|---|---|
| 25 mm | 54 PSI | 68 PSI | 81 PSI | 95 PSI | 108 PSI |
| 28 mm | 46 PSI | 57 PSI | 68 PSI | 80 PSI | 91 PSI |
| 32 mm | 36 PSI | 45 PSI | 54 PSI | 63 PSI | 72 PSI |
| 35 mm | 31 PSI | 39 PSI | 47 PSI | 55 PSI | 62 PSI |
| 40 mm | 24 PSI | 30 PSI | 36 PSI | 42 PSI | 48 PSI |
| 45 mm | 20 PSI | 26 PSI | 31 PSI | 36 PSI | 41 PSI |
| 2.25 in MTB | 16 PSI | 20 PSI | 23 PSI | 27 PSI | 31 PSI |
Never go above the tire or rim limit, even if the table suggests it.
A PSI Formula for Total System Weight
This is a rule of thumb, not a factory spec.
Starting PSI = total system weight (lb) x width factor
Width factors: 25 mm = 0.45, 28 mm = 0.38, 32 mm = 0.30, 35 mm = 0.26, 40 mm = 0.20, 45 mm = 0.17, 2.25 in MTB = 0.13.
Then adjust:
- Tubeless setup: subtract about 10 percent.
- Front tire: subtract 2 to 3 PSI. Rear tire: add 2 to 3 PSI.
- Rough or loose ground: subtract 5 to 10 percent.
Example: A 165 lb rider plus a 25 lb bike weighs 190 lb. On tubed 32 mm tires, 190 x 0.30 = 57 PSI. Run about 55 front and 59 rear.
Adjusting Pressure for Your Weight
- Estimate total riding weight, including bike and cargo.
- Check the tire size, tire build, and rim compatibility.
- Use a trusted calculator or the maker’s guidance for an initial pressure.
- Test ride on familiar terrain and adjust in small steps.
Not sure of your tire size? See what bike tire size you need and how to measure bike tire size.
Should Front and Rear Tires Use the Same PSI?
Not always. The rear tire often carries more load, especially on upright bikes.
Different tire widths or wheel sizes can also call for different pressures. Follow the setup guidance for your bike, especially on suspension mountain bikes and e-bikes.
Inflating Bike Tires to the Correct PSI
Inflating is simple when you follow the same steps each time. Use this numbered guide.
- Read the tire’s pressure range, and check any wheel or rim limits.
- Identify the valve type: Presta or Schrader.
- Attach a compatible pump with a pressure gauge.
- Inflate to your chosen starting PSI within the permitted range.
- Remove the pump carefully, close the valve if needed, and check for leaks.
- Take a short test ride and fine-tune the pressure.
Presta valves are thin and have a small locking nut. Schrader valves look like car valves.
Tools You Need to Inflate Tires
- A floor pump with a readable gauge works well for home setup.
- A digital gauge helps with small changes, especially on gravel and mountain tires.
- A mini pump or CO2 inflator handles roadside repairs. Check that it fits your valve.
Checking Your Tire Pressure Regularly
Check before important rides and as part of regular care. Narrow, high-pressure tires can lose noticeable air faster.
A good habit is to check before every ride you care about, and at least once a week if you ride daily. Check again after big temperature swings, long storage, or a suspected puncture. Air pressure shifts by about 2 percent for every 10°F change.
Read why bike tires lose air and how often to check bike tyres.
Tubeless vs. Inner-Tube Tire Pressure
Tubeless tires can often run lower pressure, since there is no tube to pinch against the rim. Inner tube setups may need more pressure to avoid pinch flats, depending on width and terrain.
Tubeless still needs compatible rims, tires, valves, and tubeless sealant. Sealant is a liquid that seals small punctures as you ride.
| Factor | Tubeless | Inner tube |
|---|---|---|
| Typical pressure | Lower | Higher |
| Pinch flat risk | Low | Higher |
| Small puncture sealing | Yes | No |
| Upkeep | Sealant checks | Little |
New to this? See our list of best bike tyres for beginners.
PSI for Tubeless Bike Tires
Start with a tire-specific recommendation based on width, load, and conditions. Subtracting about 10 percent from tube-type numbers is a common starting point.
Avoid pressure so low that the tire folds, burps air, or lets the rim hit the ground. Check sealant levels and look for cuts or leaks during routine care.
Does Tire Casing TPI Affect Pressure?
TPI means threads per inch in the casing. It describes thread density. It does not set the correct PSI on its own.
Casing flexibility, sidewall strength, width, and construction all affect support and feel. Compare the whole tire design. Learn more about the bike tire casing.
Tire Pressure Effects on Speed, Comfort, and Grip
Higher pressure can cut tire deformation on smooth surfaces. Too much adds vibration and reduces control.
Lower pressure improves comfort and grip on rough ground. Too little can raise rolling resistance or damage the rim.
The best pressure balances rolling resistance, cornering grip, impact protection, and control. For comfort tips, see our picks for 700c tires built for comfort.
Is Higher PSI Faster?
Not always. Very high pressure can make a tire bounce on rough surfaces, which wastes energy.
Width, casing, tread pattern, and road texture all change rolling resistance. Test on the same route before you decide what feels faster. Read why tread patterns differ.
Can Low Pressure Cause Flats?
Yes. Low pressure raises pinch flat risk with tubes. It also raises rim strike risk on rough terrain.
Tubeless tires may burp air or suffer sidewall damage if pressure is too low. Add a little pressure if the tire feels unstable or the rim keeps hitting things. For long rides, see how to choose tires for long distance.
Special Tire Pressure Tips for Commuters, Gravel Riders, and E-Bikes
Match pressure to your route, cargo, tire design, and conditions. Check load limits and tire advice before you change pressure for comfort or speed.
E-bike torque and added system weight make reliable tire support and regular checks especially important.
Daily Commuting and City Riding
Choose a pressure that balances efficient rolling with comfort over potholes and broken pavement. Puncture-resistant tires with a puncture belt help against glass and debris.
Check pressure more often if you carry a heavy backpack, panniers, or work gear. See how to choose tires for a commuter bike, the best tire size for commuting, and what bike tyre to buy for commuting.
Gravel and Mixed-Surface Riding
Wider gravel tires often run lower pressure than road tires of similar diameter. Tune for grip on loose gravel while avoiding squirm, burping, and rim strikes.
Adjust with care when you move between pavement, packed dirt, and rough trails. Read how to choose tires for mixed surfaces for more.
E-Bike Tire Pressure
Account for the heavier bike, rider, battery, and cargo. Follow the tire and wheel makers’ instructions for e-bike use and load limits.
Check the speed rating too, such as 25 km/h (about 15.5 mph) or 45 km/h (about 28 mph). Inspect tires often for cuts, wear, and embedded debris. See how to choose tires for daily cycling.
Common Bike Tire Pressure Mistakes to Avoid
Small habits cause most pressure problems. Avoid these common errors.
- Always inflating to the maximum. It can hurt comfort and grip without making you faster.
- Using a thumb test. You cannot repeat it, so you cannot learn from it.
- Ignoring limits and load. Rim limits, tire wear, and load changes all affect safety.
- Riding worn tires. Check how much tread a bike tyre should have.
- Fitting tires blindly. See if you can use wider tires on your bike and how much wider a tire you can fit.
Signs Your Tire Pressure May Be Too High
- The ride feels harsh or bumpy on rough roads.
- The tire skips or loses grip on uneven surfaces.
- The bike feels less settled over gravel or small bumps.
Signs Your Tire Pressure May Be Too Low
- The tire feels vague, squirmy, or unstable in corners.
- You get frequent pinch flats, rim strikes, or tubeless air loss.
- The casing deforms too much under load.
Testing and Fine-Tuning Bike Tire Pressure
Change pressure in small steps. Record PSI, tire size, rider load, and terrain. Test on the same route when you can, and note comfort, grip, stability, and speed.
Use repeatable methods, not only gut feel. A simple phone note works well. Adjust by 2 to 3 PSI at a time.
Here is a simple method. Ride your normal route at your starting PSI. Lower it by 2 to 3 PSI and ride it again. Stop lowering when the bike feels vague in corners or the rim starts to bottom out, then add back 2 to 3 PSI.
Over time, you will build a personal chart for each bike. That chart is worth more than any generic number.
A Reliable Tire Pressure Test
- Use a calibrated or consistent gauge, and check pressure before each test.
- Keep the route, load, and conditions as similar as possible.
- For expert reviews, document the tire model, casing, tread, rim width, tube or tubeless setup, and test conditions.
We explain our standards in our editorial policy and share more about our team on the about page.
Be careful with claims. No chart gives the perfect PSI for every rider. Trust sources that show their method.
Frequently Asked Questions About Bike Tire Pressure
Is It Bad to Overinflate Bike Tires?
Yes. Overinflation hurts grip and comfort. It can also push a tire past its limit and cause a blowout or bead failure. Always stay under the lowest limit on the tire and rim. A very hard tire also gives you less contact with the road, so it can slide sooner in wet corners.
Can You Use a Car Air Pump on Bike Tires?
Often, yes, if your bike has a Schrader valve. Gas station hoses fill very fast, so use short bursts and check with a gauge. Presta valves need an adapter. You can also check whether you can change your bike tire width before you rethink pressure.
Are Tubeless Tires Run at Lower PSI?
Usually, yes. With no tube to pinch, tubeless setups can run lower pressure. Do not go so low that the tire folds or burps. Many riders start about 10 percent below their tube-type number and work down in small steps.
Do Wider Tires Need Less Air?
Usually. More air volume carries the same load at lower pressure. Confirm that the tire fits your rim and frame. See whether you can put a different size tire on your bike.
Should Wet Weather Pressure Be Lower?
A small drop, about 5 to 10 percent, may help grip on wet roads. Test it first, and do not drop so far that you risk rim strikes.
Why Do Bike Tires Lose Air Overnight?
All tires lose some air through the tube, valve, or tire wall. Light tubes lose air faster than thicker ones. A fast leak points to a puncture or bad valve.
Will Hot Weather Change Tire Pressure?
Yes. Air expands with heat, so pressure rises. Expect about a 2 percent change for every 10°F. Check pressure before rides in extreme weather.
When Should You Replace a Tire That Keeps Going Flat?
Replace tires with exposed casing, deep cuts, bulges, or damaged beads. Read how often bike tyres should be replaced for guidance.
Conclusion: Put the Right Air in Your Bike Tires
The right pressure depends on tire width, total weight, terrain, tire build, and riding style. Start with the chart, stay inside the sidewall and rim limits, then fine-tune.
Key takeaways:
- Use a reliable gauge, and never exceed the lowest pressure limit.
- Match PSI to your total system weight and tire width.
- Check pressure often, and adjust in small steps.
Want a wider view? See how to choose bike tyres and choosing bike tires for road and off-road. For daily riders, how to choose bike tires for everyday riding is a good next read.
Find Your Exact PSI With the Free Calculator
Stop Guessing, Start Riding
A few PSI can change how your bike grips, rolls, and feels.
Try it now: Visit TheBikeTires.com to use the Free Bike Tire Pressure Calculator and Tire Finder Tool. Enter your weight, bike, tire width, and terrain to get a starting pressure for your next ride.
Take two minutes today. Your next ride will feel smoother, safer, and more fun.

Mohidul Islam is a leading cycling technology specialist and bike tire consultant with over 15 years of hands-on experience in the bicycle industry. He holds a Bachelor of Science in Mechanical Engineering from Penn State University, where he focused heavily on material science, tread mechanics, and rubber compound performance. Over the past decade and a half, Alex has conducted extensive field testing, tubeless setup evaluations, and tire pressure modeling for road, mountain, and e-bikes. His practical insights and data-driven approach help cyclists of all levels optimize grip, speed, and durability on every ride.



