
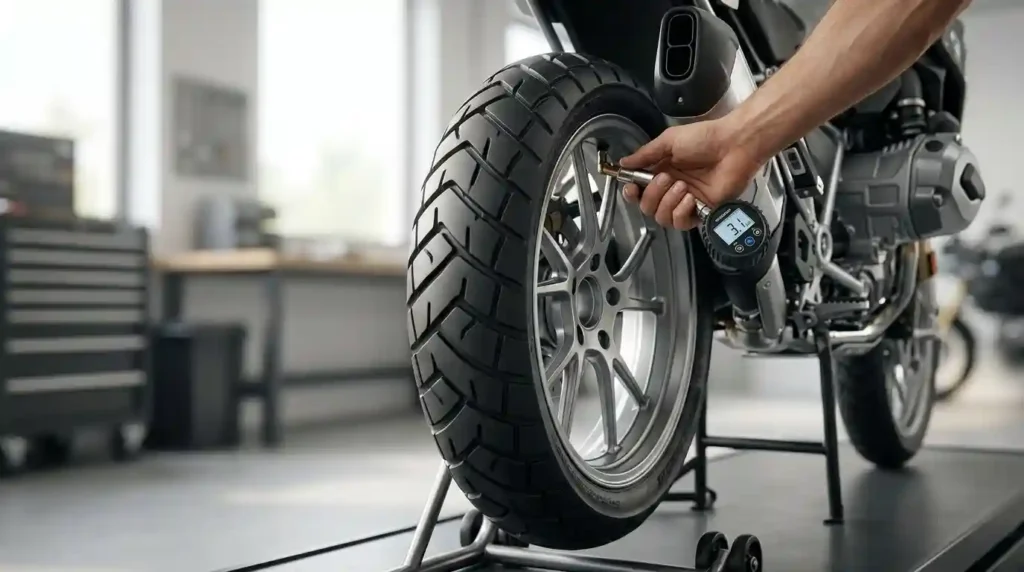
Flats, a squirmy front end, and tires that wear out too soon. Many US riders over 200 lb know these problems well. The cause is often simple: the wrong air pressure.
Getting bike tyre pressure for heavier riders right is not about copying a number from a friend. It depends on your total weight, tire width, rim, and surface. That could be a smooth Midwest bike path, Southwestern loose rocks, or Pacific Northwest mud.
The right PSI (pounds per square inch) protects your rims and cuts pinch flats. It also improves cornering traction and comfort. A tire that sags wastes energy, so correct pressure can help your speed too. See how much bike tires affect speed for the full picture.
This guide gives you plain-English terms, a simple formula, charts, and a safe testing routine. Every number here is a starting point, not a promise. Read how we vet advice on our testing process page.
What Is Bike Tire Pressure for Heavier Riders?
Bike tire pressure for heavier riders is the air pressure, measured in PSI, that supports a rider’s total weight without letting the tire collapse or bounce. Heavier riders usually need more PSI than lighter riders on the same tire. The best number still depends on tire width, rim design, and surface.
- Total system weight and wheel load: rider, bike, gear, and cargo all count.
- Tire width and air volume: wider tires carry the same load at lower PSI.
- Rim, casing, and surface: these set the safe limits and the best feel.
PSI is the unit that measures how hard the air pushes inside the tire. One bar equals about 14.5 PSI. Most US pumps show PSI, but many tire labels also show bar or kPa.
Rider weight changes how much the tire squashes under load. This squash is called tire deflection. Too much deflection hurts handling and can damage the rim. If you want the basics, read how bike tires work.
Why Rider Weight Matters When Setting PSI
More weight means more deflection. If pressure is too low, the tire can pinch the tube against the rim edge. That is a pinch flat, and it often shows up as two small holes in the tube.
Correct pressure also balances rolling resistance, comfort, and grip. Rolling resistance is the energy lost as the tire flexes while it rolls. The front and rear tires may need different PSI because they carry different loads.
What Happens When Tire Pressure Is Too Low or Too High?
Low PSI can cause tire squirm, rim strikes, pinch flats, and vague handling. The tire feels like it rolls under you in a corner.
Too much PSI makes the ride harsh and can reduce grip, especially on rough roads and gravel. Learn the full list of effects in our guide on what happens if bike tire pressure is wrong. The goal is pressure that supports you without passing tire or rim limits.
How to Find the Best Bike Tire Pressure for Your Weight
Finding your number takes four short steps. First, add up your total riding load. Second, check the limits on the tire and rim. Third, run a calculator or the formula below. Fourth, test and adjust in small steps.
- Include body weight, clothing, backpack, cargo, and accessories.
- Read the tire sidewall and the rim label before you inflate.
- Treat any calculator result as a starting point.
For a wider overview, see how to find the correct bike tire pressure.
Use Rider Weight and Total System Weight
Total system weight is the rider plus the bike, gear, and cargo. Here is the quick math:
System weight = rider + clothing + bike + bag and cargo
Example: a 235 lb rider, 25 lb bike, and 10 lb of gear equals 270 lb. In kilograms, that is about 122 kg. Heavier loads need more support, but tire volume and casing change the final PSI.
Measure Front and Rear Wheel Loads
Weigh each wheel for the best accuracy. Put one bathroom scale under each wheel and keep the bike level. Sit in your normal riding position while a helper reads both scales.
Write down both numbers. Many road bikes carry about 40 percent of the load on the front and 60 percent on the rear. Gravel bikes are often near 42/58, and mountain bikes near 45/55. Pay special attention to the rear tire if you haul cargo.
Use a Bike Tire Pressure Calculator
A good calculator asks for rider weight, bike weight, tire width, wheel size, and surface. Some also ask for inner rim width. Always get a separate front and rear result.
Then stay inside every manufacturer limit. Our how much air should I put in my bike guide shows how to read those limits.
A Simple PSI Formula Using Total System Weight
Use this three-step method when you have a trusted reference pressure from the tire maker.
- Find your rear wheel load: rear load = system weight x rear share (for example, 0.60 on a road or gravel bike).
- Scale the reference: rear PSI = reference PSI x (your rear load / reference rear load).
- Lower the front: front PSI = rear PSI x 0.90 for road and gravel, or x 0.93 for mountain bikes.
Example: a tire maker lists 30 PSI for a 160 lb system on a 40 mm gravel tire. That is a 96 lb rear load. At 260 lb, your rear load is 156 lb. So rear PSI is 30 x (156 / 96), or about 49 PSI. Front is about 44 PSI.
Safety note: This is a rough estimate. Wider tires often need less of an increase than the math shows. Never go past the tire, rim, or rim tape maximum.
Bike Tire Pressure Chart for Heavier Riders
This chart gives a fast starting range for the rear tire with tubeless setups on smooth to average surfaces. Set the front about 10 percent lower. All figures are estimates, not universal recommendations.
| Total system weight | Approx. rider weight | Road 28 mm | All-road 32 mm | Gravel 40 mm | MTB 2.4 in |
|---|---|---|---|---|---|
| 200 lb (91 kg) | 175 lb | 58 to 64 PSI | 46 to 52 PSI | 36 to 42 PSI | 21 to 24 PSI |
| 250 lb (113 kg) | 225 lb | 66 to 74 PSI | 54 to 60 PSI | 43 to 49 PSI | 25 to 28 PSI |
| 300 lb (136 kg) | 275 lb | 74 to 82 PSI | 61 to 68 PSI | 50 to 56 PSI | 29 to 32 PSI |
| 350 lb (159 kg) | 325 lb | 82 to 90 PSI | 68 to 75 PSI | 56 to 62 PSI | 33 to 36 PSI |
Wider tires can often run lower PSI because they hold more air. Tubeless setups may allow even less. The safe minimum still depends on the tire and rim.
How much PSI does a 250 lb rider need? On a 28 mm road tire, the rear often starts near 66 to 74 PSI.
Example PSI Ranges by Tire Width
Use this table to plan, not to prescribe. Real pressure must account for system weight, load split, rim and tire limits, casing, and surface.
| Tire type and width | Heavier-rider pressure guidance |
|---|---|
| Road tires, 25 to 28 mm | Often need higher PSI; check tire and rim limits carefully |
| Road or all-road tires, 30 to 35 mm | Can often run lower PSI than narrow road tires |
| Gravel tires, 38 to 50 mm | Use lower pressure when tire volume and rim allow |
| Mountain bike tires, 2.2 to 2.6 in | Often run much lower PSI than road tires |
| E-bike tires, 2.0 to 2.6 in | Account for bike weight, motor assist, cargo, and tire rating |
Never publish or follow one PSI range for every heavier rider. Tubeless tires may allow lower pressure than tube setups, but the safe floor depends on the tire and rim design.
How to Adjust PSI for Different Rider Weights
Start with the tire maker’s chart or a trusted calculator for your tire type. If the tire feels unstable or the rim hits bumps, add 2 to 3 PSI.
If the ride feels harsh or grip is poor, remove 1 to 2 PSI at a time. Stop when the tire feels stable. Our guide to how often to inflate bike tires helps you keep that number steady.
Short answer: There is no single PSI for all heavier riders. Tire width, wheel load, and tire construction decide the correct setting.
How Tire Width Affects Pressure for Heavy Riders
Wider tires hold more air, so they can carry the same load at lower pressure. Narrow tires need higher PSI to avoid too much deflection. Width alone does not set pressure, though. The real inflated width and rim fit also matter.
Not sure what the numbers mean? Read bike tire width explained and what the numbers on bike tires mean.
Narrow Road Tires vs. Wide Comfort Tires
Narrow road tires feel quick on smooth pavement but pass more vibration to your hands. Wider tires add comfort and grip on rough roads when they are inflated well.
Before you switch, check frame, fork, and brake clearance. Our guides on using wider tires and how much wider a tire can fit walk you through it. Not sure of a size like 700×28? See what 700×28 means.
How Rim Width Affects Tire Pressure
Inner rim width is the gap between the inside walls of the rim. It changes tire shape and real inflated width. A wider rim can make a tire sit rounder and feel more stable.
Do not assume a wider rim always means lower PSI. Casing and load still matter. Use this table to check common matches, then confirm with the rim and tire maker.
| Inner rim width | Common tire width range | Notes |
|---|---|---|
| 19 mm | 25 to 32 mm | Older road rims; often hooked |
| 21 to 23 mm | 28 to 40 mm | Modern road and all-road rims |
| 25 mm | 30 to 45 mm | Wide road and gravel rims |
| 30 mm | 2.2 to 2.6 in | Common trail mountain bike rims |
Run through bike tire size compatibility and ETRTO sizing for more detail.
Hookless vs. Hooked Rims Explained
A hooked rim has small lips that hold the tire bead in place. A hookless rim has straight walls with no lips. Hookless rims are lighter and often tubeless only.
Most hookless road rims cap tire pressure at 72.5 PSI (5 bar). Heavier riders on narrow 25 mm tires can bump into that limit. A 28 to 32 mm tire is often the smarter choice. Always follow the rim label.
Best Tire Pressure for Different Types of Bikes
Match PSI to bike type, tire width, terrain, and total load. Road, gravel, mountain, commuter, and e-bike tires each need their own plan. The permitted pressure range on the tire is a firm safety line.
Not sure which tire suits your riding? Start with how to choose bike tires.
Road Bike Tire Pressure for Heavier Riders
Smooth pavement rewards balance. Lower pressure can cut vibration, while higher pressure cuts sag. Wider road tires often give a comfortable ride at lower PSI.
Do not inflate to the sidewall maximum by default. The max is a limit, not a target. For comfort ideas, see how to choose comfortable bike tires.
Mountain Bike Tire Pressure for Heavy Riders
Base your pressure on tire width, casing strength, wheel load, terrain, and riding style. Too little air can cause rim strikes, casing damage, and burping in tubeless setups. Burping is when air escapes at the bead.
Too much air cuts cornering grip on loose dirt. In Pacific Northwest mud, a bit less pressure and an open tread help. In Southwestern loose rocks, add 2 to 3 PSI to protect the rim.
Gravel Bike Tire Pressure for Heavier Riders
Gravel tires need enough support for rocks, washboard, and loose surfaces. Wider tires and tubeless setups can often run lower pressure, if the rim allows.
Adjust as the surface changes, but keep enough air to avoid rim hits. See how to choose tires for gravel roads and tires for mixed surfaces.
Commuter and E-Bike Tire Pressure
Count racks, panniers, locks, and cargo in your total load. E-bike torque and quick starts also stress the tire grip and casing.
Many e-bikes list a maximum gross weight, often in the 300 to 400 lb range, so check yours. Follow the tire load rating and pressure limits, especially on cargo e-bikes. See tires for daily commuting and how to choose tires for a commuter bike.
Weather and Terrain Adjustments
Does wet weather change PSI? Yes, a little. In rain, drop pressure by 2 to 3 PSI on road or gravel, and 1 to 2 PSI on a mountain bike. Stay above the point where the rim hits.
Cold air also lowers pressure. Check before every ride. For tread picks, read how to choose bike tires for wet weather and tires for rough roads.
How Tire Construction Affects Pressure and Durability
Tire design affects how well it supports a heavier rider. Casing strength, rubber compound, and puncture protection shape handling and ride feel. Pressure must suit the whole tire and wheel system, not just the tread.
Curious about the materials? See what bike tires are made of and what makes a good bike tire.
Casing TPI and Sidewall Strength
TPI means threads per inch. It describes how dense the casing threads are. Low TPI casings are usually tougher. High TPI casings are often lighter and more supple.
Higher TPI is not always stronger. Thread material and ply design matter too. Heavier riders often do well with a robust casing. Learn more in what a bike tire casing is.
Puncture Belts and Flat Protection
A puncture belt is a strip of tough material under the tread. It helps stop glass, thorns, and debris. It may add weight or change the feel.
Even a belted tire needs correct PSI to avoid pinch flats. Compare options in how to choose puncture-resistant tires and best tires for puncture protection.
Tread Pattern, Rubber Compound, and Cornering Grip
Smooth or light tread works well on pavement. Deeper tread helps on loose ground. Durometer measures how soft the rubber is. A lower number means softer, grippier rubber that wears faster.
Correct PSI lets the tread meet the ground as designed. See why tread patterns differ and what rubber compound means. For tread depth, check how much tread a bike tire should have.
Tubeless vs. Inner-Tube Tires for Heavier Riders
Both systems work when the tire, rim, and pressure fit your load. Tubeless setups cut pinch flats and seal small holes. Tubes are simpler to fix but can pinch when pressure runs low.
Benefits of Tubeless Tires
Tubeless sealant is a liquid inside the tire that plugs small punctures as you ride. Tubeless tires may also allow lower pressure for grip and comfort.
The tire and rim must be tubeless compatible. Sealant also dries out, so check it every few months.
When Inner Tubes May Be the Better Choice
Tubes are cheap and easy to swap on the road. Right pressure keeps pinch flats and rim damage down.
Carry a spare tube, tire levers, and a pump. For common leaks, read why bike tires lose air.
How to Set Up Tubeless Tires Safely
- Confirm the tire, rim, and rim tape are tubeless ready.
- Fit the correct valve and add the sealant amount the maker lists.
- Seat the tire with a suitable pump or inflator, following the maker’s steps.
- Check for leaks, confirm the bead is seated, then set a safe riding pressure.
How to Inflate Bike Tires Correctly
Use a floor pump with a clear gauge or a calibrated digital gauge. Check pressure when tires are cool, and before each ride. Recheck after you swap tires or add cargo.
Step-by-Step Tire Inflation Guide
- Read the tire sidewall and rim pressure limits.
- Identify your valve type (Presta or Schrader) and use the right pump head.
- Measure current PSI, then add air in small bursts.
- Check front and rear pressure separately.
- Inspect the bead and casing before you ride.
For more detail, see how to inflate a bike tire correctly and how to check bike tire pressure.
How Often Should Heavier Riders Check Tire Pressure?
Check before each ride if you ride often, especially on road or tubeless setups. Look for pressure loss after a long ride, a puncture, or a big temperature change.
Use inflation time to look for cuts, bulges, and embedded debris. See how often you should check bike tires.
How to Test and Fine-Tune Tire Pressure
Begin with a safe baseline from the maker and your wheel load. Test on a familiar route and change one thing at a time. Record PSI, weather, surface, comfort, grip, and any instability.
Signs Your Tire Pressure Is Too Low
- The tire feels vague or squirmy in turns.
- You feel or hear the rim hit bumps.
- Inner tubes pinch flat, or tubeless tires burp air.
Signs Your Tire Pressure Is Too High
- The ride feels harsh on rough pavement or gravel.
- The tire skips or loses grip over uneven ground.
- Vibration rises with no gain in speed or control.
Overdoing it is risky. Learn more about overinflating a bike tire.
Simple Testing Standards for Expert Reviews
Use the same route, rider load, and tire setup each time. Read pressure with the same gauge under similar conditions. Compare comfort, grip, flats, and rolling feel, and do not claim results you did not measure.
Our editorial policy explains how we hold ourselves to these same rules.
Common Tire Pressure Mistakes Heavier Riders Should Avoid
Then do not copy another rider’s PSI without matching their tire size and load. Do not break rim or tire limits to make up for a tire that is too narrow. Do not assume maximum pressure gives the best speed or grip.
Is 100 PSI too high for a bike tire? It can be. Many wide tires and hookless rims cap far lower, so always follow the lowest listed limit.
Using Maximum Sidewall PSI as the Default
Maximum PSI is a limit, not a goal. The right number depends on load, tire volume, casing, and terrain. Confirm that both the tire and rim maker allow your chosen pressure.
Ignoring Rear Wheel Load and Tire Wear
The rear tire often carries more weight, but the split varies by bike and posture. Cuts, cracks, uneven wear, or exposed threads mean it is time for a new tire. Adding air will not fix a damaged tire.
See how often bike tires should be replaced.
How to Choose the Best Bike Tires for Heavier Riders
Pick the right load rating, a compatible rim width, and the correct size. Compare casing durability, puncture protection, rolling resistance, and grip. Match tread and compound to your usual roads or trails.
Check fit first with will this bike tire fit my wheel and how to measure bike tire size. Decode labels with how to read bike tire size.
Features to Look for in a Durable Tire
- Reinforced casings and sidewalls hold up under demanding use.
- Puncture belts help on debris-covered commuter roads.
- A stated load capacity or maker guidance suits your setup.
See how to choose durable bike tires.
Choosing Between Speed, Comfort, and Puncture Protection
Fast tires suit smooth roads but may offer less protection. Wider tires add comfort on rough surfaces when your bike has room. A balanced tire often works best for daily commuters and mixed-surface riders.
Dig into puncture protection vs. rolling resistance, how tires affect comfort, and how tires affect grip. Shopping for comfort? See the best bike tires for comfort.
Frequently Asked Questions About Bike Tire Pressure for Heavier Riders
1. What is the best bike tire pressure for a heavier rider?
There is no single ideal PSI. Tire width, wheel load, casing, rim limits, and surface all play a part. Start with maker guidance or a good calculator, then test in small steps.
2. Should heavier riders use higher bike tire pressure?
Often yes, on the same tire and setup. A wider tire may carry you at lower PSI than a narrow one. Never set pressure by rider weight alone.
3. Are tubeless tires better for heavier cyclists?
Can cut pinch flats and seal small holes. They may also give more grip at lower pressure. They are not automatically better, because setup and upkeep matter.
4. Can low tire pressure damage a bike rim?
Yes. A hard hit can dent or crack a rim when the tire bottoms out. Add air in small steps if you feel rim strikes, and inspect the wheel.
5. Does a wider bike tire need less PSI?
Usually, for the same load, because it holds more air. Real width and rim fit can change the result. Follow the limits on your tire and rim.
6. How often should heavier riders inflate bike tires?
Check before every ride. Top up when you fall below your target range. If pressure drops fast, look for a leak.
7. How do I know if my bike tires are worn out?
Look for a flat tread, visible casing, deep cuts, cracks, or bulges. Check any wear marks the tire has. Replace damaged tires right away, even if they still hold air.
8. Can I use the same PSI for both bike tires?
You can, but it may not be ideal. Front and rear loads differ, so the rear usually needs more. Measure each wheel and set them apart when you can.
Conclusion: Find the Right PSI for Your Riding Weight
The best bike tyre pressure for heavier riders depends on total system weight, tire width, wheel load, casing, and conditions. Right pressure improves comfort, rolling speed, cornering grip, and flat protection. Stay within tire and rim limits, and test in small steps.
Here are the key takeaways:
- Weigh your full load, then split it between the front and rear wheels.
- Use wider tires and tubeless setups when your bike and rims allow.
- Treat every chart and formula as a starting point.
Ready to dial in your exact setup? Use the Free Bike Tire Pressure Calculator and Tire Finder Tool at TheBikeTires.com. Enter your weight, tire width, and terrain to get a front and rear PSI in seconds. Meet the team behind the advice on our about page.

Mohidul Islam is a leading cycling technology specialist and bike tire consultant with over 15 years of hands-on experience in the bicycle industry. He holds a Bachelor of Science in Mechanical Engineering from Penn State University, where he focused heavily on material science, tread mechanics, and rubber compound performance. Over the past decade and a half, Alex has conducted extensive field testing, tubeless setup evaluations, and tire pressure modeling for road, mountain, and e-bikes. His practical insights and data-driven approach help cyclists of all levels optimize grip, speed, and durability on every ride.



