
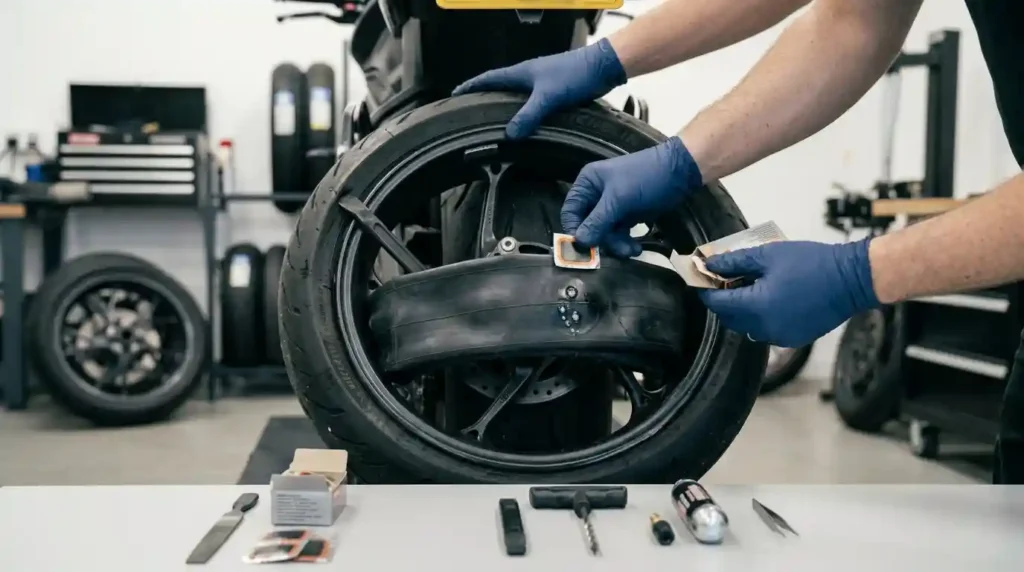
A flat tire can show up anywhere. It might happen on a city bike lane covered in glass, a gravel road in Colorado, or a desert trail packed with thorns. The good news is that many small punctures are easy to fix at home with a patch kit and a few basic tools.
If you want to learn how to repair a bike inner tube, this guide walks you through it. You will learn how to find the hole, prepare the tube, apply a patch, and check the repair. We also cover correct tire pressure, safe reinstallation, and ways to prevent future flats.
US riders deal with more than flats. Low pressure hurts cornering traction. Wrong PSI wears tread out early. A damaged tire is also slower and less safe.
The right tire, the right tube, and the right pressure shape how much bike tires affect grip, speed, and comfort. A good repair keeps all three on track.
You do not need special skills. With a little care, even a first-time repair can hold for thousands of miles.
Grab your tools and let us get started.
Can You Repair a Bike Inner Tube?
Short answer: Yes. You can often repair a small puncture with a patch kit made for your inner tube.
- Large tears, damaged valve stems, and badly worn tubes usually need replacement.
- Always inspect the tire and rim before you reinstall a repaired tube.
- That check stops the next flat before it starts.
When Should You Patch or Replace an Inner Tube?
| Situation | Best choice |
|---|---|
| Small hole, rubber around it is healthy | Patch it |
| Large split | Replace it |
| Torn valve | Replace it |
| Several damaged areas | Replace it |
If you replace the tube, match its diameter, width range, and valve type to your wheel and tire. Learn how to read bike tire size from the sidewall to pick the right one.
How Long Does an Inner Tube Repair Take?
A simple patch job often takes 10 to 20 minutes once your tools are ready.
Finding a slow leak or removing a stubborn tire can take longer. Follow the kit instructions for surface prep and curing time. Do not rush these steps, because a rushed patch is the most common reason for a second flat.
Practice at home once. It builds the muscle memory you need when you are on a roadside in the rain.
What Tools Do You Need to Repair a Bike Inner Tube?
Gather your tools before you remove the wheel. That way you can finish without stopping to hunt for items.
Use a patch kit that suits your tube material and has a clear process. Carry a spare tube and a compact pump for roadside emergencies.
Essential Tools for Patching an Inner Tube
| Tool | What it does |
|---|---|
| Tire levers | Lift the tire bead off the rim |
| Patch kit | Holds patches and, for traditional kits, vulcanizing solution |
| Pump and gauge | Inflate the tire to a safe PSI after the repair |
| Chalk or pen | Marks the hole so you can find it again |
A tire bead is the edge of the tire that locks onto the rim. Levers protect it from damage.
There are two common patch types. Vulcanizing patches use a glue-like solution that bonds the patch to the tube. Self-adhesive patches stick on right away and are handy on the road.
Do You Need a Spare Tube as Well?
A spare tube is faster than patching during a ride. Many riders swap the tube on the trail and patch the old one at home.
A patch kit is useful when you want to save money or cannot carry several spares. Check that any spare fits your wheel diameter, tire width, and valve opening. Tube sizes often read like 700×28 to 32 on the box. Our guide to what 700×28 means explains how to read it. For help, see what bike tire size you need and how to measure bike tire size.
How to Repair a Bike Inner Tube in 6 Easy Steps
Quick steps:
- Remove the wheel and take out the inner tube.
- Inflate the tube slightly to find the hole.
- Mark the puncture and let the tube deflate.
- Clean and prepare the damaged area.
- Apply the patch according to the kit instructions.
- Check the repair, reinstall the tube, and inflate the tire.
Work in good light on a clean surface. A towel on the ground keeps small parts from rolling away.
Take your time with each step. A calm repair of 15 minutes beats a rushed one that fails after a mile.
Remove the Wheel and Inner Tube (Step 1)
Shift to an easier gear before you take off a rear wheel. This makes the wheel slide out more easily.
Release the brake or axle system as your bike maker advises. On an e-bike, switch off the system first. Lift one bead with a lever and pull the tube out without damaging it further.
Find the Puncture (Step 2)
Add a little air to the tube. Listen for a hiss or feel for air on your lips or cheek.
If the hole is too small to hear, use soapy water. Bubbles show the leak. Mark the hole with chalk or a pen so you can find it after the tube goes flat.
If you find one hole, keep looking. Pinch flats and thorn hits often leave more than one.
Prepare the Damaged Area (Step 3)
Let the tube deflate fully before you work on it.
Clean and dry the area around the hole. Lightly roughen the rubber if your patch kit tells you to. A clean, dry, slightly rough surface gives the patch something to grip.
Most kits include a small piece of sandpaper or a scuffer for this job. Sand only the patch area, and wipe away the dust.
Apply the Patch (Step 4)
For a vulcanizing patch, spread the solution thinly and wait as the maker directs. It should turn tacky before you add the patch.
Press the patch firmly over the hole and smooth the edges. For a self-adhesive patch, follow that product’s cleaning and application steps. Hold pressure for a full minute.
Make sure the patch fully covers the hole with a margin of about half an inch on every side.
Check the Repair (Step 5)
Let the patch cure for the time stated in the kit. Then inflate the tube slightly and check for air around the patch.
If it leaks or lifts at the edges, repeat the repair with a suitable kit or replace the tube. A failed patch is easier to fix now than on the road.
Some riders let a patched tube rest for a few minutes under light air pressure. If it holds, it is ready for the tire.
Reinstall the Tube and Tire (Step 6)
Check the inside of the tire for glass, thorns, or other sharp bits. Use a cloth to help you feel for them.
Add a little air to the tube before you fit it. This helps prevent twists and trapped rubber. Refit the bead, confirm the tube is not pinched, and inflate in stages. See how to inflate a bike tire correctly for pump tips.
How to Find Different Types of Inner Tube Damage
The shape and spot of a hole point to its cause. Match the damaged area of the tube to the tire and rim before you repair it.
Fix the underlying problem to lower the risk of another puncture. If flats keep returning, read why bike tires lose air.
| Damage | Likely cause | Action |
|---|---|---|
| Single hole, tire side | Glass, thorn, or nail | Remove the object |
| Two nearby holes | Pinch flat | Check PSI and tire width |
| Hole near the valve | Valve stem or core issue | Replace the tube or valve part |
| Hole on the rim side | Rim tape or spoke hole | Fix the rim first |
Single-Hole Punctures From Glass or Thorns
A small hole on the tire-facing side often points to a sharp object in the tread.
Check the same spot inside the tire for glass, wire, or thorns. Remove the object safely before you fit the tube. Then look for deeper damage to the casing, which is the fabric body of the tire. Learn more about the bike tire casing.
Pinch Flats From Low Tire Pressure
Two nearby holes are often called a snakebite puncture. They usually point to a pinch flat.
A pinch flat happens when the tire squashes against the rim after a pothole or hard hit. Check your tire pressure (PSI) and ask if the tire width suits your load and surface. Read what happens if bike tire pressure is too high to see the other side of the problem.
Valve Damage and Rim-Side Holes
A leak near the valve may come from a bad stem or a loose core, depending on the valve type.
A hole on the rim side may point to worn rim tape or an exposed spoke hole. Repair the cause before you fit a new tube. Otherwise the new tube will fail the same way.
A small strip of tape can cover a sharp spoke end as a short-term fix. Replace the rim tape as soon as you can.
How to Repair a Slow Leak in a Bike Inner Tube
Slow leaks are hard to hear, but careful checking finds tiny holes.
Inflate the tube slightly and check small sections at a time. Use soapy water to spot bubbles around the tube, valve, or suspected hole. Check how often to check bike tires to catch slow leaks early.
How to Use Soapy Water to Find a Leak
- Mix a little dish soap with water.
- Brush it on the suspect area.
- Watch for bubbles that keep forming.
Dry the tube before you apply a patch. Follow the kit instructions. Use only a little soap, since too many bubbles can hide the real source.
If you cannot find a leak on the tube, test the valve and the rim tape next. Slow leaks often start there.
Checking a Presta or Schrader Valve
A Presta valve is thin and has a small tip you open and close. A Schrader valve looks like a car valve.
- For Presta, check the tip and stem for damage and make sure it is closed.
- For Schrader, inspect the core and base for leaks.
- Replace damaged or mismatched valve parts instead of relying on a patch.
What Tire Pressure Should You Use After an Inner Tube Repair?
Correct pressure helps the tire carry the rider and cuts the risk of pinch flats. Low pressure can cause rim strikes. Too much reduces comfort and grip.
Choose PSI based on total load, tire width, terrain, and the tire and rim limits. See how to find the correct bike tire pressure for more detail.
How to Choose the Correct PSI for Your Weight
Use these steps for a solid starting point.
- Add your weights. Total system weight = rider + bike + cargo. A 170 lb rider on a 30 lb bike with 10 lb of gear is 210 lb.
- Split the load. The rear wheel carries about 60 percent. The front carries about 40 percent.
- Pick a base PSI from the table below.
- Adjust for conditions. Take off 3 to 5 PSI for wet roads or loose gravel. Add 3 to 5 PSI when you use inner tubes.
- Stay inside the limits printed on the tire and rim.
| System weight | 28 mm road (1.1 in) | 40 mm gravel (1.6 in) | 2.3 in MTB |
|---|---|---|---|
| 140 lb (64 kg) | 60 to 70 PSI | 30 to 36 PSI | 20 to 24 PSI |
| 170 lb (77 kg) | 68 to 78 PSI | 34 to 40 PSI | 22 to 26 PSI |
| 200 lb (91 kg) | 75 to 85 PSI | 38 to 45 PSI | 25 to 29 PSI |
| 230 lb (104 kg) | 82 to 92 PSI | 42 to 50 PSI | 27 to 32 PSI |
Note: These are tubeless starting points. See how much air to put in bike tires. One bar equals 14.5 PSI.
Does Tire Width Affect Inner Tube Punctures?
Yes. Wider tires hold more air, so they can run lower pressure for the same load. Narrow road tires usually need higher PSI than gravel or mountain bike tires.
Check rim width compatibility and make sure the tire clears the frame and fork. Learn what tire width to choose and read bike tire width explained.
How Often Should You Check Tire Pressure?
Check before long rides and at least once a week if you ride often. Check more often for daily commuting or long trips.
Use a gauge, not your thumb. Tires lose air slowly even when they are fine. A few PSI per week is normal, and more is a sign to look for a leak. Learn how often to inflate bike tires and how to check bike tire pressure.
Common Mistakes to Avoid When Patching an Inner Tube
A poor patch bond can leak soon after you inflate the tube. Fitting a tube without checking the tire can lead to another puncture.
Using an incompatible tube or going over pressure limits can make the setup unsafe. Avoid these three errors in particular.
Applying a Patch to a Wet or Dirty Surface
Dirt and moisture weaken the bond between the patch and the tube.
Clean and dry the repair area first. Follow the kit steps for roughening the rubber and using vulcanizing solution. Do not touch the glued area with your fingers. Oils from your skin can weaken the bond.
Forgetting to Check the Inside of the Tire
A shard of glass or a thorn left in the tread can puncture the repaired tube again.
Inspect the tire closely and use a cloth to find sharp objects. If the hole was on the rim side, check the rim tape and spoke holes too. See how much tread a bike tire should have to judge tire wear.
Trapping the Tube Under the Tire Bead
A trapped tube can split during inflation.
Check both sides of the tire before you add full pressure. Inflate in stages and make sure the bead sits evenly around the rim. Most riders look for the thin line molded on the tire sidewall. It should sit an even distance from the rim all the way around.
Should You Repair an Inner Tube or Switch to Tubeless Tires?
Inner tubes are simple to repair and replace. That makes them a practical choice for many riders.
Tubeless tires use sealant to close many small holes and can cut pinch flats. The best setup depends on your wheels, upkeep habits, riding, and budget.
Inner Tubes vs. Tubeless Sealant
| Feature | Inner tube | Tubeless |
|---|---|---|
| Small tread holes | Needs a patch or new tube | Often seals itself |
| Pinch flats | More likely at low PSI | Much less likely |
| Upkeep | Simple and cheap | Sealant top-ups |
Tubeless sealant is a liquid latex that plugs small holes as air escapes. Larger cuts may need plugs or a new tire. Both systems can puncture, so carry repair tools for your setup.
Can You Patch an Inner Tube Used Inside a Tubeless Tire?
Yes, if the tube is suitable for patching and still in good shape.
Remove the puncture source and check the inside of the tire before you reinstall the tube. Follow the tire and wheel maker’s advice when you switch between tubeless and tube setups. Check tire size compatibility before you change.
How to Choose Tires That Help Prevent Future Punctures
Pick protection based on your roads, riding style, and common hazards. Weigh the casing, tread pattern, puncture belts, and rolling resistance together.
Check rim width, tire clearance, and any e-bike load or speed needs. Start with how to choose puncture resistant bike tires and browse the best bike tires for puncture protection.
What Is a Puncture Protection Belt?
A puncture belt is a protective layer under the tread that helps block sharp objects.
Materials and builds vary between models. More protection can add weight or change ride feel, so compare the whole tire. Explore puncture protection vs rolling resistance to weigh the trade-off.
Does Casing TPI Affect Puncture Resistance?
TPI means threads per inch. It shows how dense the casing weave is.
Higher TPI may feel more supple. Lower TPI can use thicker threads. TPI alone does not set puncture resistance, since casing layers and tread protection also matter. The rubber matters too. Durometer is a rubber hardness scale. See the bike tire rubber compound guide.
Which Tires Suit Road, Gravel, and E-Bike Riders?
- Road riders want low rolling resistance with enough protection for their routes.
- Gravel riders need casing strength and a tread pattern for loose or mixed surfaces. See bike tires for gravel roads.
- E-bike riders need tires built for the bike’s load and speed, including repeated acceleration from e-bike torque.
In Pacific Northwest mud, a slightly lower PSI helps traction. On Southwestern loose rock, add a little pressure and pick a strong casing. For rain, see wet weather bike tires.
How Do Experts Test Inner Tubes and Tire Puncture Protection?
Controlled tests help compare puncture resistance, but results depend on the method.
Experts record tire size, rim width, PSI, load, and setup. They weigh puncture resistance next to rolling resistance, durability, and grip. See our testing process, read our editorial policy, and learn about TheBikeTires.
What Should a Reliable Tire Test Measure?
- Puncture resistance: The force needed to get through the tire under a set method.
- Rolling resistance: The energy lost as the tire rolls under controlled conditions.
- Durability and grip: Wear, casing damage, and handling on the surfaces the tire is built for.
Why Test Conditions Matter
Pressure, temperature, load, and tire build all change results. Use the same method to compare models.
Good testers cite recognized methods. They never claim that a tire is puncture proof. Learn how bike tires work to read test data with confidence.
Frequently Asked Questions About Repairing a Bike Inner Tube
1. Can you repair a bike inner tube without replacing it?
Yes. A small puncture can often be fixed with a suitable patch kit.
Replace tubes with large tears, damaged valve stems, or wide damage. Always check that the patch holds air before you reinstall the tube.
2. How long should a bike tube patch last?
A well-applied patch can last the rest of the tube’s useful life. The result depends on the patch type, surface prep, tube condition, and fitting.
Check for leaks after you repair the tube. If the same tube keeps failing, the rubber may be worn thin.
3. Can I use super glue to patch a bike inner tube?
Ordinary super glue is not a reliable stand-in for a patch kit made for inner tubes. It can dry hard and crack as the tube flexes.
Use a compatible self-adhesive or vulcanizing patch. Follow the product’s steps for a secure bond.
4. How do I know if an inner tube is beyond repair?
Large splits, torn valve stems, or wide damage usually call for a new tube. A small puncture may be repairable if the rubber nearby is sound.
When in doubt, use a compatible replacement tube rather than risk a failed repair.
5. What PSI should I use after patching a bike tube?
There is no single PSI for every bike. Weigh rider and bike weight, tire width, surface, and the tire and rim limits.
Use a reliable gauge and stay inside the maker’s range. Read about overinflated bike tires to stay in a safe zone.
6. Is patching a tube better than using a spare?
A spare tube is often faster during a roadside repair. Patching saves money and cuts waste when the tube is otherwise sound.
Carry both on long rides or when repair supplies are hard to find. Daily riders can see commuter bike tires.
7. Can a patched tube cause another flat?
A sound patch should hold air. Another flat may come from a poor bond, a trapped tube, or debris left in the tire.
Inspect the whole tire and rim before you reinstall the tube. Also check how often bike tires should be replaced.
8. Does rim width affect inner tube compatibility?
Tube and tire fit depends on wheel diameter, tire width, and the rim and tire specs. Rim width affects tire shape and must fall inside the tire maker’s approved range.
Check the whole wheel setup instead of picking a tube by diameter alone. Hookless rims often cap pressure near 72.5 PSI (5 bar). Hooked rims have a bead lip and usually allow higher limits.
| Inner rim width | Typical tire width |
|---|---|
| 17 mm | 25 to 35 mm |
| 19 mm | 28 to 42 mm |
| 21 mm | 32 to 50 mm |
| 25 mm | 40 to 60 mm (1.6 to 2.4 in) |
Treat these as typical ranges and confirm with the maker. See whether a tire will fit your wheel and learn about ETRTO tire sizes.
Conclusion: Repair Your Inner Tube and Prevent Future Flats
You now know how to repair a bike inner tube. Keep these points in mind:
- Patch with care. Find the puncture, prepare the area, and use a compatible patch.
- Inspect before reinstalling. Check the tire, rim tape, valve, and bead.
- Prevent repeats. Keep your PSI right and pick suitable tires. Start with how to choose bike tires, or see the best bike tires for long rides.
Find Your Ideal Tire Pressure
Take the guesswork out of your tire setup. Visit TheBikeTires.com and use the Free Bike Tire Pressure Calculator and Tire Finder Tool. Find a smart starting PSI and explore tire options for your bike, riding style, and road conditions.

Mohidul Islam is a leading cycling technology specialist and bike tire consultant with over 15 years of hands-on experience in the bicycle industry. He holds a Bachelor of Science in Mechanical Engineering from Penn State University, where he focused heavily on material science, tread mechanics, and rubber compound performance. Over the past decade and a half, Alex has conducted extensive field testing, tubeless setup evaluations, and tire pressure modeling for road, mountain, and e-bikes. His practical insights and data-driven approach help cyclists of all levels optimize grip, speed, and durability on every ride.



