
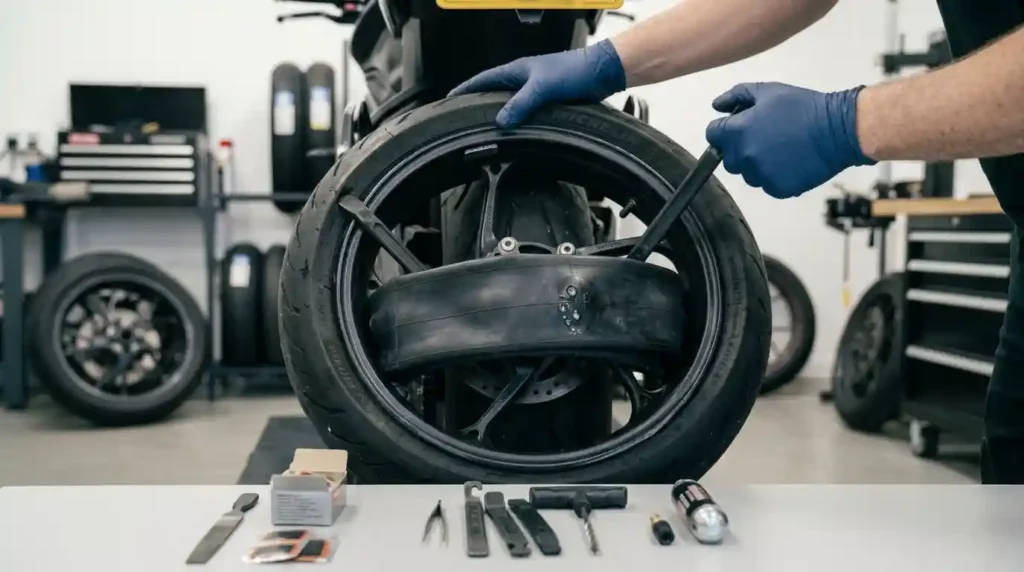
You fix a flat, but the new tube fails within minutes. Or you pull off a tire to check a leak and slice the tube with a lever. Both mistakes are common, and both are easy to avoid.
If you want to know how to remove a bike tyre without damaging the tube, this guide shows you a safe, simple method. You will see the tools you need, the exact steps, common mistakes, and tips for different bike types. We also cover reinstalling the tire and setting the right tire pressure (PSI).
US riders face many tire problems. Flats top the list. Poor cornering traction, soft or overinflated tires, and early tread wear follow close behind. Careless tire removal adds to the trouble by creating pinched tubes and bead damage.
Good tire handling pays off in safety, speed, and comfort. See how much bike tires affect grip, speed, and comfort to learn why.
With the right method, removing a tire is quick and safe. Most riders finish in about five minutes once they know the steps.
You do not need strong hands or special skills. You only need patience, a little technique, and the right tools. Let us start.
Why You Should Remove a Bike Tire Without Damaging the Tube
A tire lever can catch the inner tube and leave a small hole or tear. That hole may not show until you inflate the tire.
Careful removal protects the tire bead, the rim tape, and the tube for future rides. The tire bead is the edge of the tire that locks onto the rim.
Different bikes need different handling. A rider on a commuter bike may change a tire in a hurry before work, while a mountain biker may face stiff, tubeless-ready beads on the trail. Road bikes, gravel bikes, mountain bikes, and e-bikes all fit tires a little differently. Narrow road tires can be tight. E-bike wheels are heavy and may have motor cables. Daily riders may also like our guide to commuter bike tires.
Many flats start at home, not on the road. A tube nicked by a lever during a tire change often fails on the first ride. That is why careful removal matters as much as the repair itself.
Taking an extra minute now can save you a roadside repair later. If flats keep returning, read why bike tires lose air.
What You Need Before Removing a Bike Tire
Gather your tools first. Set up in good light on a clean, flat surface. A towel on the ground keeps small parts from rolling away.
Check whether your bike uses an inner tube or a tubeless tire. If you are not sure, look for a tubeless label on the rim and tire. The steps are close, but tubeless tires release tubeless sealant when you break the bead.
Essential Tools for Safe Tire Removal
| Tool | Why it helps |
|---|---|
| Plastic tire levers | Smooth levers lower the risk of tube and rim damage |
| Pump and pressure gauge | Check PSI before you start and reinflate after |
| Patch kit or spare tube | Ready if you find a puncture during removal |
| Clean cloth | Wipes the tire and helps you feel for sharp bits |
Choose plastic levers made for bikes. Metal tools can cut rubber and scratch rims.
A small multitool and a pair of gloves also help. Gloves keep your hands clean and protect them from sharp debris. A bit of chalk is handy for marking a hole if you find one.
Can You Remove a Bike Tire Without Tire Levers?
Yes. Many tires come off by hand when the bead is loose and the tire does not fit too tightly.
Push the bead into the rim’s center channel to create slack. Then lift it over the rim edge. Avoid screwdrivers, knives, and other sharp tools. They can damage the tube, the rim, or the bead.
Hand removal works best on wider, softer tires and on rims with a deep center channel. On tight road tires, a lever is often the safer choice. Use the lever gently and keep it shallow.
How to Remove a Bike Tyre Without Damaging the Tube
Quick steps:
- Release the brake and remove the wheel.
- Let all the air out of the inner tube.
- Push the tire bead into the rim’s center channel.
- Lift one side of the tire carefully.
- Work around the rim slowly.
- Remove the tube and inspect the tire.
The sections below explain each step. Follow them in order for a clean removal.
Read the steps once before you begin. Knowing the full plan keeps you from rushing in the middle.
Release the Brake and Remove the Wheel (Step 1)
Shift the chain to an easier gear before you remove a rear wheel. This makes the wheel slide out more easily.
Follow your bike maker’s steps for thru-axles and quick-release skewers. Open rim brakes if needed. For hydraulic disc brakes, check the manual and avoid squeezing the brake lever while the wheel is off.
On an e-bike, switch off the system first. Follow the maker’s steps for the wheel and motor cables.
Place the bike upside down on its saddle and bars, or use a stand. A stable bike keeps you from dropping the wheel and bending a rotor or a derailleur.
Let All the Air Out of the Inner Tube (Step 2)
Open the Presta valve by unscrewing its small tip and pressing it. For a Schrader valve, press the center pin.
Make sure the tire feels soft and flexible before you touch the bead. A tire with air left in it is much harder to remove. Squeeze the tire all around to push out any trapped air. For a tubeless tire, release the air slowly and expect some sealant to escape.
Push the Tire Bead Into the Rim’s Center Channel (Step 3)
Squeeze both sidewalls toward the middle. Work all the way around the wheel to loosen the bead.
The center channel is the deeper part of the rim. When the bead sits there, you get extra slack. This step helps most with tight road tires and tubeless-ready rims. It is the secret to removing a tire with little force.
If the tire still feels tight, check that the bead is truly in the channel on both sides. A bead that sits high on one side will fight you the whole way.
Lift One Side of the Tire Carefully (Step 4)
Start opposite the valve. Use your hands to lift the bead over the rim edge.
If needed, slide a plastic lever gently under the bead. Do not push it deep into the tire. Keep the tip away from the tube so you do not pinch or scrape it.
Hook the lever onto a spoke if it has a notch for that. This frees your hand to hold the tire in place and lowers the risk of a slip.
Work Around the Rim Slowly (Step 5)
Slide the lever along the rim in short sections. Use a second lever if the tire is too tight.
Stop if the lever catches the tube or needs a lot of force. Push more of the bead into the center channel instead. Once one side is free, pull the tube out carefully, starting near the valve if that is easier.
Go slowly near the valve. The area around the valve base is a weak spot, and a hard pull can tear it.
Remove the Tube and Inspect the Tire (Step 6)
Lift the valve straight out of the rim hole. Do not bend it or pull it sideways.
Check the inside of the tire for glass, thorns, wire, or other sharp debris. Look at the rim tape, bead, and tube for cuts, wear, or pinch marks. Learn how to read bike tire size if you need to buy a new tube.
If you find a hole, mark it with chalk and match it to the tire. That tells you what caused the flat. A hole on the outer side points to debris. Two small holes side by side point to a pinch flat.
How to Avoid Pinching or Puncturing the Inner Tube
Most pinched tubes come from three habits: leftover air, too much force, and a lever pushed too deep. Fix those, and your tubes will last far longer.
Keep the tube fully deflated. Move it away from the bead before you use a lever.
Do not force the lever deep under the tire. Only the bead needs to pass over the rim edge. Check for debris in good light, and use a cloth or glove to feel the inside of the tire. Never run bare fingers over a tire that may hold glass or sharp metal.
If the tube looks fine but has a pinch mark, replace it or patch it before you ride. Weak spots tend to fail later, often at higher pressure.
Common Tire Removal Mistakes to Avoid
| Mistake | Why it hurts | Better way |
|---|---|---|
| Using a screwdriver | Cuts rubber and scratches the rim | Use plastic levers |
| Pulling hard on a tight tire | Pinches the tube | Loosen the bead all around first |
| Skipping the rim tape check | Leaves spoke holes exposed | Inspect the tape every time |
| Leaving some air in the tube | Makes the bead tight and hard to lift | Squeeze out all the air |
How to Remove Different Types of Bike Tires Safely
Each bike type has quirks. Know them before you start.
| Bike type | Main challenge | Quick tip |
|---|---|---|
| Road | Tight, narrow tires | Use the center channel |
| Gravel and MTB | Stiff beads and sealant | Go slowly and manage sealant |
| E-bike | Heavy wheel and cables | Follow the maker’s steps |
Check the tire and rim specs before you change tire size. For help, see bike tire size compatibility and whether a tire will fit your wheel.
Road Bike Tires
Narrow road tires can fit tightly. Deflate the tube fully and work the bead into the center channel.
Avoid heavy leverage on light rims or thin beads. Light rims can scratch or bend under hard force, and thin beads can tear. A tire of 700×28 mm (about 1.1 in) still needs patience. Learn what 700×28 means if you are unsure of your size.
Mountain Bike and Gravel Tires
Wider tires may be easier to handle by hand, since they have more slack around the rim. Stiff casings and strong beads can still be tight.
Inspect the tread knobs, sidewalls, and protection layers for cuts. In Pacific Northwest mud, check for grit packed in the bead area. On Southwestern loose rock, look for sharp chips in the casing. For tubeless setups, handle sealant with care and confirm your rim is tubeless-ready. See bike tires for gravel roads.
E-Bike Tires
Follow the maker’s steps for wheel removal, especially with hub motors, wires, and sensors.
Plan for the extra weight of the wheel and use the right tools for the axle. Ask a friend to help if the wheel is heavy. Keep motor cables free of the tire and lever. Check the tire’s load and speed rating, casing strength, and pressure before you ride. Heavy bikes and cargo loads need tires built for the job. E-bike torque loads the rear tire hard, so inspect it with care.
What to Check Before Putting the Tire Back On
Inspect the tube for holes, cuts, pinch marks, or damage near the valve base. Run your eyes and fingers along the whole tube. A small flaw now saves a flat later.
Check the tire casing, tread pattern, puncture belt, and bead for wear or trapped debris. Confirm that the rim tape is seated well and that the inner rim width suits the tire. Learn how to measure bike tire size and see ETRTO tire sizes for fit.
How to Reinstall the Tire Without Pinching the Tube
- Fit one tire bead onto the rim.
- Add a little air to the tube so it holds its shape, then place it inside the tire. Seat the valve straight through the rim hole.
- Work the second bead onto the rim by hand where you can. Keep the tube inside the tire.
- Before you inflate, check both sides of the wheel. No tube should show under the bead.
Take extra care at the last section of the bead. It is the hardest part to seat. Push the tire toward the center channel, then roll the last bit over with your thumbs.
Inflate in stages. Our guide on how to inflate a bike tire correctly covers pump tips.
Setting the Correct Tire Pressure
Check the range printed on the tire and follow the rim maker’s limits. Do not use one number for every bike. A tire that is too soft invites pinch flats, and one that is too hard rides harshly.
Use this simple method for a starting point.
- Add your weights. Total system weight = rider + bike + gear. A 170 lb rider on a 30 lb bike with 10 lb of gear is 210 lb.
- Split the load. The rear carries about 60 percent. The front carries about 40 percent.
- Pick a base PSI from the table.
- Adjust. Take off 3 to 5 PSI for wet roads or loose gravel. Add 3 to 5 PSI for tubes.
| System weight | 28 mm road (1.1 in) | 40 mm gravel (1.6 in) | 2.3 in MTB |
|---|---|---|---|
| 140 lb (64 kg) | 60 to 70 PSI | 30 to 36 PSI | 20 to 24 PSI |
| 170 lb (77 kg) | 68 to 78 PSI | 34 to 40 PSI | 22 to 26 PSI |
| 200 lb (91 kg) | 75 to 85 PSI | 38 to 45 PSI | 25 to 29 PSI |
| 230 lb (104 kg) | 82 to 92 PSI | 42 to 50 PSI | 27 to 32 PSI |
Note: These are tubeless starting points. Use the free calculator at the end of this guide to fine-tune. See how to find the correct bike tire pressure and how much air to put in bike tires. One bar equals 14.5 PSI.
How Tire Design Affects Removal and Tube Protection
Tire design changes how a tire feels during removal. It also shapes how well it protects the tube.
A stiff tire with a wire bead can take more effort. A supple folding tire is gentler on the hands but may still be snug. Rubber hardness matters too. Durometer is a rubber hardness scale. Softer rubber grips better, while harder rubber lasts longer.
| Feature | What it means |
|---|---|
| Tire bead | Wire beads are less flexible. Folding beads are easier to handle but can still fit tightly |
| Casing TPI and puncture belt | Affect flexibility, durability, and feel |
| Rim width and tubeless design | Inner rim width and bead seat shape change fit and effort |
TPI means threads per inch and shows how dense the casing weave is. A puncture belt is a protective layer under the tread. See the bike tire casing guide and learn what bike tires are made of. The bike tire rubber compound page explains how rubber affects wear and grip.
Do Tire Pressure and Tread Pattern Affect Punctures?
Yes, pressure matters. Wrong PSI can raise the risk of pinch flats over potholes and sharp edges. Very low pressure allows rim strikes. Too much pressure cuts comfort and grip.
Tread pattern mostly affects traction. It does not stop every puncture, so casing protection and tire condition matter too. Learn why there are different tread patterns and read what happens if bike tire pressure is too high. For wear checks, see how much tread a bike tire should have.
How to Test the Tire and Tube After Reinstallation
Inflate gradually. Check that the bead sits evenly around both sides of the rim.
Listen for escaping air. Brush soapy water around the valve or a suspect spot if needed. Growing bubbles show a leak.
Give the tire a quick spin and watch the bead line. It should sit an even distance from the rim all the way around. Refit the wheel securely, check the brakes, and confirm that the wheel spins freely before you ride. Learn how to check bike tire pressure with a gauge.
What Cycling Tire Tests Can Tell You
- Use repeatable checks for air retention, bead seating, puncture resistance, and casing damage. A tire that holds its pressure overnight is a good sign.
- Compare products with clear test methods, matching tire sizes, and controlled pressure.
- Separate maker specs from independent results. Do not treat casing TPI alone as proof of puncture resistance.
- Look at rolling resistance too. A tough tire that rolls slowly may not suit every rider.
Good tests state tire size, rim width, pressure, and load. Without those details, results are hard to compare.
See our testing process, our editorial policy, and learn about TheBikeTires.
Frequently Asked Questions
1. How do you remove a bike tire without damaging the inner tube?
Fully deflate the tube. Push the bead into the rim’s center channel. Then lift the bead gently with your hands or a plastic lever.
Keep the lever shallow and away from the tube.
Go slowly. Most tube damage during removal comes from speed and force, not from the lever itself.
2. Can you remove a bike tire without tire levers?
Yes, if the bead is loose enough to lift over the rim by hand.
If the tire is tight, use proper plastic levers instead of metal tools.
Two levers spaced a few inches apart usually work better than one. Hold the first in place and slide the second along the rim.
3. Why does my inner tube keep getting pinched?
The tube may be trapped under the bead during fitting. Wrong pressure, sharp rim edges, damaged rim tape, or poor seating can also play a part.
If it keeps happening, slow down during fitting and check the bead on both sides before you add air. A tube that is slightly inflated before fitting twists less.
Also check how often you inflate. See how often to check bike tires.
4. Should I replace the inner tube every time I remove a tire?
No. A sound tube can be reused if it has no cuts, weak spots, or valve damage.
Replace it if the damage is severe or you cannot repair it well.
A tube that has been patched many times, or one that feels thin, is worth replacing. Keep the old one as an emergency spare if it still holds air.
5. What tire pressure should I use based on my weight?
There is no single PSI for every rider. Tire width, system weight, terrain, and rim limits all matter.
Use the tire and rim limits and a calculator for a practical starting point. Read about overinflated bike tires to stay in a safe range.
6. Can tubeless bike tires be removed the same way?
The basic bead steps are similar. Tubeless tires may release sealant and can fit tightly on the rim.
Follow the tire and rim maker’s steps and use compatible tubeless sealant when you reinstall.
Work over a rag or a tray, since sealant can stain floors. Clean the rim edge before you refit the tire so the bead can seal.
7. How do I know if my bike tire or tube needs replacing?
Replace a tube with large tears, damaged valve bases, or failed patches.
Replace a tire if the casing shows, the sidewall is badly cut, or the tread and protection are worn through. See how often bike tires should be replaced and the best bike tires for puncture protection.
8. Does rim width affect how hard a tire is to remove?
Yes. Rim shape, inner width, bead seat design, and tire size all affect fit.
Hookless rims often cap pressure near 72.5 PSI (5 bar) and need compatible tires. Hooked rims have a bead lip and usually allow higher limits.
| Inner rim width | Typical tire width |
|---|---|
| 17 mm | 25 to 35 mm |
| 19 mm | 28 to 42 mm |
| 21 mm | 32 to 50 mm |
| 25 mm | 40 to 60 mm (1.6 to 2.4 in) |
A wide tire on a narrow rim can bulge and sit unevenly. A narrow tire on a wide rim may not seal or hold its shape. Both raise the chance of pinch flats and bead trouble.
Treat these as typical ranges and check the maker’s guide before you buy. Learn what tire width to choose first.
Conclusion: Remove Your Bike Tire Safely and Prevent Flats
You now know how to remove a bike tire without damaging the tube. Keep these points in mind:
- Release all the air, loosen the bead, and use the right tools. Keep the lever away from the tube.
- Inspect before reinstalling. Check the tube, casing, rim tape, and bead, then set the right PSI.
- Handle tires with care. Compatible parts and regular checks reduce avoidable punctures. A weekly look at your tires takes two minutes and can save a ride. Start with how to choose bike tires, or see how to choose puncture resistant bike tires.
Find Your Ideal Tire Pressure
Take the guesswork out of your tire setup. Visit TheBikeTires.com and use the Free Bike Tire Pressure Calculator and Tire Finder Tool. Find a smart starting PSI and explore tire options for your bike, riding style, and road conditions.

Mohidul Islam is a leading cycling technology specialist and bike tire consultant with over 15 years of hands-on experience in the bicycle industry. He holds a Bachelor of Science in Mechanical Engineering from Penn State University, where he focused heavily on material science, tread mechanics, and rubber compound performance. Over the past decade and a half, Alex has conducted extensive field testing, tubeless setup evaluations, and tire pressure modeling for road, mountain, and e-bikes. His practical insights and data-driven approach help cyclists of all levels optimize grip, speed, and durability on every ride.



