
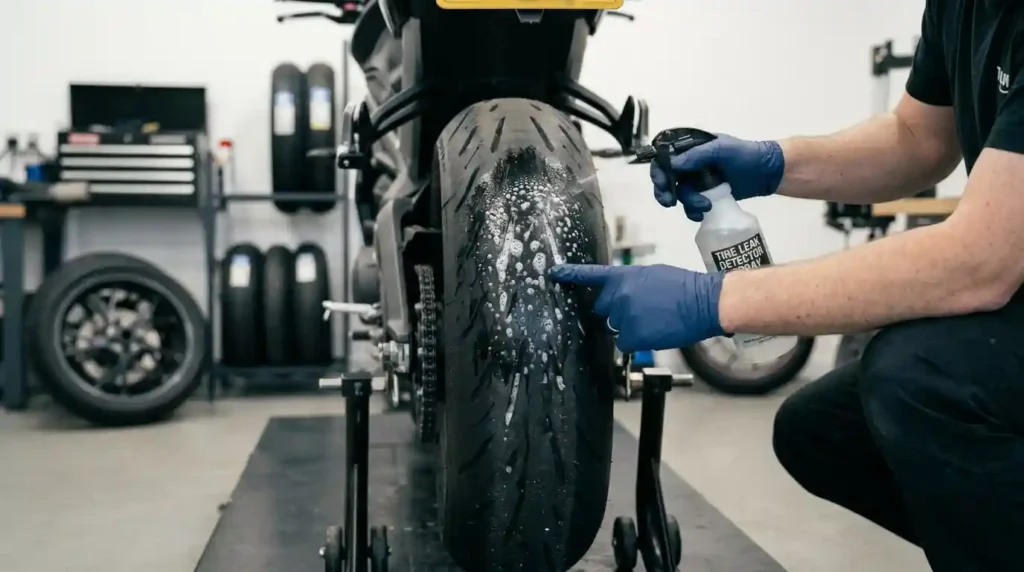
Sometimes a puncture is obvious. You hear a bang, feel the rim hit the road, and the tire is flat. Other times the leak is so slow that you pump the tire every morning and never see a hole.
If you are trying to learn how to find a puncture in a bike tyre, this guide shows you simple ways to do it. You will learn how to inspect the tire, inner tube, valve, and rim for the source of escaping air. We cover listening for air, using soapy water, and checking for sharp debris.
US riders face a lot of tire trouble. Glass in city bike lanes, goathead thorns in the Southwest, and sharp rock on gravel all take their toll. Low pressure also hurts cornering traction and wears tread early.
Finding the true cause matters for safety, speed, and comfort. A tire with a hidden flaw rides worse and fails sooner. See how much bike tires affect grip, speed, and comfort to learn why.
You only need a few basic tools and a little patience. Most leaks take less than ten minutes to find once you know the steps.
Let us find that leak.
How Do You Find a Puncture in a Bike Tire?
Short answer: Remove the wheel if needed and inspect the tire for glass, thorns, nails, or cuts. Then inflate the tube slightly and listen or feel for air. Use soapy water to reveal small leaks.
- Match the hole in the tube to the same spot on the tire and rim.
- That match tells you what caused the flat.
- Fix the cause before you fit a new tube.
What Tools Do You Need to Find a Bike Tire Puncture?
| Tool | Why you need it |
|---|---|
| Tire levers | Lift one tire bead off the rim without harming it |
| Pump and soapy water | Add air and show tiny leaks as bubbles |
| Patch kit | Confirms the damage and repairs the tube |
| Clean cloth | Wipes the tube and checks the tire for sharp bits |
A tire bead is the edge of the tire that locks onto the rim. Not sure which spare tube fits? Learn how to read bike tire size from the sidewall.
Can You Find a Puncture Without Removing the Wheel?
Sometimes. You may see a nail or hear a hiss while the wheel is still on the bike.
For a hidden hole in the tube, removing the wheel and tube is usually easier. Never run bare fingers over a tire that may hold glass or sharp metal. Use a cloth or a glove instead.
If you ride on busy roads, a quick check on the spot can save time. Pull over somewhere safe, spin the wheel slowly, and watch the tread for anything that glints or sticks out.
Step-by-Step Guide to Finding a Puncture in a Bike Tire
Quick steps:
- Stop riding and inspect the tire for visible damage.
- Remove the wheel if the leak is not easy to find.
- Remove one tire bead and take out the inner tube.
- Add a little air and listen or feel for escaping air.
- Use soapy water to locate a slow leak.
- Match the puncture to the tire and rim before you repair it.
The sections below walk through each step. Follow them in order for the best results.
Work in good light and on a clean surface. A towel on the ground keeps small parts from rolling away, and a bright phone light helps you see tiny cuts.
Check the Tire for Visible Damage (Step 1)
Look closely at the tread. Check for glass, thorns, wire, nails, and small cuts.
Look at the sidewalls too. Bulges, tears, and exposed casing threads are warning signs. If you spot a suspect area, mark it with a pen or a bit of tape before you remove the tire.
Spin the wheel slowly and watch the tread as it turns. A small object that sticks out will show as a bump or a glint. Check the tread near the center first, since most debris lands there.
Remove the Wheel and Inner Tube (Step 2)
Shift to an easier gear before you take off a rear wheel. This makes removal simpler.
Release the brake or axle system as your bike maker advises. Lift one bead with a lever and pull the tube out. Try not to shift the tire on the rim more than you need to. That keeps the match between tube and tire accurate.
On an e-bike, switch off the system and follow the maker’s wheel removal guidance. The motor, cables, and battery add steps that regular bikes do not have.
Inflate the Tube Slightly (Step 3)
Add just enough air for the tube to hold its shape. Do not stretch it.
Move the tube slowly past your ear and listen for a hiss. You can also hold it near your lips or cheek, since skin feels air well. Keep the tube away from sharp objects and never inflate it beyond its normal size.
If you hear nothing, do not give up. Many small holes make almost no sound. Move on to the soapy water step.
Use Soapy Water to Find Small Leaks (Step 4)
Mix a little dish soap with water. Brush or dab it on the area you suspect.
Watch for bubbles that form or grow. A tiny stream of bubbles marks the hole. Wipe the tube dry before you patch it, and follow the patch kit steps.
Match the Hole to the Tire and Rim (Step 5)
Keep the valve position in mind. It lets you line up the hole with the right spot on the wheel.
Check that part of the tire for debris or cuts. Then look at the rim side. Damaged rim tape, exposed spoke holes, and sharp edges can all cut a tube from below.
How to Find a Slow Leak in a Bike Tire
A slow leak can come from a tiny puncture, a bad valve, a damaged tube, or a poor tubeless seal.
Slow leaks are the hardest to find, and they test your patience. Work in a calm, quiet spot and check one area at a time.
Inflate the tire to a safe pressure and check likely spots for bubbles. If the leak stays hidden, inspect the tube and valve on their own. To learn the common causes, read why bike tires lose air.
| Method | Best for | Time needed |
|---|---|---|
| Listening | Loud or medium leaks | 1 minute |
| Feeling for air | Medium leaks | 1 minute |
| Soapy water | Pinholes and valve leaks | 3 to 5 minutes |
| Water bucket | Tubes with several holes | 5 minutes |
How to Find a Tiny Hole in an Inner Tube
Inflate the tube a little. Check small sections at a time rather than the whole tube at once.
Use soapy water to reveal bubbles around pinholes that are too quiet to hear. As soon as you find the hole, mark it with a pen or a dab of chalk. It is easy to lose the spot once the air is gone.
Checking for a Leaking Valve
There are two common valve types. A Schrader valve looks like a car valve. A Presta valve is thinner and has a small tip you open and close.
- For a Schrader valve, check whether the core is loose or damaged.
- For a Presta valve, make sure the tip is closed fully and look for bends.
- Apply soapy water around the base and core and look for bubbles.
Why Does My Bike Tire Lose Air Overnight?
A tiny puncture can let air out slowly while the bike sits. A faulty valve, a weak tubeless bead seal, or damaged rim tape may do the same.
Check pressure with a gauge over several days. Write the numbers down. A steady drop of a few PSI per night points to a leak, while small swings may just be temperature changes.
Do not keep adding air without a fix. Learn how often to check bike tires and how often to inflate bike tires to spot trouble early.
How to Find a Puncture in a Tubeless Bike Tire
Quick answer: Tubeless tires may seal small holes on their own when tubeless sealant reaches the hole.
- Leaks that last often come from the tread, the bead, the valve, or the rim tape.
- Use soapy water to find escaping air.
- Follow the tire maker’s repair advice.
How to Check Tubeless Sealant for Leaks
Turn the wheel slowly so the liquid sealant can reach the suspect spot.
Look for bubbles or sealant oozing from the tread or sidewall. If the sealant is dry or low, add more as the maker directs. In hot, dry places such as Arizona, sealant can dry in a few months.
Finding a Leak Around the Tire Bead
Apply soapy water where the tire meets the rim. Look for bubbles that keep forming.
A leak at the bead often comes from dirt on the rim edge or a bead that did not seat fully. Re-inflating with a strong burst of air can help the bead pop into place.
If the leak continues, check for dirt, a damaged bead, or poor seating. Clean the rim edge and try again. Check that the tire and rim are a proper match, using tire size compatibility as a guide.
How to Check a Tubeless Valve and Rim Tape
Inspect the valve base for leaks, damage, or a loose fit. Look at the rim tape for tears, gaps, or exposed spoke holes.
Replace any damaged part with one that suits your rim and tubeless system. A good seal needs matching parts. See ETRTO tire sizes if you are unsure about fit.
What Do Different Bike Tire Punctures Look Like?
The position and shape of a hole give clues. Matching the tube damage to the tire and rim helps you stop another flat.
Inspect every part before you fit a new tube or fix the tire.
| Mark | Likely cause | First action |
|---|---|---|
| Single hole, outer side | Glass, thorn, or nail | Remove the object |
| Two nearby holes | Pinch flat | Check PSI and tire width |
| Hole on the rim side | Rim tape or spoke hole | Fix the rim before reinstalling |
Single-Hole Punctures From Glass or Thorns
A small hole on the outer side of the tube often means a sharp object sits in the tread.
Check the same area of the tire for glass, wire, or thorns. Remove the object safely. Then look for deeper damage to the casing. The casing is the fabric body of the tire. Learn more about the bike tire casing.
Pinch Flats From Low Tire Pressure
Two nearby holes are often called a snakebite puncture. They point to a pinch flat.
A pinch flat happens when the tire squashes against the rim after a pothole or hard hit. Check your tire pressure (PSI) and whether the tire width suits your load and terrain. See what happens if bike tire pressure is too high for the other side of the problem.
Rim-Side Punctures and Spoke Damage
A hole on the inner face of the tube may mean worn rim tape or an exposed spoke hole.
Run a gloved finger or a cloth along the inside of the rim to feel for burrs. Check each spoke end as well.
Check for sharp rim edges and spokes that stick out. Fix the rim issue before you fit another tube. Otherwise the new tube will fail the same way.
What Should You Do After Finding a Puncture?
Remove the cause first. Then check whether the tire casing is still safe.
Patch a small hole or replace the tube if the damage is big. Replace a tire with serious damage instead of relying on a patch alone.
A careful look now prevents a second flat on the ride home.
When Should You Patch or Replace the Inner Tube?
| Situation | Best choice |
|---|---|
| Small hole, tube otherwise sound | Patch it |
| Torn valve | Replace the tube |
| Large split or many holes | Replace the tube |
Inflate and test any patched tube before you reinstall it. Learn how to inflate a bike tire correctly to avoid new damage.
When Should You Replace the Tire?
Replace tires with deep cuts, bulges, exposed casing, or sidewall damage.
Also check the tread and casing for wear that thins protection. See how much tread a bike tire should have and how often bike tires should be replaced. Follow the maker’s repair limits.
How Tire Pressure and Tire Design Affect Punctures
Wrong tire pressure raises the risk of pinch flats. It can also cut grip and comfort.
Tire width, casing build, tread pattern, and puncture belts all change how a tire performs. Pick a pressure that suits your weight, your bike, your terrain, and the tire and rim limits.
How to Choose the Right Tire Pressure (PSI)
Use this method as a starting point.
- Add your weights. Total system weight = rider + bike + gear. A 175 lb rider on a 25 lb bike with 10 lb of gear is 210 lb.
- Split the load. The rear carries about 60 percent. The front carries about 40 percent.
- Pick a base PSI from the table below.
- Adjust for conditions. Take off 3 to 5 PSI for wet roads or loose gravel. Add 3 to 5 PSI for tubes.
- Stay inside the limits printed on the tire and rim.
| System weight | 28 mm road (1.1 in) | 40 mm gravel (1.6 in) | 2.3 in MTB |
|---|---|---|---|
| 140 lb (64 kg) | 60 to 70 PSI | 30 to 36 PSI | 20 to 24 PSI |
| 170 lb (77 kg) | 68 to 78 PSI | 34 to 40 PSI | 22 to 26 PSI |
| 200 lb (91 kg) | 75 to 85 PSI | 38 to 45 PSI | 25 to 29 PSI |
| 230 lb (104 kg) | 82 to 92 PSI | 42 to 50 PSI | 27 to 32 PSI |
Note: These are tubeless starting points. See how to find the correct bike tire pressure and how much air to put in bike tires. One bar equals 14.5 PSI.
Do Puncture-Resistant Tires Help?
Yes. Many commuter tires use reinforced layers or a puncture belt to cut tread punctures. A puncture belt is a protective layer under the tread.
Gravel tires balance protection, tread pattern, and rolling resistance. E-bike tires should match the bike’s load and speed. Browse the best bike tires for puncture protection and learn how to choose puncture resistant bike tires.
What Do Casing TPI and Rubber Compounds Mean?
TPI means threads per inch. It shows how dense the casing weave is.
Rubber compounds and protective layers shape grip, wear, and puncture resistance. Durometer is a rubber hardness scale. Softer rubber grips well, while harder rubber lasts longer. TPI alone does not predict puncture resistance. Read about the bike tire rubber compound and what bike tires are made of.
How to Prevent Future Bike Tire Punctures
Check tire pressure before rides. Inspect the tread and sidewalls often.
Steer around sharp debris when safe. Pick out embedded objects before they work deeper. Riding a little farther from the road edge helps, since glass and metal collect near the curb. Choose tires that suit your route, rim width, riding style, and need for protection.
Prevent Punctures on Road, Gravel, and Mountain Bike Trails
- Road riders should watch for glass and metal near road edges and intersections.
- Gravel riders and mountain bikers should pick tread and casing for their terrain. See bike tires for gravel roads and tires for rough roads.
- Everyone should avoid pressure that is too low for the load or too high for the surface.
In Pacific Northwest mud, a slightly lower PSI helps traction. On Southwestern loose rock, add a little pressure and use a strong casing. For rainy days, see wet weather bike tires.
Reduce Punctures on E-Bikes
Use tires that meet the bike’s load and speed needs. Check pressure more often if you haul cargo or accelerate often.
E-bike torque can load the rear tire hard. Inspect it for cuts and wear, mainly on heavy bikes. Read about commuter bike tires for daily e-bike use.
How Do Experts Test Bike Tire Puncture Resistance?
Controlled tests help compare tires. The results still depend on the method and the conditions.
Experts record tire size, rim width, pressure, load, and the test setup. They weigh puncture resistance next to rolling resistance, durability, and cornering traction. See our testing process, our editorial policy, and learn about TheBikeTires.
What Should a Reliable Tire Test Measure?
- Puncture resistance: The force needed to get through a tire under a set method.
- Rolling resistance: The energy lost as the tire rolls under controlled conditions.
- Durability and grip: Wear, casing damage, and handling on suitable surfaces.
Why Test Conditions Matter
Pressure, temperature, load, and tire build all change results. Compare products with the same method.
A tire tested at 60 PSI cannot be fairly compared with one tested at 90 PSI. Each tire should run a pressure that suits its width and use.
Good testers cite recognized methods. They never claim a tire is puncture proof. Learn how bike tires work to read test data with more confidence.
Frequently Asked Questions About Finding Bike Tire Punctures
1. How do I find a puncture in a bike tire quickly?
Look for debris or cuts in the tread and sidewall first. Then inflate the tube slightly and listen for air.
Use soapy water to reveal bubbles. Match the hole to the tire and rim to find the cause.
2. Can I find a bike tire puncture without water?
Yes. Listen for a hiss or feel for air near the tube. A quiet spot makes a small leak easier to hear.
Soapy water helps when the hole is too small to find by sound. A bowl or bucket of plain water also works. Dip the tube in sections and watch for a trail of bubbles.
3. Why does my bike tire keep losing air but have no visible hole?
A pinhole, leaky valve, damaged rim tape, or weak tubeless seal can be hard to see.
Check the tube and valve with soapy water. If pressure keeps dropping, fix the source before you ride.
Also check the rim tape and the bead. These are common hidden sources of slow leaks.
4. Can I use soapy water on a bike tire?
Yes. A little soapy water shows escaping air as growing bubbles.
Apply it to the tube, valve, or tire bead. Clean and dry the area before patching, and follow the component maker’s advice.
Use only a little soap. Too much makes bubbles that hide the real source.
5. Do tubeless tires get punctures?
Yes. Glass, thorns, and sharp rocks can still cut or pierce tubeless tires.
Sealant closes many small holes, but larger cuts may need a plug or a new tire. Check sealant levels if a tire loses air again and again.
6. What PSI should I use to avoid pinch flats?
The right PSI depends on rider and bike weight, tire width, terrain, and tire build. Start inside the maker’s limits and adjust for your setup.
Do not ride so low that the tire bottoms out on the rim. Read about overinflated bike tires so you stay in a safe range.
7. How do I know if my bike tire needs replacing?
Look for deep cuts, exposed casing threads, bulges, or heavy wear. A small puncture does not always mean a new tire.
Follow the maker’s repair advice and replace structurally damaged tires. When in doubt, ask a local bike shop to look at the tire. A quick check is cheap and keeps you safe.
8. Can the wrong rim width cause repeated punctures?
Yes. A poor tire and rim pairing can change tire shape and bead fit.
A tire that is too wide or too narrow for the rim may not seat well. That can cause leaks at the bead and raise the chance of pinch flats.
Check the maker’s approved rim range. Hookless rims often cap pressure near 72.5 PSI (5 bar) and need compatible tires. Hooked rims have a bead lip and usually allow higher limits.
| Inner rim width | Typical tire width |
|---|---|
| 17 mm | 25 to 35 mm |
| 19 mm | 28 to 42 mm |
| 21 mm | 32 to 50 mm |
| 25 mm | 40 to 60 mm (1.6 to 2.4 in) |
Treat these as typical ranges and confirm with the maker. See whether a tire will fit your wheel before you buy.
Conclusion: Find the Leak, Fix the Cause, and Ride With Confidence
You now know how to find a puncture in a bike tire. Keep these points in mind:
- Inspect everything. Check the tire, tube, valve, and rim instead of guessing.
- Use simple tests. A light inflation and soapy water reveal most small leaks.
- Prevent repeats. Keep pressure in safe limits and pick the right tire. Start with how to choose bike tires, or see the best bike tires for long rides.
Find Your Ideal Tire Pressure and Tire Type
Stop guessing about your tire setup. Visit TheBikeTires.com and use the Free Bike Tire Pressure Calculator and Tire Finder Tool. Find a smart starting PSI and explore tire options for your bike, riding style, and road conditions.

Mohidul Islam is a leading cycling technology specialist and bike tire consultant with over 15 years of hands-on experience in the bicycle industry. He holds a Bachelor of Science in Mechanical Engineering from Penn State University, where he focused heavily on material science, tread mechanics, and rubber compound performance. Over the past decade and a half, Alex has conducted extensive field testing, tubeless setup evaluations, and tire pressure modeling for road, mountain, and e-bikes. His practical insights and data-driven approach help cyclists of all levels optimize grip, speed, and durability on every ride.



