
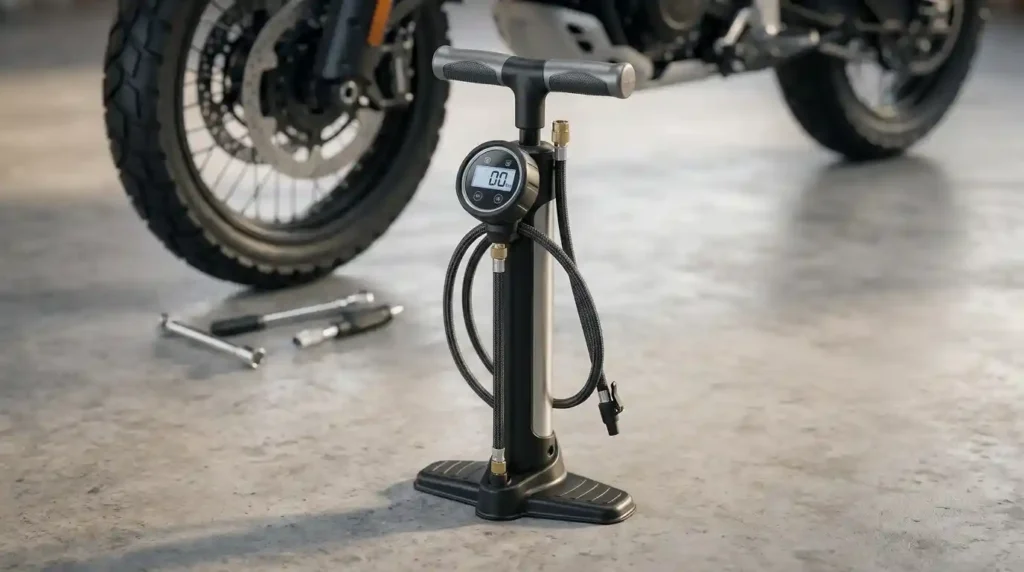
Soft tires cause a lot of trouble. They bring pinch flats, vague cornering traction, and a sluggish feel. Overinflated tires are just as bad. They buzz over rough pavement and slide on loose gravel.
The best bike floor pump with a pressure gauge fixes both problems. It combines a readable, reliable gauge, a secure valve head, a suitable pressure range, and efficient airflow. Choose a high-pressure model for many road tires or a high-volume model for wider gravel and mountain bike tires.
A floor pump makes regular inflation faster and easier than a mini pump. A long barrel moves more air per stroke. A stable base lets you push with your body weight instead of fighting the pump.
A reliable gauge is the real prize. It helps you set tire pressure (PSI) for comfort, grip, and rolling resistance. Our guide on how much bike tires affect comfort shows why small PSI changes matter.
Here are the key buying factors you will learn about:
- Gauge accuracy
- Pump head design
- Airflow
- Pressure range
- Stability
- Tubeless support
US riders face wide-ranging terrain. Pacific Northwest mud, Southwestern loose rock, and rough city streets all need different pressures. If you want the pressure basics first, read how to find the correct bike tire pressure.
What to Look for in the Best Bike Floor Pump With Pressure Gauge
Start with the gauge. Choose one that is easy to read and covers your tire’s normal PSI range. A road tire at 80 PSI and a mountain bike tire at 22 PSI need very different scales.
Next, check the build. Look for a stable base, a comfortable handle, and a hose long enough to reach the valve with ease. Then check that the pump works with your Presta or Schrader valve and suits your tire volume.
Established brands such as Topeak, Lezyne, Silca, Blackburn, and Cannondale appear often in third-party test roundups. Treat that as a starting list, not a verdict.
Quick Comparison of Floor Pump Features
| Feature | Why it matters | Best for |
|---|---|---|
| Analog gauge | Simple readings without batteries | Everyday home use |
| Digital gauge | Clear numerical readings | Riders who want precise adjustments |
| High-pressure barrel | Helps reach higher PSI | Many road tires |
| High-volume barrel | Moves more air per stroke | MTB and gravel tires |
| Dual-valve pump head | Supports common valve types | Households with different bikes |
| Long hose | Reduces strain on the valve | Regular maintenance |
| Tubeless booster | Delivers a rapid burst of air | Seating compatible tubeless tires |
What Should You Spend on a Floor Pump?
Typical US retail prices run from under $30 for basic models to well over $100 for premium pumps. Price tends to track gauge quality, head design, and materials more than raw pressure.
A budget pump can serve a casual rider well if the head seals and the gauge is readable. Frequent riders often gain more from a mid-range pump with serviceable seals and a clear warranty. Pay for features you will use, such as a better gauge or a tubeless booster.
Types of Bike Floor Pumps Explained
Floor pumps come in several styles. Each one solves a slightly different problem.
Standard Floor Pumps
A standard pump uses a long barrel and handle to move more air per stroke than most mini pumps. It suits regular tire checks and inflation at home or in a workshop.
Look for a stable base, a strong handle, and a secure pump head. These three parts decide how the pump feels after the hundredth use. Our guide on how often to inflate bike tires shows how often you will reach for it.
High-Pressure Floor Pumps
High-pressure pumps are designed to reach higher pressures with manageable effort. They often suit narrow road tires that require higher PSI than wider tires.
Check the useful pressure range, not just the pump’s maximum rating. A pump rated for 160 PSI can still feel awkward at 25 PSI. Most road riders never need more than about 110 PSI.
High-Volume Floor Pumps
High-volume pumps move more air per stroke. That makes them useful for wide gravel and mountain bike tires. They can reduce the number of strokes needed for large tire volumes.
Check whether the pump still works well at your tire’s target pressure. Some high-volume designs get hard to push as PSI climbs.
Digital-Gauge Floor Pumps
These pumps display pressure in numbers, often in PSI, bar, or both. They may offer finer display increments than basic analog gauges.
Check battery life, accuracy specifications, and display readability. A bright display helps in a dim garage. A dead battery does not.
Tubeless Booster Floor Pumps
Booster pumps store or deliver a rapid burst of air. That burst helps seat compatible tubeless tire beads. It can reduce the need for a separate air compressor during setup.
Check the required airflow, rim compatibility, and tire manufacturer’s installation instructions. Our guide on choosing puncture resistant bike tyres covers tubeless sealant and tire choice.
Digital vs. Analog Pressure Gauges
Both gauge types can work well. The right choice depends on how you like to read pressure.
Benefits of an Analog Gauge
An analog gauge works without batteries and is simple to use. A well-designed dial can give dependable readings for years.
Check scale spacing and readability, especially when making small PSI adjustments. A tiny dial that jumps in 10 PSI steps is poor for low-pressure tires.
Benefits of a Digital Gauge
A digital gauge displays numbers clearly, which can make pressure checks easier. Some models include unit switching, backlighting, or pressure-release features.
A digital display does not guarantee better accuracy. Check the stated tolerance before you buy.
Which Gauge Type Should You Choose?
Choose analog for simple, routine inflation without battery concerns. Choose digital if you prefer clear numerical readings and easy pressure comparisons.
Compare verified accuracy and resolution before choosing based on display type. A good analog gauge beats a poor digital one. Use our steps to check bike tire pressure with a second gauge.
Key Buying Factors That Affect Pump Performance
Five factors shape how a pump performs in daily use. Check each one before you spend money.
Pressure Range and PSI Accuracy
Select a pump that covers the recommended pressure range of your tires. Check your sidewall first. Our guide to what the numbers on bike tyres mean makes this easy.
Resolution shows the smallest displayed increment. Accuracy describes how close the reading is to the true pressure. Compare the built-in gauge with a suitable reference gauge if readings seem inconsistent.
Presta and Schrader Valve Compatibility
Presta valves are common on road bikes and many gravel bikes. Schrader valves appear on many everyday bikes and some mountain bikes.
Choose a compatible head that seals well and detaches without bending the valve stem. Many modern heads switch between valve types automatically.
Airflow and Pump Barrel Design
A high-volume barrel moves more air per stroke. A high-pressure design can make higher PSI easier to reach.
Consider both tire volume and target pressure when choosing a pump. Wide tires need volume. Narrow tires need pressure. Our bike tire width explained guide shows how width changes air volume.
Build Quality and Stability
A wide base helps prevent the pump from tipping during use. Metal barrels and durable seals can support long-term service.
Check handle comfort, hose quality, replacement parts, and warranty terms. A pump with serviceable seals can last for many years.
Hose Length and Pump Head Design
A long hose makes it easier to reach valves without moving the bike. A locking head can help prevent leaks during inflation.
A flexible hose reduces strain on the valve, especially with deep-section wheels. It also protects the stem on e-bikes with fenders and heavy racks.
How to Choose a Floor Pump for Your Bike Type
Your bike sets the pressure range and the air volume you need. Use these picks as a starting point.
Best Floor Pump for Road Bikes
Look for a high-pressure range, a readable gauge, and a secure Presta valve head. Choose a pump that lets you make small pressure changes with confidence.
Match PSI to tire width, total system weight, rim limits, and road surface. Riders chasing speed can read how to choose fast rolling bike tyres.
Best Floor Pump for Mountain Bikes
Prioritize airflow and a gauge that is easy to read at lower pressures. A high-volume barrel can speed up inflation of wide tires.
Consider tubeless support for riders who install or maintain their own tires. See how to choose bike tires for rough roads for tread pattern and casing tips.
Floor Pump Picks for Gravel Bikes
Look for a pump that can move enough air into larger tire volumes. Choose a gauge that works well at the lower pressures often used for gravel tires.
Check rim width and tire compatibility before changing tire size or pressure. Our guide to choosing bike tires for gravel roads helps you pick the tire first.
Best Floor Pump for Commuter and Hybrid Bikes
Choose a durable model with a clear gauge and a simple valve head. A dual-valve design can support different bikes in the same household.
Favor easy maintenance and reliable performance over features you rarely use. See how to choose tyres for a commuter bike.
Floor Pump Needs for E-Bikes
Check the pressure range and airflow required by your e-bike tires. Consider a stable base and durable construction for frequent maintenance.
Account for total system weight and tire design. E-bike torque does not mean every tire needs higher PSI. The sidewall may show a load rating, so review bike tyre markings explained for beginners.
How to Find the Correct Bike Tire Pressure
The right PSI balances grip, comfort, and speed. Three inputs matter most:
- The tire’s pressure range and the rim manufacturer’s limits
- Rider weight, bike weight, tire width, casing design, and road conditions
- A tire pressure calculator used as a starting point, then adjusted in small steps
How do you find the right bike tire PSI?
- Check the tire’s recommended pressure range.
- Confirm the rim’s tire-size and pressure limits.
- Account for tire width, total system weight, and riding conditions.
- Inflate with a reliable floor pump gauge.
- Test ride and make small adjustments within the approved limits.
For more detail, see how much air to put in bike tires.
Does Rider Weight Affect Tire Pressure?
Yes. Higher total system weight often requires higher pressure, all else being equal. Front and rear tires may need different pressures due to different wheel loads.
Rider weight alone cannot determine the ideal PSI. Most riders carry about 55 percent of their weight on the rear wheel.
| System weight (lb) | 28 mm road tire (PSI) | 40 mm gravel tire (PSI) | 2.4 in MTB tire (PSI) |
|---|---|---|---|
| 150 | 62 | 28 | 20 |
| 175 | 68 | 31 | 22 |
| 200 | 74 | 34 | 24 |
| 225 | 80 | 37 | 26 |
| 250 | 86 | 40 | 28 |
Note: These are rear-tire starting points for tubeless setups on dry pavement or smooth trail. They are estimates, not rules. Always stay under the tire and rim maximums.
Simple PSI Formula and Worked Example
Use this four-step method to set pressure from total system weight.
- Add rider weight, bike weight, and gear weight. This is your system weight.
- Find your tire type in the table above and read the rear PSI. Interpolate between rows if needed.
- Multiply the rear PSI by 0.93 for a front PSI estimate.
- Subtract 5 to 10 percent for wet or loose ground. Add 5 to 10 percent if you ride tubes instead of tubeless.
Example: A 190 lb rider has a 24 lb bike and 6 lb of gear. System weight is 220 lb. On a 28 mm tire, the table gives about 79 PSI rear. Front is about 73 PSI. For a wet ride, drop each by about 7 percent, to roughly 73 rear and 68 front.
How Tire Width and Rim Width Affect PSI
Wider tires often allow lower pressure under a similar load. Rim width affects tire shape and measured tire width. Confirm approved tire sizes and pressure limits before making changes.
| Inner rim width | Typical tire width range | Typical use |
|---|---|---|
| 17 to 19 mm | 25 to 32 mm (1.0 to 1.25 in) | Classic road |
| 21 to 23 mm | 28 to 42 mm (1.1 to 1.65 in) | Modern road and light gravel |
| 25 to 27 mm | 35 to 50 mm (1.4 to 2.0 in) | Gravel and hybrid |
| 30 to 35 mm | 2.2 to 2.6 in (56 to 66 mm) | Trail and enduro MTB |
These are common ranges only. Read bike tire size compatibility explained and ETRTO bike tyre sizes for the full picture. Thinking of going bigger? See how much wider a tire you can fit.
Plain-English Tire Terms That Change Your PSI
| Term | What it means | Why it matters for PSI |
|---|---|---|
| Casing TPI | Threads per inch in the tire fabric | Higher TPI is thinner and more supple. See what a bike tire casing is. |
| Durometer | Rubber hardness rating | Softer rubber grips better but wears faster. See bike tire rubber compound. |
| Rolling resistance | Energy lost as the tire flexes | Both very low and very high PSI can raise it. |
| Hooked vs. hookless rims | Hooked rims have a lip that holds the bead. Hookless rims do not. | Many hookless rims have lower maximum PSI limits. |
| Tubeless sealant | Liquid latex that seals small holes | Allows lower pressure with fewer flats. |
| Puncture belt | A protective layer under the tread | Adds cut resistance. See best bike tyres for puncture protection. |
Does Tubeless Setup Change the Ideal Pressure?
Tubeless tires may allow lower pressures than comparable tubed setups. Pressure that is too low can cause tire burping, rim strikes, or unstable cornering.
Check tubeless sealant levels and inspect the bead during routine maintenance. Sealant dries out over a few months, so mark a date on your calendar.
How Tire Pressure Affects Rolling Resistance and Grip
Pressure affects tire deformation and how the tire responds to road bumps. Excessive pressure can reduce comfort and grip on rough surfaces.
The best setting balances rolling efficiency, cornering grip, and puncture protection. Learn more about how bike tires affect grip and how they affect speed. Rain in Seattle or Portland often rewards a small PSI drop, as our guide to bike tires for wet weather explains.
How to Use a Bike Floor Pump With a Pressure Gauge
Good technique protects your valve, your tire, and your gauge. It also saves time.
Step-by-Step Tire Inflation Guide
- Inspect the tire for cuts, worn tread, and visible casing damage.
- Connect the correct pump head to the valve.
- Inflate gradually while watching the gauge.
- Adjust to the target PSI.
- Remove the head carefully.
For a deeper walkthrough, see how to inflate a bike tire correctly.
How to Inflate a Presta Valve
Remove the cap and loosen the small valve nut. Press it gently to release a puff of air. This frees a stuck core.
Attach the pump head securely without bending the valve stem. Inflate to the target pressure, remove the head, and close the valve.
Schrader Valve Inflation Steps
Remove the cap and attach a compatible pump head. Inflate while watching the pressure gauge.
Detach the head and replace the valve cap. The cap keeps dirt out of the valve core.
How to Inflate a Tubeless Tire
Confirm the tire and rim are compatible with the tubeless setup. Add the correct tubeless sealant and follow the tire maker’s seating instructions.
Use a suitable booster pump if a standard floor pump cannot seat the bead safely. Wear eye protection, since a bead can pop with a loud bang.
Common Pumping Mistakes to Avoid
- Never exceed the tire or rim pressure limits.
- Do not force a pump head onto an incompatible valve.
- Avoid relying on the pump’s maximum PSI rating as a guide to the correct tire pressure.
Learn the risks in our guides on overinflating a bike tire and what happens if bike tire pressure is too high.
How to Test a Bike Floor Pump Before Recommending It
A fair pump review uses repeatable tests, not first impressions. These steps help you judge any review, or run your own home comparison.
Transparency note: This guide explains testing methods and does not claim that specific pumps were independently lab tested. Manufacturer claims should always be labeled as such. Read our testing process and editorial policy to see how we handle evidence.
Gauge Accuracy Testing
Compare the built-in gauge with a calibrated reference gauge. Record differences at several relevant pressure points.
Repeat readings to check whether the results stay consistent.
Inflation Speed and Effort Testing
Use the same tire, starting pressure, and target PSI for each pump. Record inflation time or stroke count under consistent conditions.
Note how much effort is needed as pressure rises.
Valve Seal and Usability Testing
Test the pump head on compatible Presta and Schrader valves. Check for air leaks, difficult removal, and valve stem strain.
Assess handle comfort, base stability, and display readability.
Durability and Tubeless Testing
Inspect the hose, seals, handle, base, and pump head during repeated use. Test tubeless bead seating only with compatible tires and rims.
Report test conditions and limitations instead of making unsupported claims.
Common Bike Floor Pump Problems and Fixes
Most pump problems come from a poor seal, a wrong head setting, or a worn part. Work through the simple checks first.
Floor Pump Care That Prevents Problems
A little care keeps a pump accurate for years. Store it indoors, since a damp shed ages seals and gauge faces faster than a hallway hook.
Wipe the barrel after muddy rides, and keep the pump head clear of grit. Apply a drop of light lubricant to the seal if the manufacturer allows it. Check the head gasket twice a year and replace it if it looks cracked.
Drops can knock a gauge out of true. After any hard knock, compare the reading with a second gauge.
Why Does My Pump Gauge Show the Wrong PSI?
The gauge may have limited accuracy or may be damaged. A poor valve seal can also cause inconsistent readings.
Compare it with a suitable reference gauge and replace it if needed.
Why Won’t My Floor Pump Inflate My Tire?
Check the valve type and pump head setting. Inspect the valve core, hose, and pump seals for leaks or damage.
Confirm that the tire and valve are not blocked or damaged. If the tire still goes flat, read why bike tyres lose air.
What Makes a Floor Pump Hard to Use at High Pressure?
Air pressure inside the tire increases the force needed to push air in. A high-pressure pump design may make road tire inflation easier.
Check for damaged seals or a faulty valve connection if effort seems unusually high. A dry seal can also add drag.
Frequently Asked Questions
What Is the Best Bike Floor Pump With a Pressure Gauge?
The best model has a suitable pressure range, a readable gauge, a secure valve head, and efficient airflow. Choose high pressure for many road tires or high volume for wider tires.
Are Digital Bike Pump Gauges More Accurate Than Analog Gauges?
Not always. Digital gauges can be easier to read, but either type can be accurate. Check the manufacturer’s accuracy specifications and compare readings when needed.
How Much PSI Should I Put in My Bike Tires?
The correct PSI depends on tire width, rider and bike weight, rim limits, casing design, and riding conditions. Use a pressure calculator for a suitable starting point.
Can One Floor Pump Work With Presta and Schrader Valves?
Yes. Many floor pumps have dual-compatible or convertible heads. Check the product specifications and confirm that the head seals securely on your valve type.
Can a Floor Pump Inflate Tubeless Bike Tires?
Some tubeless tires can be inflated with a standard floor pump. Others need a rapid burst of air from a booster pump or suitable compressor to seat the bead.
Is a High-Pressure or High-Volume Floor Pump Better?
A high-pressure pump suits tires that need higher PSI. A high-volume pump suits tires that need more air, such as many mountain and gravel tires.
How Often Should I Check My Bike Tire Pressure?
Check before important rides and regularly during daily use. The right frequency depends on tire volume, tube or tubeless setup, and how quickly the tire loses air. See how often to check bike tyres and how often bike tyres should be replaced.
Can Overinflated Bike Tires Reduce Grip?
Yes. Excessive pressure can reduce comfort and may reduce grip on rough surfaces. Stay within tire and rim limits and adjust pressure for load and road conditions. If you are torn between speed and comfort, compare bike tires for speed vs comfort.
Conclusion: Choose the Right Floor Pump for Better Rides
The best bike floor pump with pressure gauge makes inflation easier and helps maintain consistent PSI. It is the tool you will use more than any other in your home workshop.
Focus on gauge accuracy, pressure range, valve compatibility, airflow, and build quality. Set pressure based on tire width, total system weight, rim limits, and riding surface. Road riders can also check the best tyre width for road and city riding.
Ready to dial in your setup? Use the Free Bike Tire Pressure Calculator / Tire Finder Tool at TheBikeTires.com. Enter your weight, tire width, and terrain, and get a starting pressure you can trust. Test your exact setup today, then confirm it with your new pump’s gauge.

Mohidul Islam is a leading cycling technology specialist and bike tire consultant with over 15 years of hands-on experience in the bicycle industry. He holds a Bachelor of Science in Mechanical Engineering from Penn State University, where he focused heavily on material science, tread mechanics, and rubber compound performance. Over the past decade and a half, Alex has conducted extensive field testing, tubeless setup evaluations, and tire pressure modeling for road, mountain, and e-bikes. His practical insights and data-driven approach help cyclists of all levels optimize grip, speed, and durability on every ride.



